 Upload your photoshoot to your Component 1 page. Discuss in pairs your photographer choices. What is it about each photographer that interests you? How will they inspire your ideas?  By now you should have chosen 3 photographers and analysed them. You should also have a set of photographs - either per artist or in general, ready to start editing. Your task this week is to edit at least one photograph in the style of each photographer (separately not combined yet). Your responses should: - use the same/similar techniques, colours, style etc. as your photographer - be your own version, not a copy - include anything you said you would during your analysis of their work  Upload each photo as you go along, and write a brief explanation of how it was inspired by the photographer. Also include ideas for alternative ways of developing your ideas through experiments linked to them, in their style, technique etc.  Work on your edits in your frees so that you can meet the deadline of having all three edits finished by Friday.
0 Comments
 Begin the lesson by reading through the Component One guide. Make a note of your homework - to watch the video on A* Photography Workflow Tips.  Carry out research into the different theme options for your personal investigation. I wouldn't normally give you such a big choice, but with so few of you in the group, I'd like you to have the opportunity to pick something that really interests you, and will capture you for the full length of the project. Things to consider when choosing: Choose the topic that interests you the most. It should spark lots of ideas and must be something that you will be able to photograph independently outside of school. With this in mind, you might choose to do something fairly straight forward that you have access to. Another thing to do is to choose something that is personal to you, as it will be easily accessible and something you know a lot about.  When you have chosen your topic, complete the following: Create a mind map of ideas - break down your question as much as you can, with all kinds of ideas, even ideas you have no interest in as it shows you have considered a wide range of concepts. Find 3 photographers to inspire your initial photo shoots - choose 3 that are quite different - different styles, techniques, approaches to the subject etc. - create a research page on each artist, including photos that inspire you most and a paragraph about their work. Discuss their techniques, style, content etc using the formal elements to help structure your comments. Ensure that you include your opinion and how the photographer will inspire you. 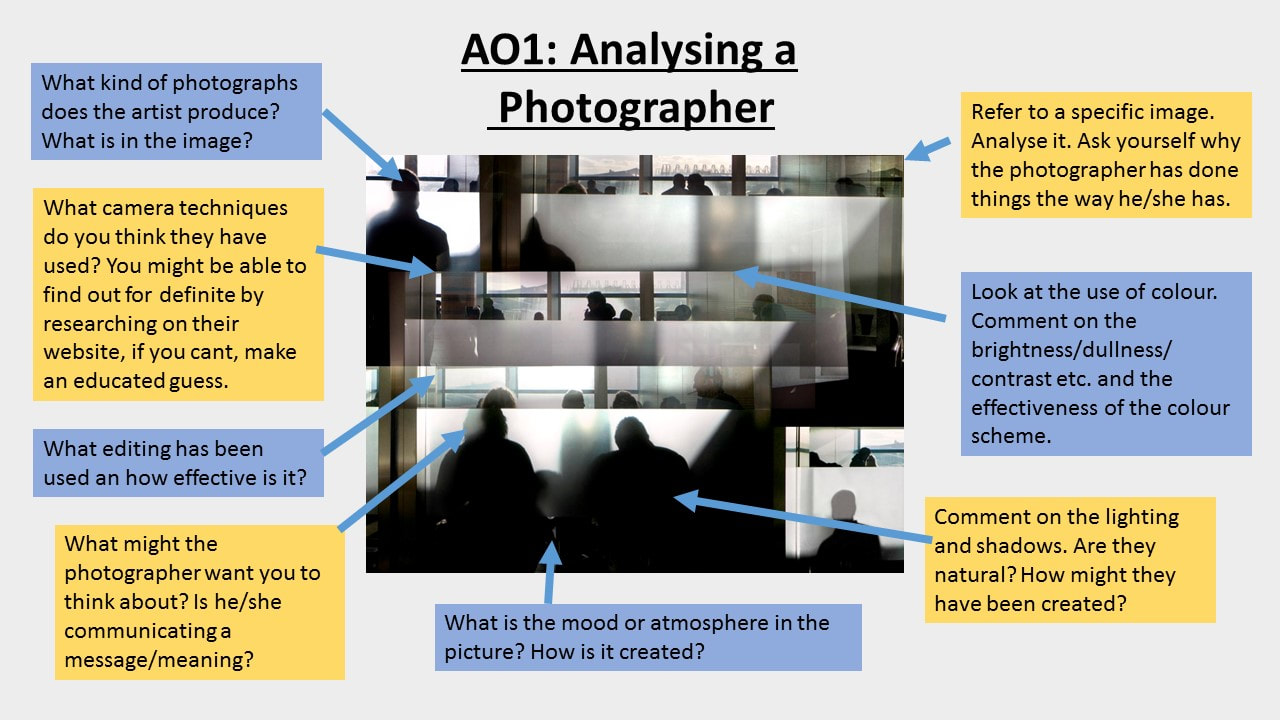 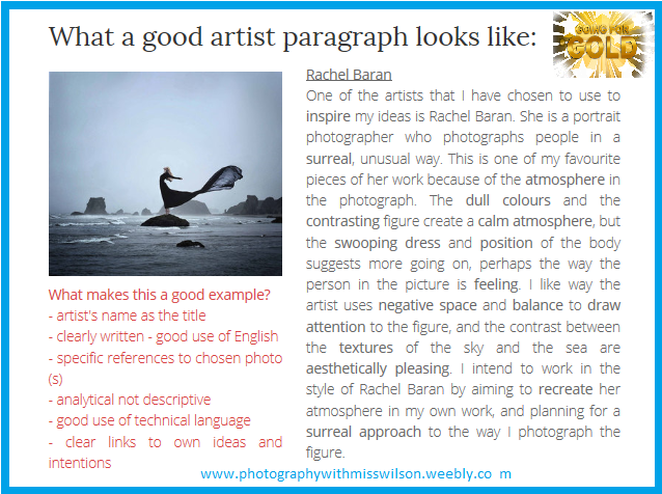  Make sure that you have completed the above by next week, ready to start your responses to your artists.
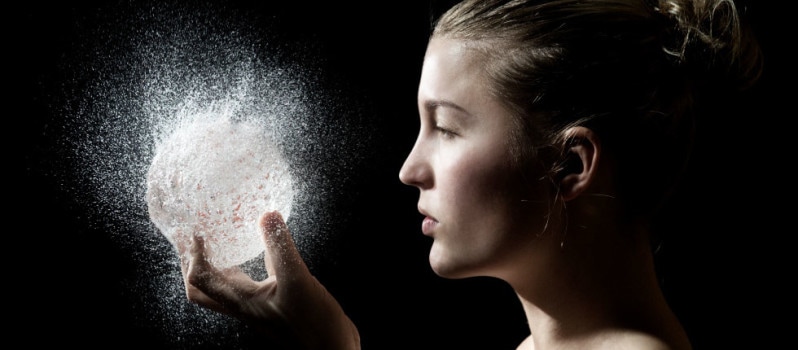
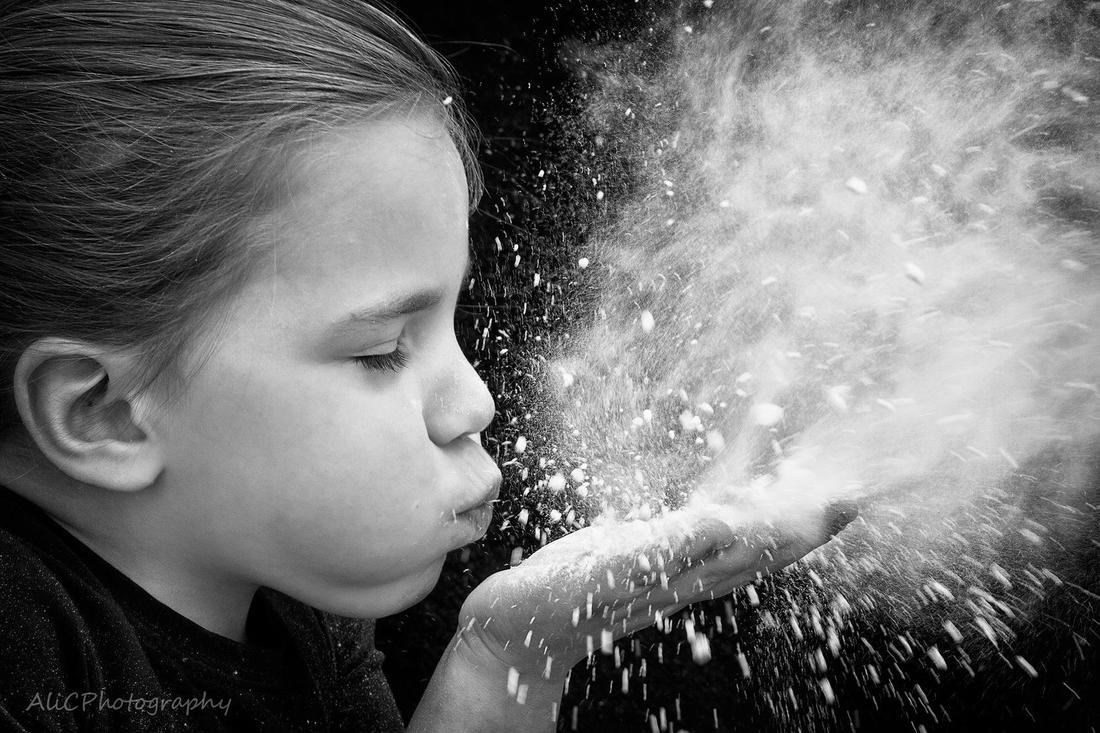
The second part of your homework is to start taking photos ready to edit next week for your artist responses. This might be one photoshoot or 3 separate depending on your artist choices.  These photos have been taken with a fast shutter speed. Can you describe how the photos would have been staged? What might be happening outside of the frame?
 You are learning how to use fast shutter speed to creatively take a portrait photograph.  You have 2 options here: 1. carry out research into fast shutter speed portraits to get ideas. You don't have to write them up if you don't have time. 2. (going for gold option) Download the worksheet below. Fill it in with Fast shutter speed portrait pictures off the internet that you would like to try in the photo shoot next lesson, and next to it write how it has been created. If you cant find out how, then you should write down how you think they were created, and see if you can work it out when taking photos!
 Take 20+ fast shutter speed portrait photos, aiming to try out different types of portraits. Eg. objects moving around a still person, or the person moving/jumping etc. On a basic camera, try the sports setting if you have one - this will be set up for a faster shutter speed. On a DSLR, try 1/400 or 1/500 if you are outside. Go a little lower if you are inside as your photos will be dark otherwise. Use the guide below and further research to learn more about how to get a good photo! Depending on your lighting, alter the aperture! 5.6 is an average aperture. 1.8 would allow a lot of light in, 3.2 would be somewhere in the middle etc. 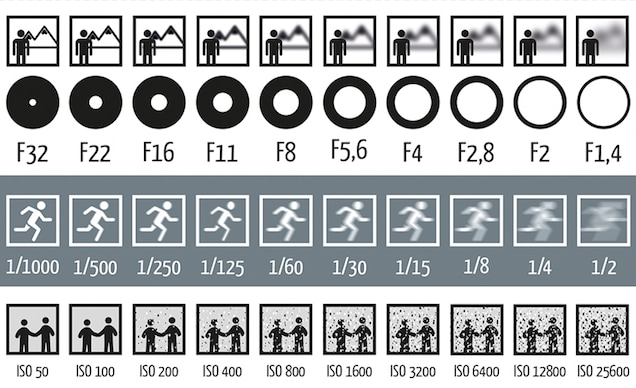 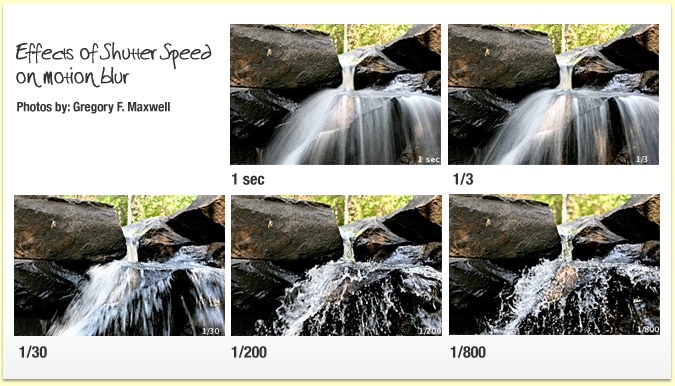  Upload ONLY YOUR GOOD photos into a gallery/ contact sheet. Hold down CTRL and click the photos that you want to upload. Put the title Fast Shutter Speed Portrait' above your work.
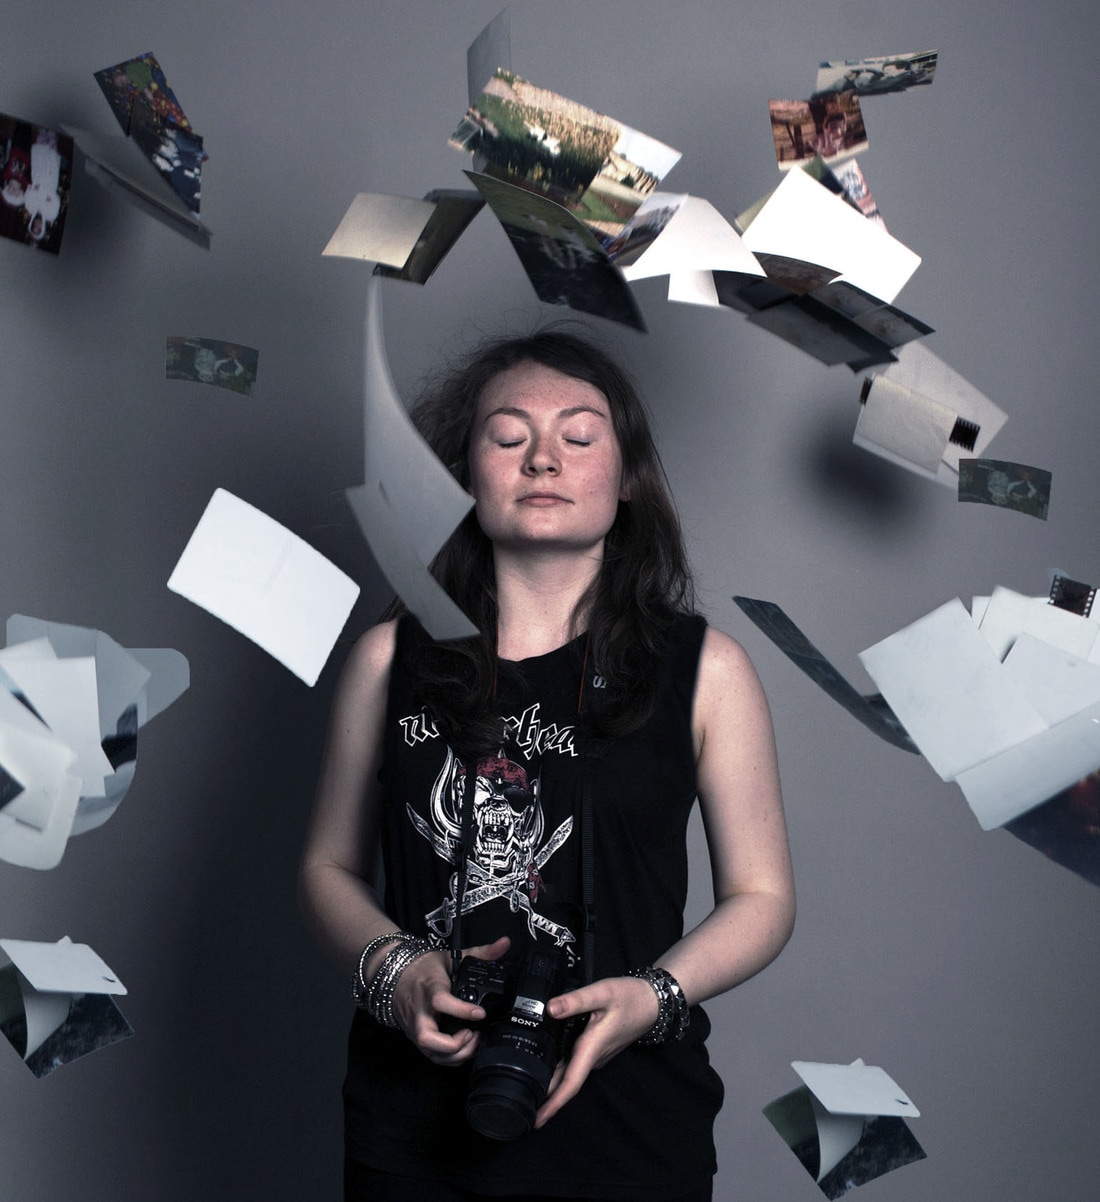
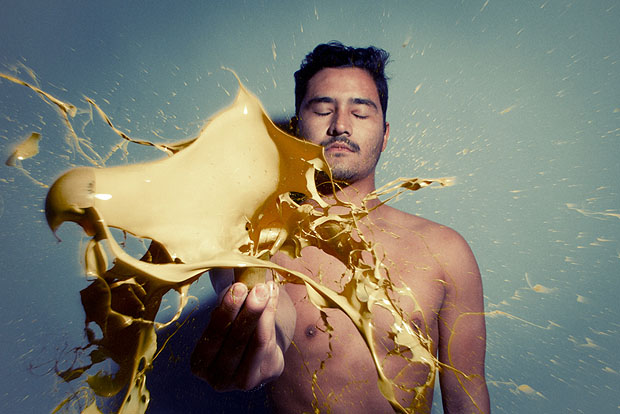
Write a few sentences to explain how to you took the photos, things you tried and the importance of resilience (not giving up!) and trial and error. Sentence starters: To take these photos I... During the photoshoot I found that I had to... Trial and error was an important part of this task because... I found that to create the most effective photos I had to... Something else I could try might be... BONUS MARKS! if you have access to photoshop and would like to edit your photos, please do! Upload your photos under your gallery :)  How do you think these photographs have been created? Hint: There is no photo editing involved!
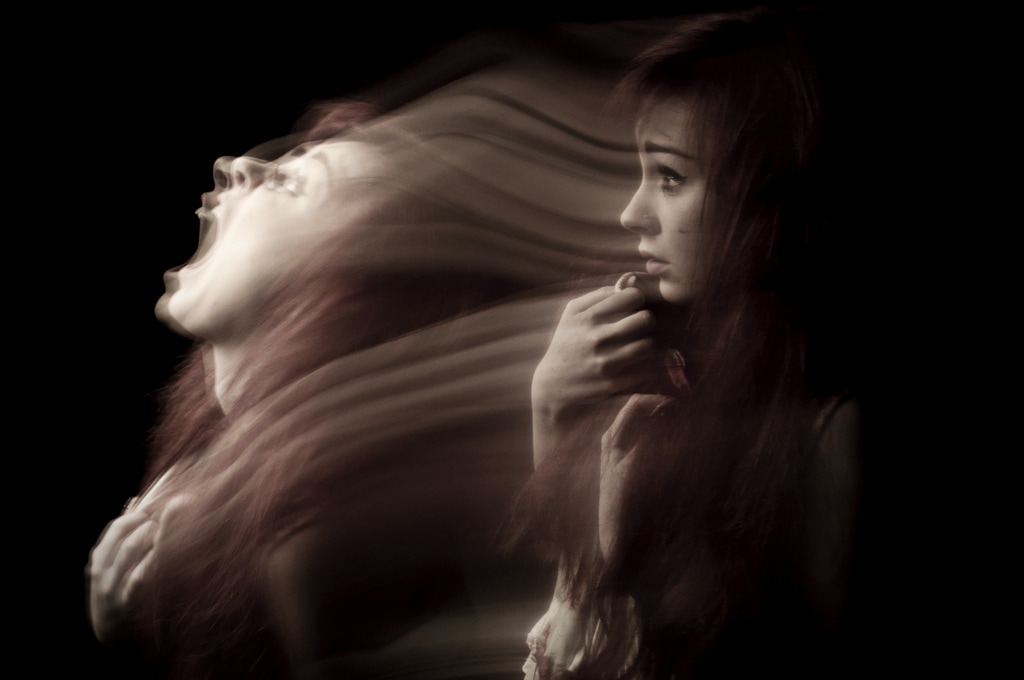
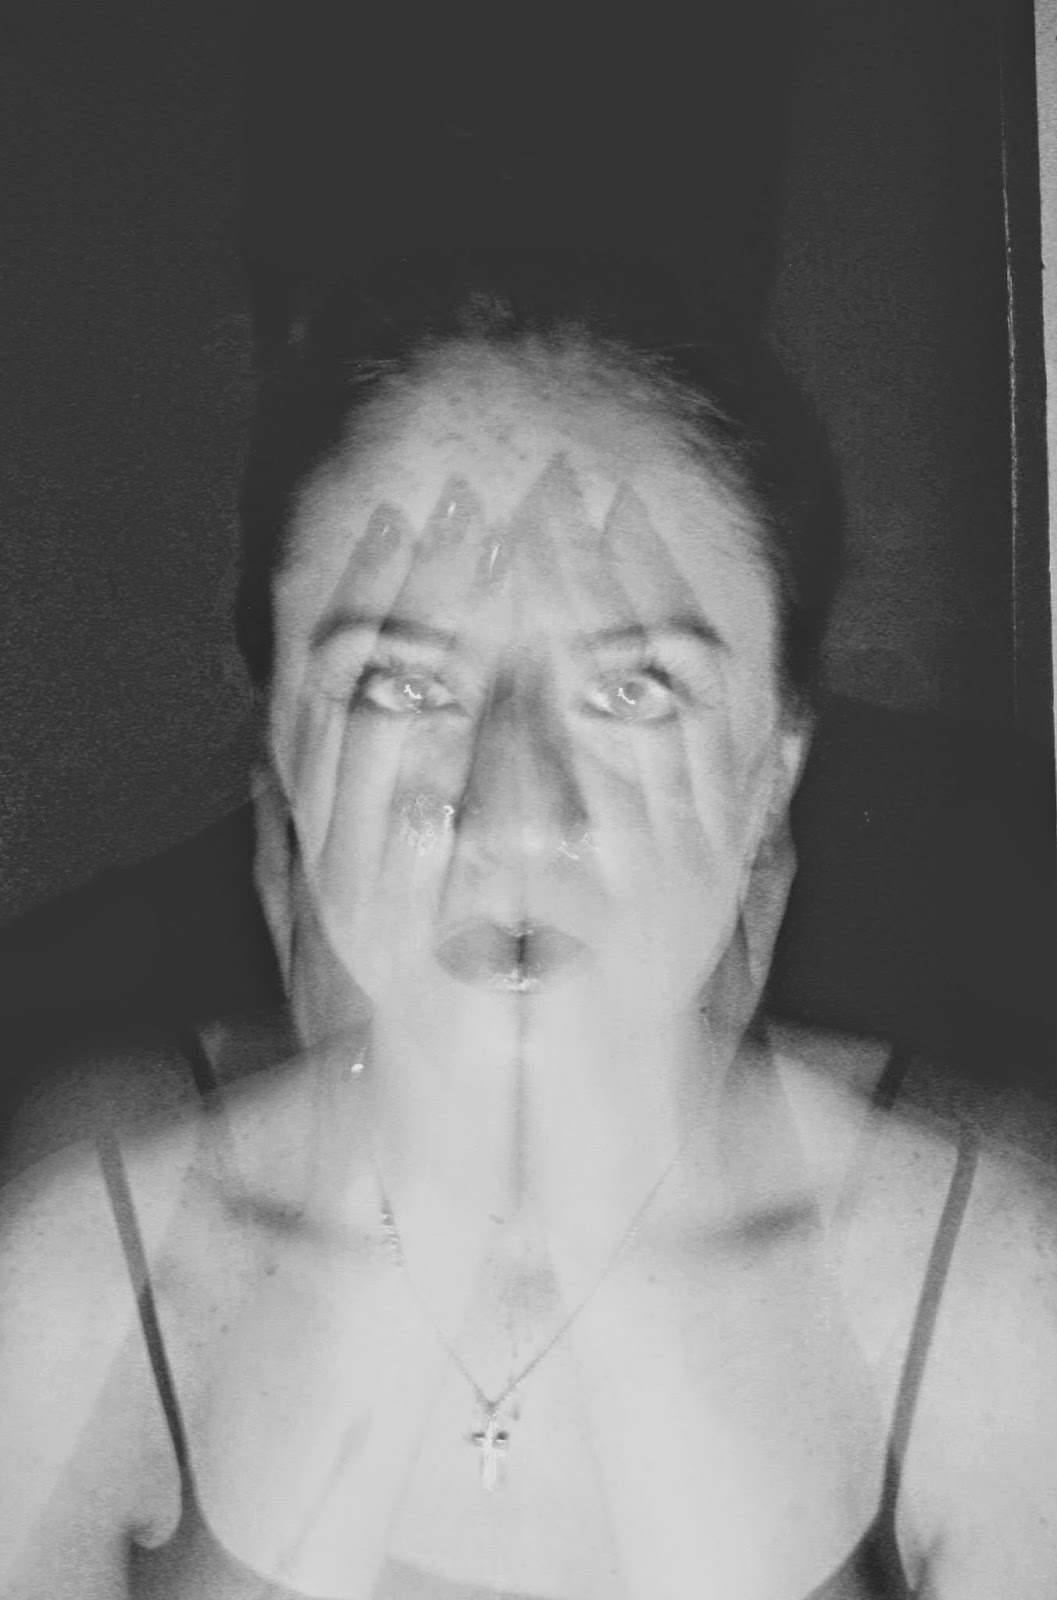
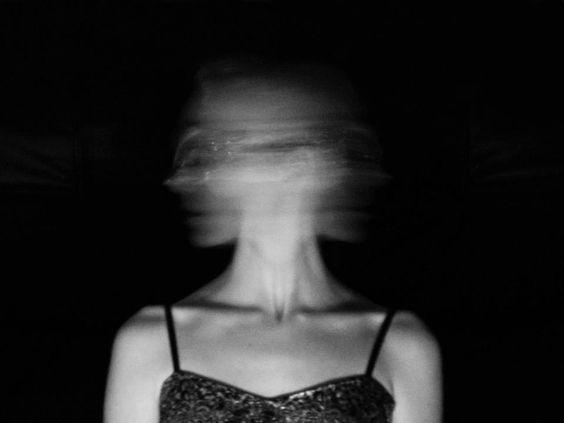
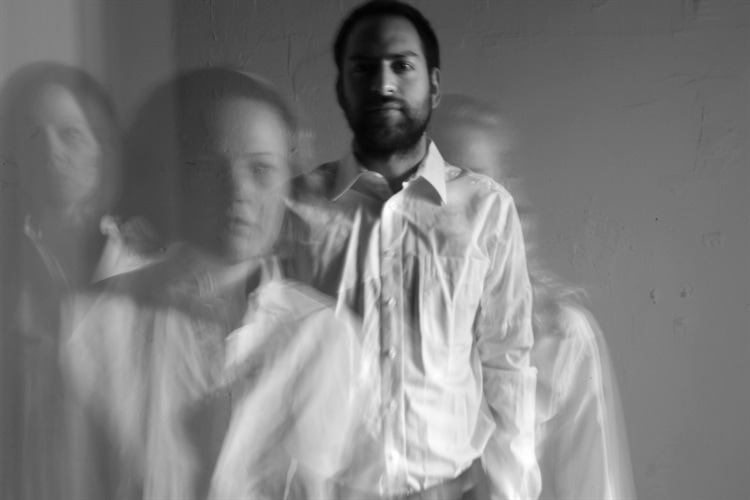
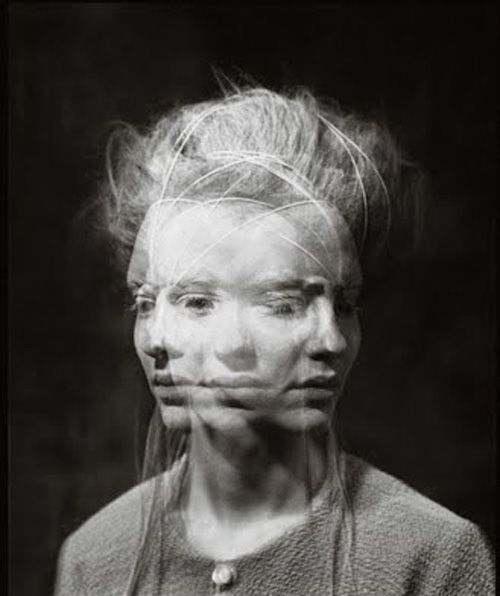
 You are learning how to create a slow shutter speed portrait through this task. When you get to the practical, it will be important that you learn how to review on your photos and make changes in order to improve through trial and error.  When the shutter stays open for longer, your photo will blur. There are many creative things that you can do with this when photographing a person! Here are just a few... - walk towards the camera - move your head slowly from left to right - stay still but have someone walk around/behind/infront of you - flick your hair if it is long - change position - move your arms around - stay still for a moment then do a quick movement  Download the worksheet below. Fill it in with pictures off the internet that you would like to try in the photo shoot next lesson, and next to it write how it has been created. If you cant find out how, then you should write down how you think they were created, and see if you can work it out when taking photos! Save your worksheet and upload it to your website under the title 'Slow Shutter Speed Portrait'.
 1. Make sure the worksheet is completed and uploaded to your website. 2. Bring in your camera on Thursday. GOING FOR GOLD: If your camera has shutter speed settings (read the book to find out!), practice further with your camera for slow shutter speed portraits. Any extra photos that you take, add them to your website for extra marks! TIP: Download a 'strobe light' or coloured torch app for creative alternatives! ALSO: If you cant work the shutter speed settings on your camera, please come and see me BEFORE the lesson as I will not be able to help you all effectively in the lesson!  Upload ONLY YOUR GOOD photos into a gallery/ contact sheet. Hold down CTRL and click the photos that you want to upload. Put the title 'Slow Shutter Speed Portrait' above your work. Write a few sentences to explain how to you took the photos, things you tried and the importance of resilience (not giving up!) and trial and error. Sentence starters: To take these photos I... During the photoshoot I found that I had to... Trial and error was an important part of this task because... I found that to create the most effective photos I had to... Something else I could try might be...  When choosing which photos to edit for this task, I would like you to choose 3 photos that show different techniques of the slow shutter portrait. Edit your photos independently in order to creatively enhance them. This might include: - changing the brightness and contrast - changing the hue and saturation - altering the background - blurring parts of the image - dodge and burn to lighten/darken - layering images and altering opacity When you are finished, upload each picture in single image blocks. Put 2 of them side by side, and your favourite/most successful image full size below them to show off your skills clearly. Underneath, add a couple of sentences to answer this one question: - How has your editing enhanced your photograph?   Due to time, we will not be able to do Fast Shutter speed portraits in lessons. For extra marks, complete the following lesson at home/lunch times, and add to your website. This is due Thursday the 23rd of March (you have over a week to complete it).
Click the button below for the lesson.  Your homework over half term is to read this powerpoint and learn about shutter speed and aperture. It is essential that you have a good understanding about these things ready for the first lesson back after half term. If you need to do further reading to ensure that you understand, please do so!

 Your first task is to finish editing and/or your paragraph from last lesson, then proceed to the main task which is to combine your three photographers styles in one or more ways. Write a short paragraph to review your photo shoot and edited photos. Put this underneath your large edited photos. Discuss the following: - what did you do during the photo shoot? How did you take your photos? How did you use lighting and backgrounds to enhance your photos? How did you direct your models to get the best possible photos? How did you take inspiration from the work of Tim Booth? - What are the strengths of your edited photos and why? Sentence starters During this photoshoot I... I took my photos by... My photos were inspired by the work of Tim Booth because... The main strengths of my edited photos are... because... - Going for gold: How could you develop this style of hand photography in your own way? What could you do differently in either the photo shoot or the editing? To develop, you would take an aspect of the original style then make changes in an individual and creative way. - Going for gold 2: carry out whatever you just said you could do above to develop the style independently. This would need to be done when everything else is finished OR as a homework. It might involve a new photo shoot, it might just be a different edit.  The main task for the lesson is to combine your Tim Booth edited photo with the style(s) of David Bailey and/or Bill Armstrong. This should be completed independently - I want to see how creative you can be. This could include some/all of the following: - Colour changes - Blurring the image - Layering hands and portrait - Changing opacity of your layers - Combining colour and black and white images Upload this photo with an explanation of the links to the artists you have used, and how you edited. Title above: Independent Hand Experiment  As the extension, you have 3 options.
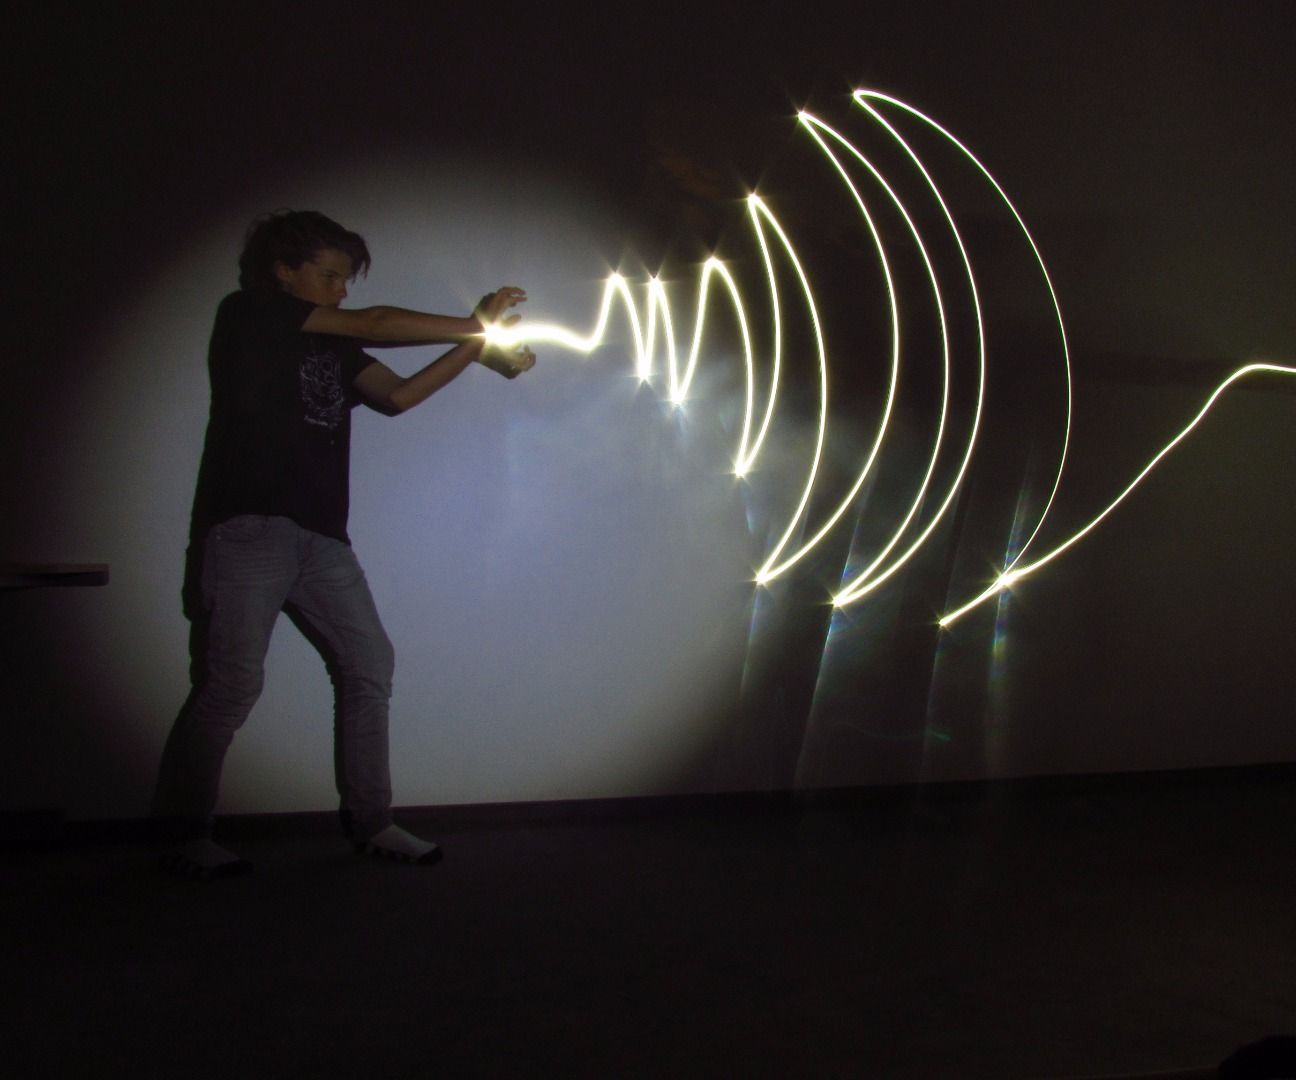
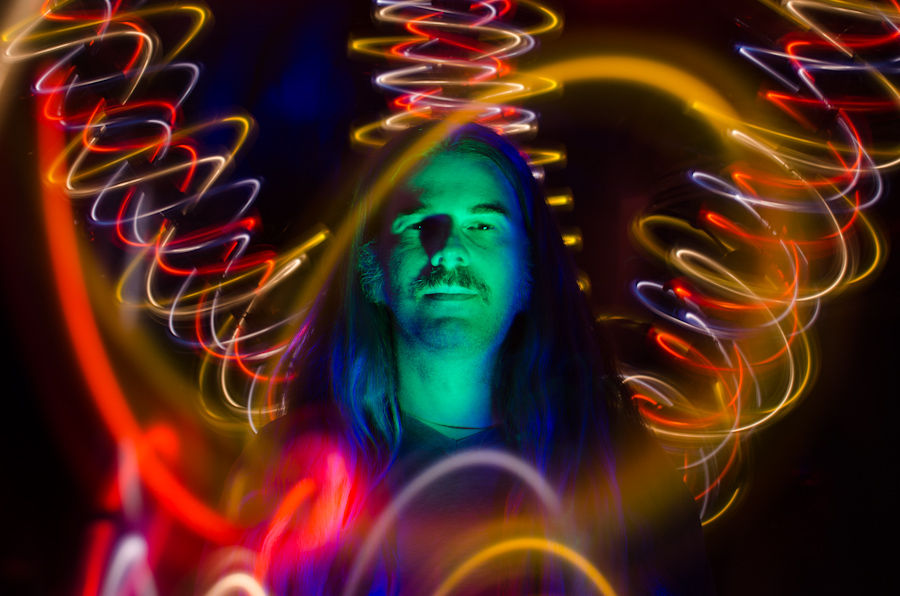
1. begin another edited photo linked to any of the photoshoots from this project so far, but bringing the three artists together. 2. Make sure all work is complete for this project ready to be marked over half term. 2. begin the homework - read the powerpoint and start to learn about shutter speed and aperture. You'll need to know these pretty well by the first lesson back after half term   This lesson you will be learning how to use shutter speed and aperture through a light drawing task. How have these pictures been created?
 Tips for the practical: - Trial and error is key. - Review every photo, and work out how to do it better as a team. - Work together - communication is going to be important on this task! - Use a tripod - however still you think you are holding a camera, it wont be still enough in your hand. - Experiment with lighting - be creative. - Focus on altering shutter speed and aperture when you need to make improvements/changes. Take it in turns to take the photos - as always, you cant share photos, which is why it is best if you have your own camera.  Upload all of your photos as a contact sheet - include the ones that didn't work! put a title above it 'Experimenting with shutter speed and aperture: Light Drawing' Add captions to the best photos and explain why they worked so well. Also choose 4/5 photos to add captions to that didn't work and explain why they didn't work. Next, under your contact sheet, write a paragraph to explain the following: What is shutter speed and when should you use it? What effect does slow shutter speed have? What effect does fast shutter speed have? What is aperture and when should you alter it? Shutter speed is... You should use it when... If you use a slow shutter speed, your photo will... If you use a fast shutter speed your photo will... Aperture is... You should use it when.... 
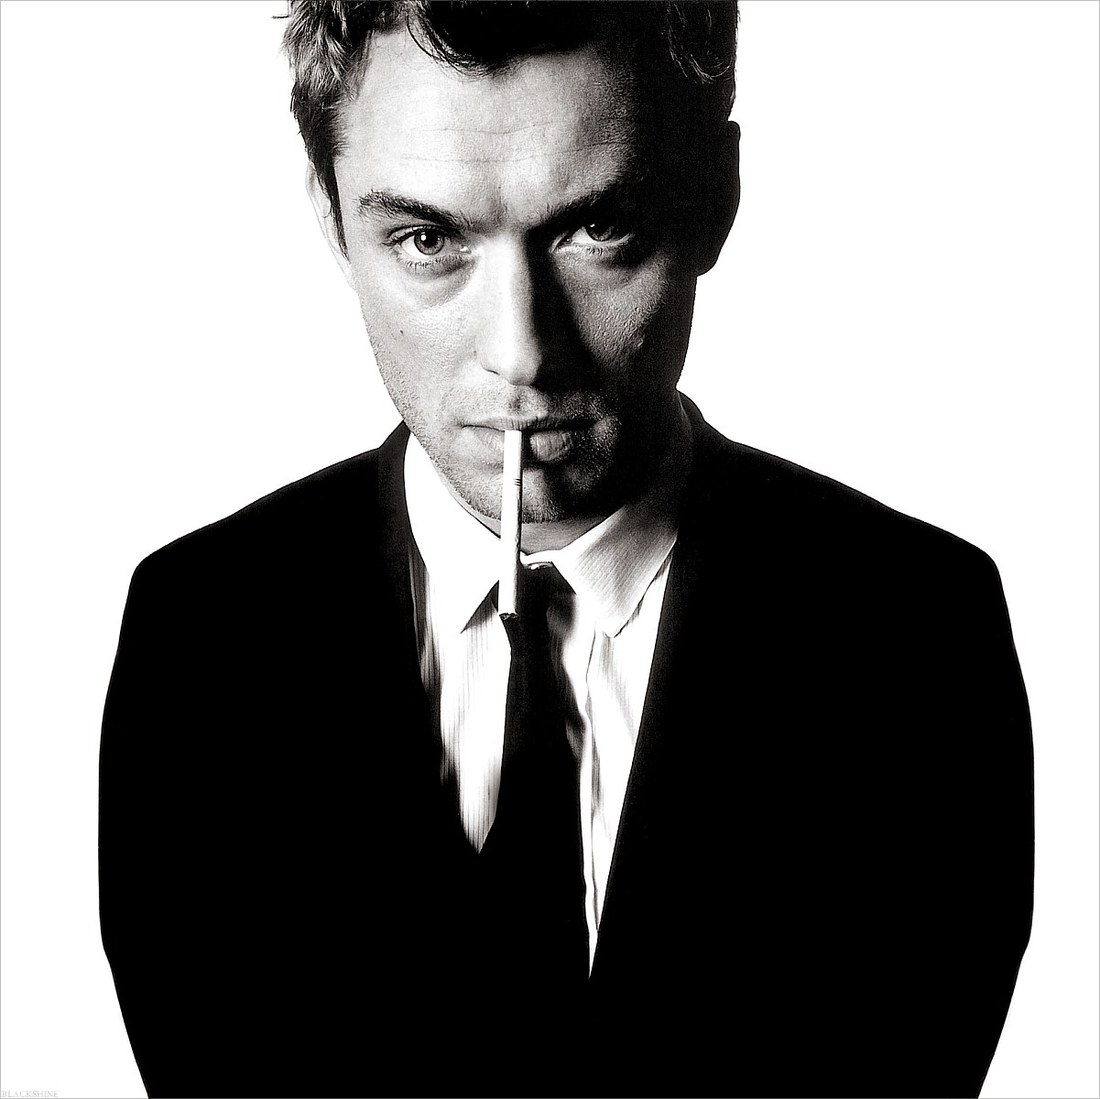
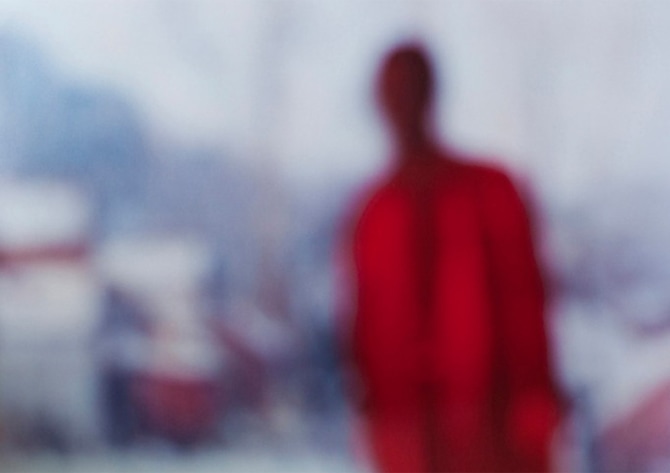
 How could you combine the techniques of David Bailey and Bill Armstrong?
 How to figure out a method of combining artist styles independently. To be successful: - you will think independently and require minimal help to complete the task - Think creatively in the way you use the two photographers styles - use your best portrait photos from the lessons so far - demonstrate confident photoshop skills - Going for Gold - Produce multiple different pieces to show different skills and ideas  There are many different ways that you could combine these two photographers styles. This lesson, your challenge is to figure out the answer for yourself. I am not giving you any instructions - instead, you need to think creatively, think back to the previous two tasks, and find a way to combine their techniques in a single image. Going for gold: To show a bigger range of skills, aim to complete 2 or 3 images that combine their techniques in different ways. Tip Look back at the David Bailey and Bill Armstrong lessons (and your work) if you need help remembering how you edited in their styles. When you are finished, upload your photo(s) as large images, with an brief explanation of how they combine the two artists styles.   Bring in your camera for the photoshoot next lesson on Thursday. You will be photographing hands, some of which feature 'props'. Bring them with you too! eg. Jewellery, objects, money, a flower (this might be inspired by your research!) etc.
|
AuthorThese lessons have been written by Miss Wilson. Archives
December 2018
Categories
All
|
||||||||||||||||||||


 RSS Feed
