 Self assessment: How have you used your artists so far? How will you combine their styles? What photoshoot do you need to do this weekend to move your ideas forwards?  How to show progression of ideas through experiments. How to be reflective in order to move your ideas forwards.  Artists... Photoshoot... Experiments... Review... Alternative idea... Experiment... Review... etc. Click the picture to enlarge. 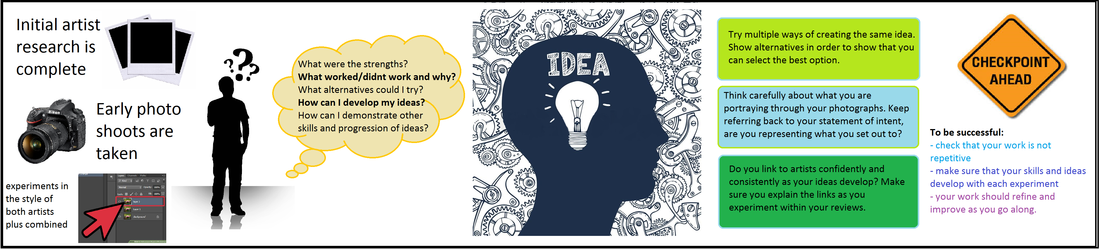 Refer back to the Powerpoint from previous lessons if you need ideas on how to experiment.  Continue to develop your ideas through experiments linked to your artists. Try different editing techniques, alternative combinations of their styles and aim to build on your previous experiments rather than just start something completely different. I would expect to see a further 3 or more experiments completed, uploaded and reviewed by the end of next week. Upload and review after each experiment rather than waiting until the end please.  New photoshoot - due Monday. 20+ photos
0 Comments
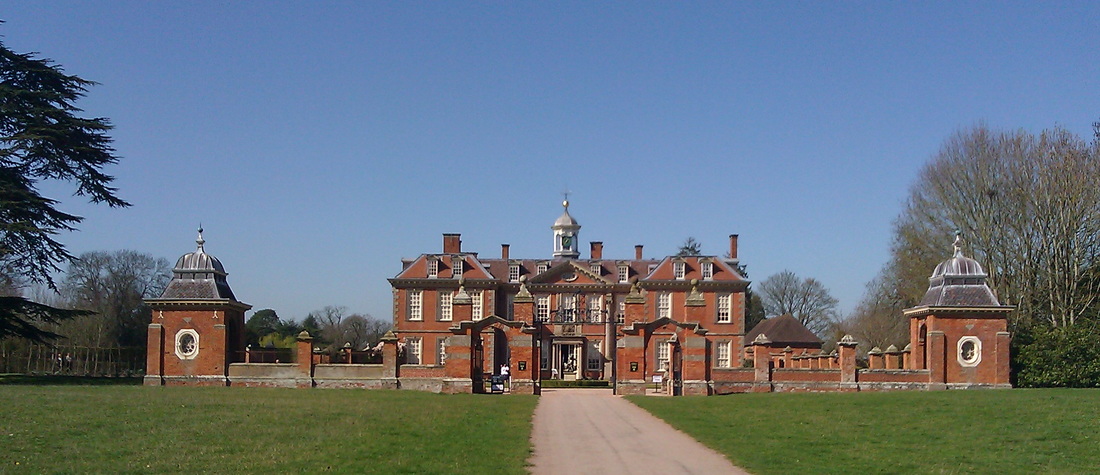
 Your first task is to upload your photos from Hanbury Hall to your website using a gallery tool. Add a title of Hanbury Hall Trip Photoshoot under your other close up work. Upload your photos into TWO galleries. One with a subtitle of Architecture, the other with a subtitle of Nature. 
 How to reflect on your own photographs, considering the strengths and weaknesses. How to make independent choices when editing.  For marks in AO3 and AO4, you must write about your work and reflect on the strengths and weaknesses. For the higher marks, you will suggest why photos turned out the way they did and how you could improve, along with confident use of key words. This lesson you will also get marks for AO2 (25%) which is for experiments.  Task 1: Write a paragraph above your two galleries about the trip to Hanbury Hall. What was there? What did you enjoy about the trip? What did you photograph? What did you have to think about? Which were your best photos and why? For these photos, we went on a trip to Hanbury Hall. Here there was... I found the trip to be... Whilst there I took photos of... To get the best possible photos I had to think about... My best photos were... because... 
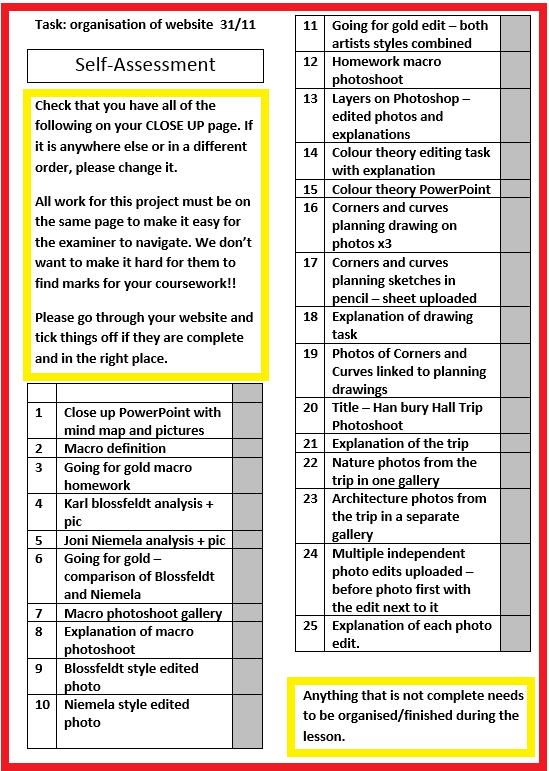
If you need to remind yourself how to do something, look back at your skills development work OR click here for the lessons or here for going for gold tips!  Complete the self assessment sheet in your red book, thinking about what you have done so far and what you will do next in this project.  Make sure everything is up to date on your website. Take a photo on your phone of your missions and self assessments in your red book to refer to at home.
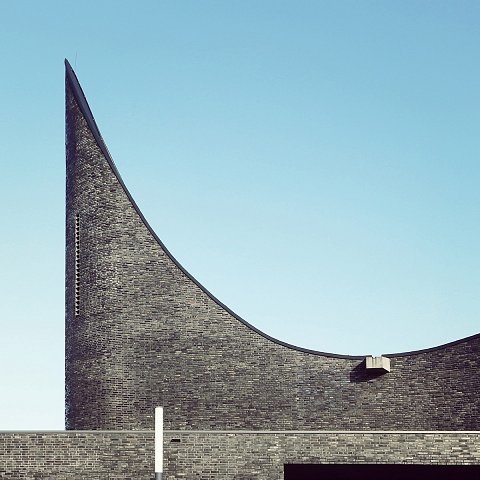
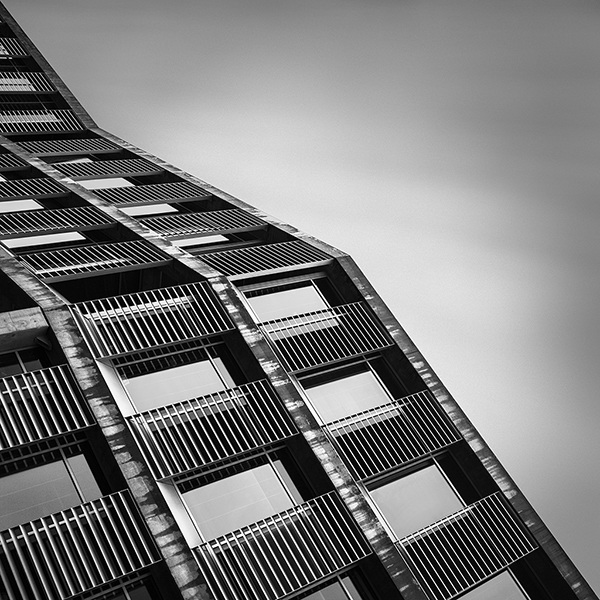
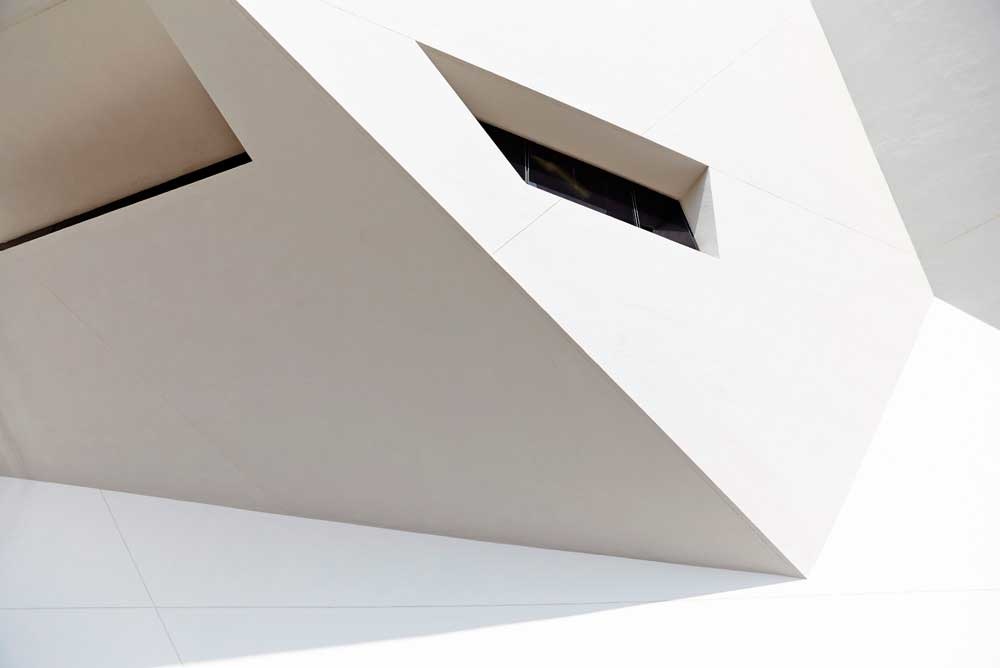
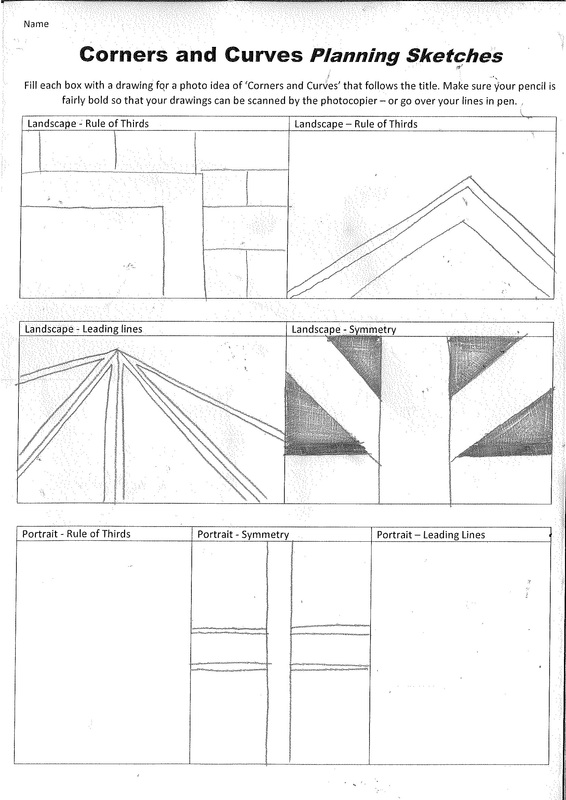
GOING FOR GOLD For extra marks, add captions to some/all of the photos from Hanbury Hall to reflect on the strengths, weaknesses and photography techniques seen within each one. See below for some examples: Too blurry Effective use of rule of thirds Symmetrical Creative viewpoint Too dark Too light Clear focal point  We are going on a trip to Hanbury Hall on the 6th of December! P2-4. Bring in your permission slips ASAP please. You will need your cameras and extra warm clothing on the day (but it is still normal sixth form clothes).  You should have found 2 artists to inspire the development of your ideas at this stage of your project. Your lessons this week should be spent planning and responding to each artist, applying their techniques, colours, editing, composition etc. either to your existing photographs or a new photoshoot if you'd prefer.  Consider how you could work in the style of both artists separately initially, as well as how you could combine their styles in further experiments. Either on a powerpoint or directly onto Weebly, make notes on how you could experiment in the artist's style, then work independently to develop ideas through experiments. Think back to your previous work and skills development and aim to apply these skills and build on them throughout the task. You have all lessons this week to create a minimum of one experiment for each artist, and a combined experiment.   Corners and Task Photoshoot This lesson you will have 20 minutes to take the photographs that you have planned for your Corners and Curves photoshoot. You will then have 20 minutes to upload your photos. For most of you this will be 6 photos linked to the task where you had to draw boxes on to photos of the school to plan for compositions. It will then be another 7 photos of the drawings that you did last lesson (or less if you didn’t finish the sheet). To be successful, your photos should be clearly linked to your planning. You should take a maximum of 13 photographs. If each photo isn’t exactly (or close to) your plan, re-take the photo until it is fairly similar. To upload your photos Add a title ‘Corners and Curves’ Photoshoot underneath your planning photos, then a gallery and upload your 13 photos (might be less if you didn’t finish the planning). Add a caption to each photo to describe the composition eg. Rule of thirds or Symmetrical.  Next, find and upload your planning drawings from last lesson - they have all been scanned into the computer. Go to student shared area/ photography/ corners and curves planning sheets. Find your work click it so it is highlighted blue then right click and copy. Open photoshop. Open a new document (clipboard size paper) Paste your picture Save it as a JPEG. Upload your JPEG below your photo with the squares drawn on. Add a title 'Planning sketches'.  Bring in your camera on Thursday. Also, bring in your trip permission slips TOMORROW so that you can come to Hanbury Hall on Thursday! Make sure you bring coats/gloves etc too as we'll mainly be outside.
  Write your intentions for this project below your artist research. This should be a short paragraph, detailing what you are aiming to capture and represent through your work, techniques you plan to explore linked to your artists, and what you hope to produce by the end of the project. Add a title of 'Statement of Intent' above this paragraph, and put the whole text in a different colour so that it is clear that this is a significant piece of writing. The examiner will look for this, as it is a big part of AO4 and 'meeting intentions'. He will look to see if you have achieved what you set out to do.  How to plan in order to develop a project independently.  At this stage of the project, you will find less structure in your lessons. This is because you are now going to begin to work more independently as you will all work at different rates within your project, and there is no longer a 'one size fits all' lesson plan. The flow diagram below will be essential for your reference throughout the rest of your project as a guide to what you should be working on. Where it says about a workbook - this is actually your website. 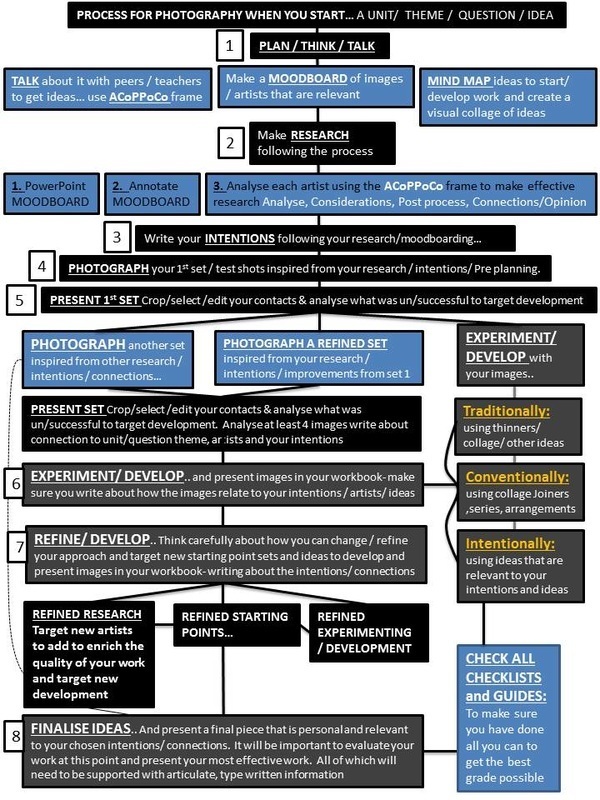 You should also refer to the lists below and ensure that you cover everything within each assessment objective. 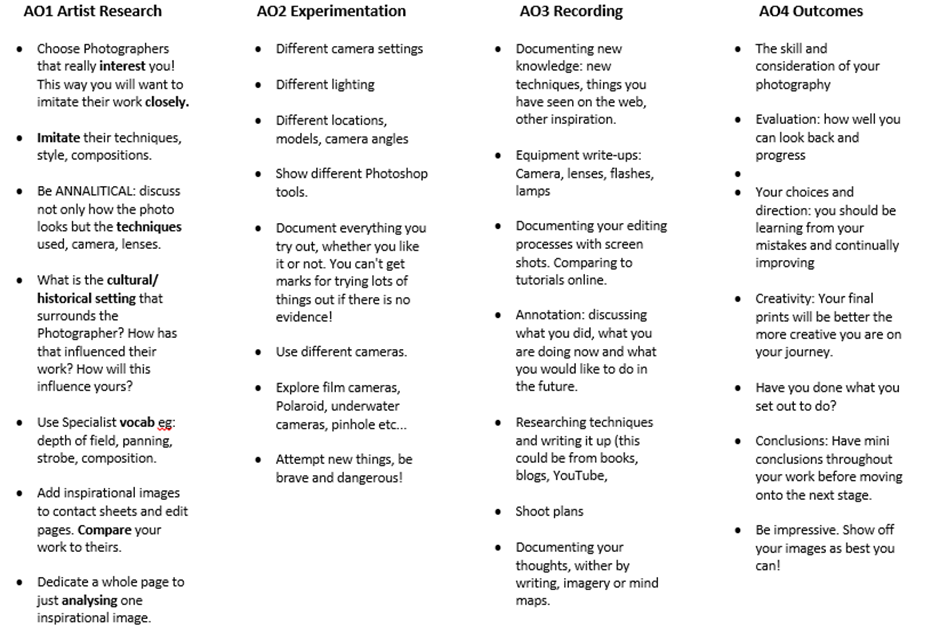  Write a plan for your project. This could be a checklist, a flow diagram, a spreadsheet -whatever works for you! This will be marked within AO3 - recording ideas, but more importantly, it will become your plan for the next few weeks in lessons.
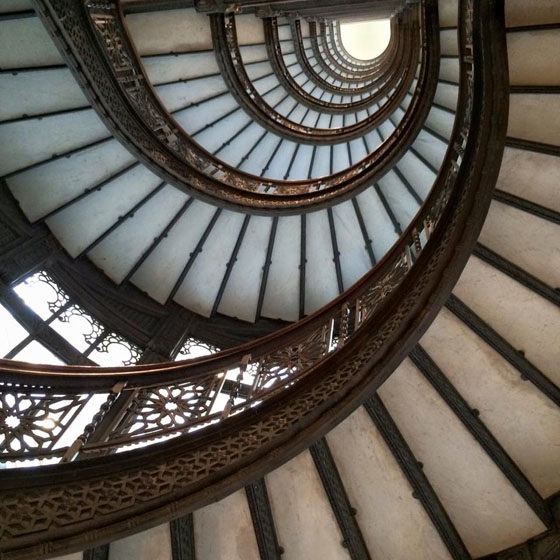
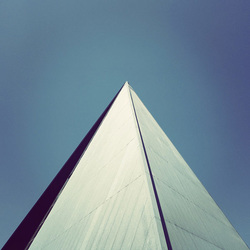
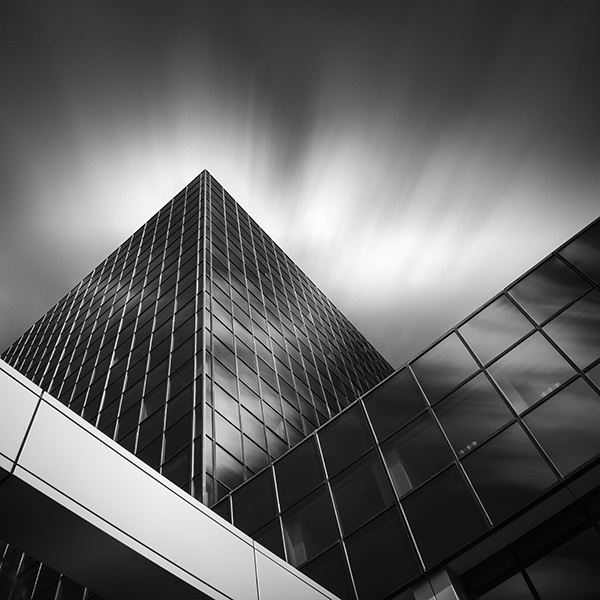
How do you want to develop your ideas? What photoshoots will you do? Where will you go? What techniques will you experiment with? How will you link to your artists? How will you combine your artists? etc. Be specific in the tasks you will complete. Eg. Experimenting with capturing movement: 1. slow shutter speed, multiple photoshoots at different times of day, 2. motion blur on photoshop, 3. layered fast shutter speed images.  This is the part of the project where you will start to make more independent choices about your work. You will continue to focus on 'Close Ups' as this is your overall project title, but within it, you will have 2 choices, then other choices within those. The first choice you will need to make will be: Do you want to focus the rest of your project on either: Architecture or Nature
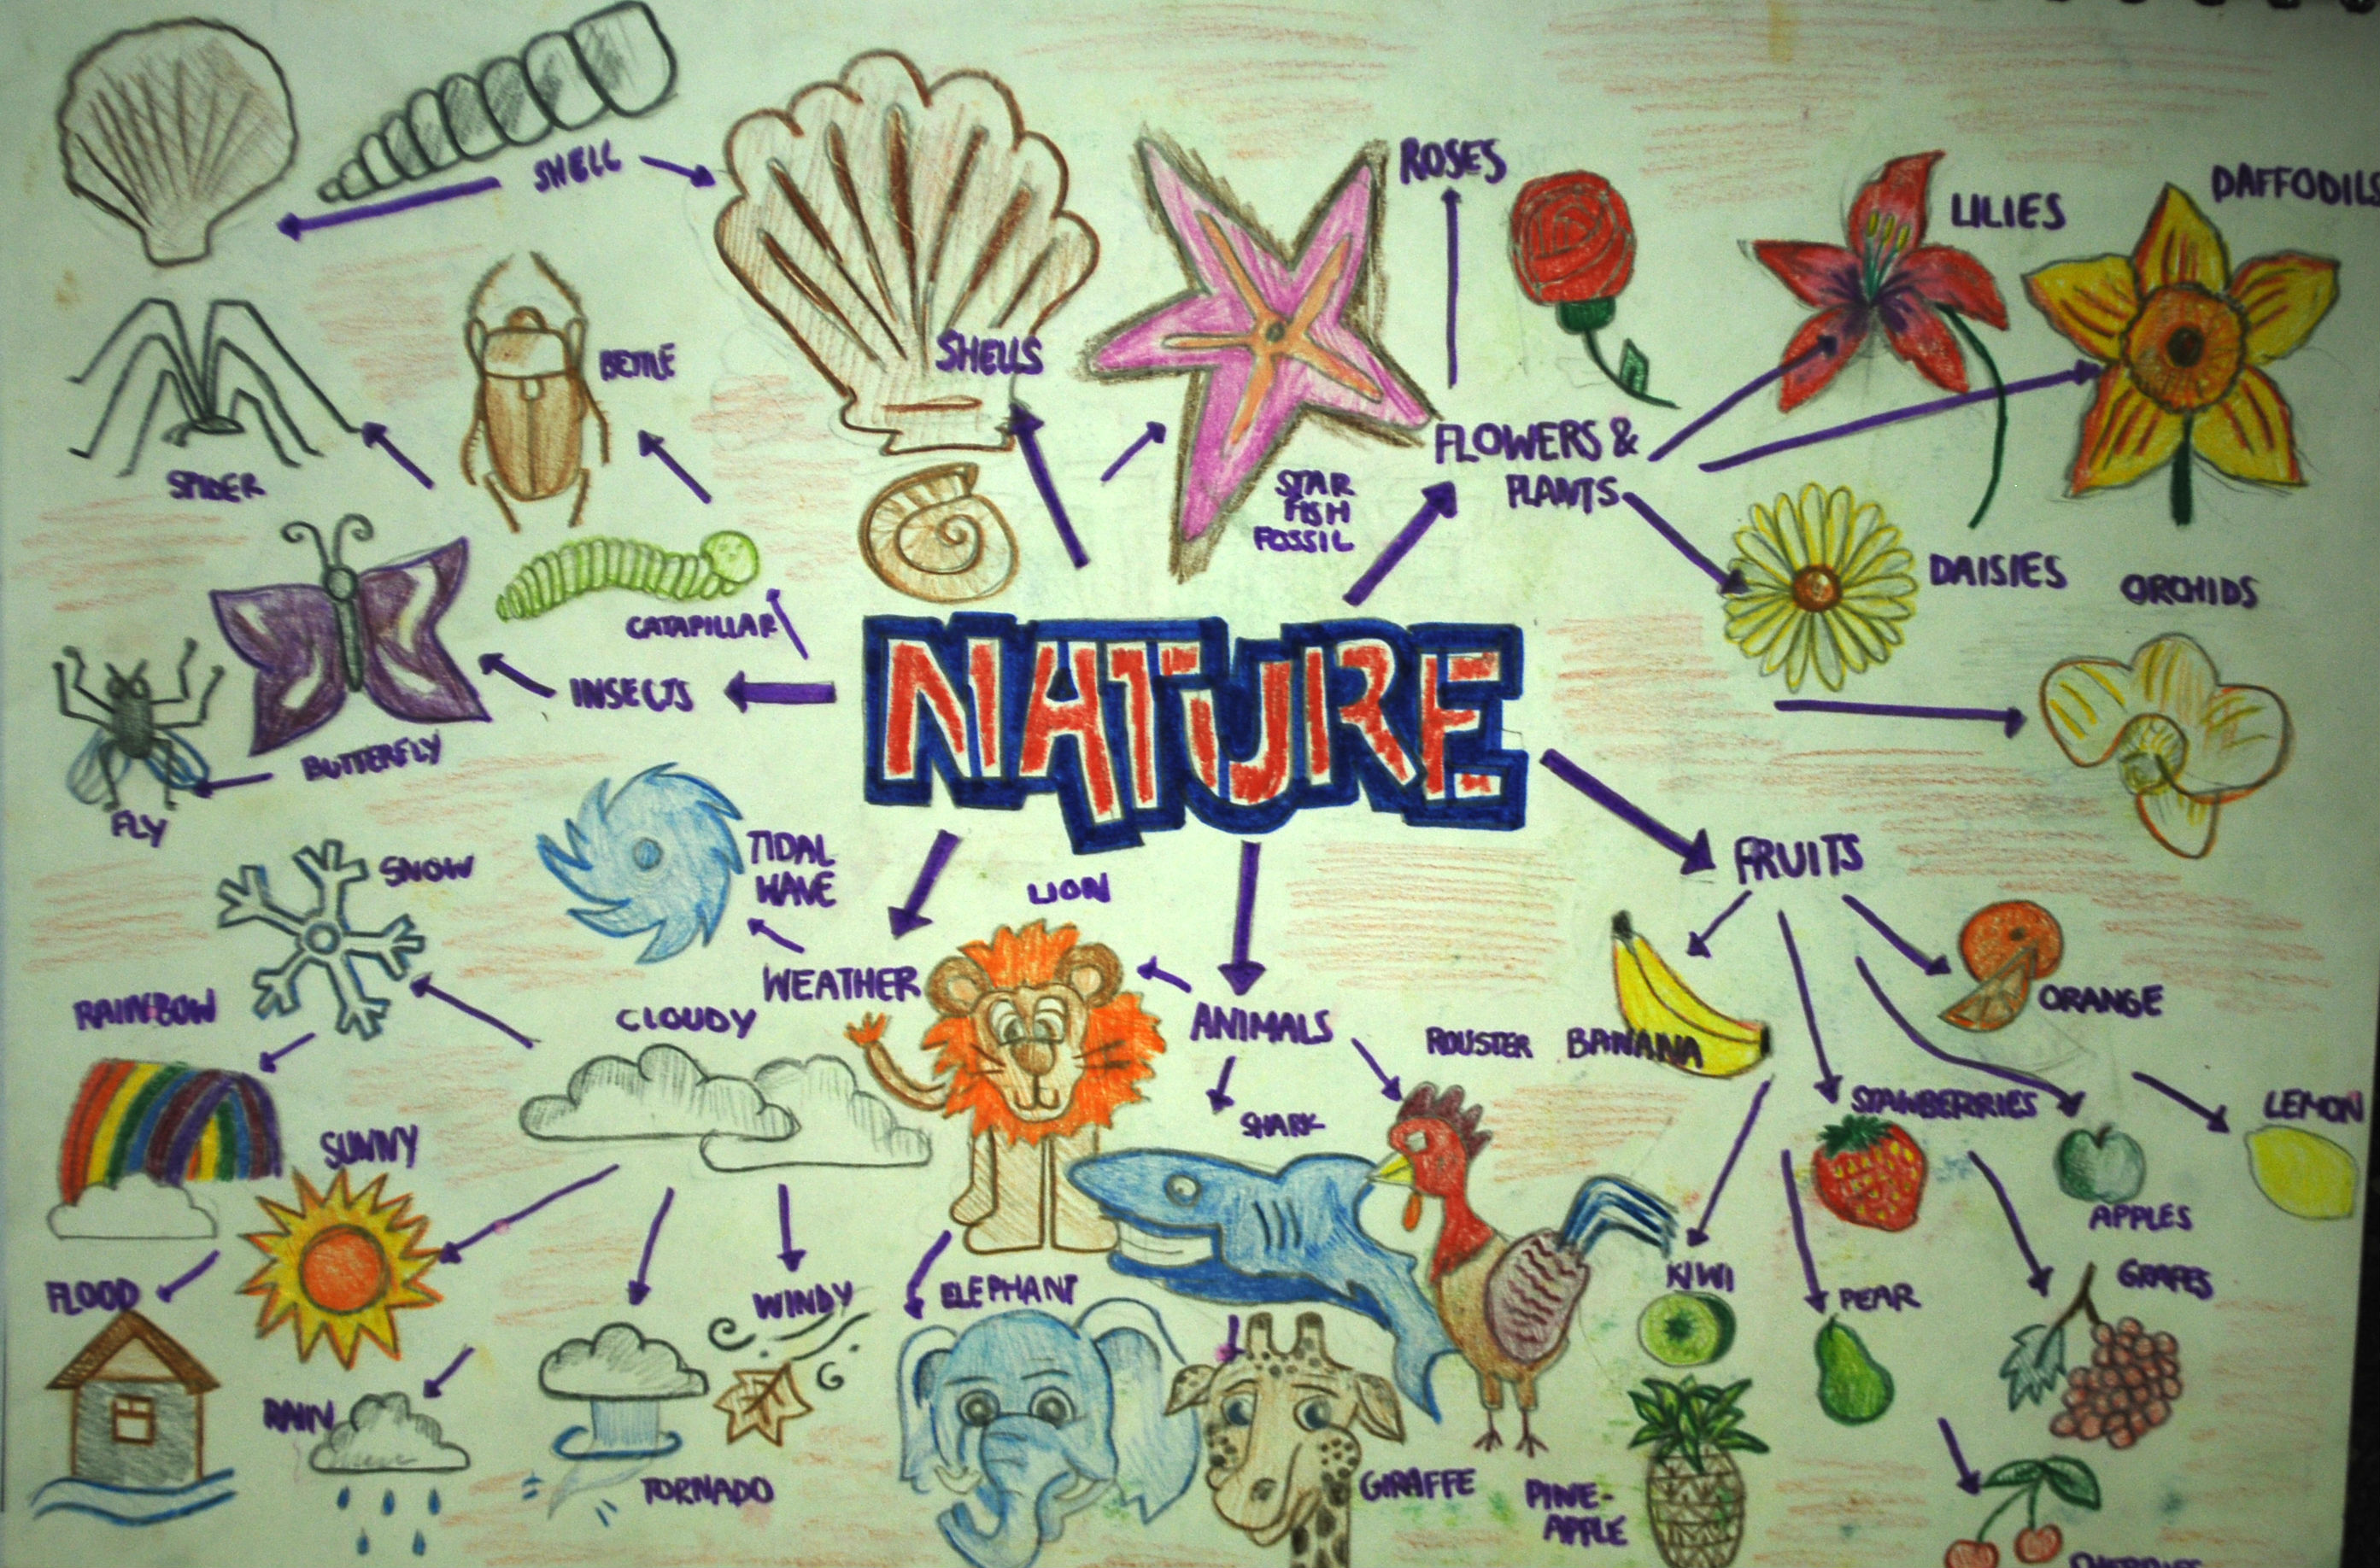
 How to create a visual mind map in order to develop ideas independently.  What is a visual mind map? A combination of images and text, with key words and descriptions, that explores lots of ideas linked to your chosen title. How do I do well at this task? - You will explore lots of different ideas - Choose photographs that are inspiring and technically interesting - Include names of photographers where possible so you can refer to them later - Use key words in your descriptions (eg. the formal elements - composition, lighting, tone, shape, line, texture, pattern etc.) - Give your opinions about some of your favourite pictures. What do you like about them?  On a PowerPoint slide, create a visual mind map for either Architecture OR Nature. Include key words, photographs, and some descriptions and/or further ideas linked to your photos. Think about: How does each photograph inspire you? How could you recreate the photo yourself? If you would rather break down your ideas into multiple slides so the slide is less full that's fine, but ensure that you have the same amount of information. QUICK TIP If you aren't sure where to start, look at the mind maps at the top of the page to help you! When you are finished, please upload your PowerPoint to your Close Up page using a Document element in Build.  When you have finished and uploaded the above task, next, you need to find one more photographer that is going to inspire your work. The photographer must photograph your choice of subject (architecture or nature). Look at all of the artists for your title, then select one and complete the task below.
Your task is to write a paragraph about the work of your chosen photographer to anaylse the way they photograph your chosen subject. You should include: - 3 photographs of their architecture/nature close ups. - key information about their work from the things you have read about (not the photographer - the work itself) - Your own observations of the photography techniques and formal elements that you see - eg. how does the photographer use composition, lighting, line, shape, tone etc? - Your opinion and explanation of how you will take inspiration from their work. If you need help getting started, copy and paste these sentences and fill in the gaps. The photographer I have chosen is... Having read about their photography, I have learnt that... When I look at _____'s photographs, I can see... One of the reasons that I have chosen this photographer to inspire my work is because I like ... I will take inspiration from ____'s work by...  When you have chosen/at the end of the lesson: Please email me the name of your photographer (as the subject of your email) with one of your chosen pictures (by the photographer) copied and pasted into the email.  Create one or more edited photographs in the style of your new photographer. You should ideally use your hanbury hall photos, but any of YOUR OWN photographs from this year are fine. (obviously go with those that fit into your choice of nature/architecture)  make sure you have finished your mind map and uploaded it to your website, and also completed the artist paragraph.  Get ahead by doing one of the following optional homeworks:
- new photos of something different - eg. if you are photographing water linked to your new artist. - a photoshoot to recreate the style of your new photographer - an edit of one or more of your hanbury hall photos in the style of your new photographer - either use photoshop via the home page, or any other editing programme you might have at home. Upload them to your website under the title 'Going for Gold homework'!  Discussion in pairs: What should you include in your planning for a photo shoot??  How to plan an initial photo shoot to record your early ideas. How to incorporate drawing into your planning (which is essential to pass the course!)  Somewhere in your planning you need to include some drawings. Use the powerpoint below to help with this.  Plan your photoshoot for the weekend. You may choose whether you do this as a powerpoint or by hand then scan in (if drawing by hand). Use the powerpoint above as a guide for what to include.  Carry out your photo shoot this weekend and upload your photos as a contact sheet in a gallery by Tuesday's lesson. I would expect to see 20-40 photographs.
To be successful, you must follow your planning (although it's fine if it changes along the way once you get started), and you must apply your knowledge of the formal elements, especially composition and lighting.   This is where you will begin to go off independently in this project. Journeys is a very open title and can be interpreted in lots of different ways, so this lesson I am hoping you will learn how your project should develop, as well as how your work will be marked so that you can work within the assessment criteria.  To start, watch this video of a top grade sketchbook on the same theme as your project. How your photography work is marked... Each project you do marked out of 96. You receive a mark out of 24 for the following 4 categories: 1. Using contextual research to influence ideas 2. Experimenting with materials, techniques and processes to develop ideas 3. Recording your ideas (photos, drawing, written work, mind maps etc.) 4. Producing a meaningful response to meet intentions To break these down further, read through the following lists of what you should include in your project in order to meet all of the assessment objectives.  Project overview To build on the information above, this is a good diagram of the process that you will work through throughout the project. Refer to it whenever you are unsure of what to do next!   Begin the lesson with some research into types of journeys and start to narrow down the direction you might want your project to go in. Present all of your research on a powerpoint (mindmap, notes, collage etc) and upload it to your page. The following list might be useful to get you started! Examples of journeys
  Watch the video below and make notes on the advice they give. Write up the advice as a blog post so you can refer back to it throughout your project.  What do you find interesting about these photographs?
 How to look at the subject matter (the thing in your photographs) creatively. 
 For your GCSE you must include drawing throughout your projects. Today you are going to plan the next photoshoot that you will do through sketches in two different ways. Task 1: Drawing over photos on PhotoshopChoose two of the five photos below the example then copy and paste them onto a new Photoshop file. On each one, use the rectangle tool, and the brush tool to draw possible compositions on each photo for up close pictures of corners and curves, like the example below. Label each one with the type of composition you have used. (Negative space, Rule of Thirds, Symmetry, Balance, Leading Lines) Use a different colour for each composition if you have multiple on one photograph. Save them both as a JPEG then upload to your page under the title Corners and Curves, with a subtitle of Planning Drawings. 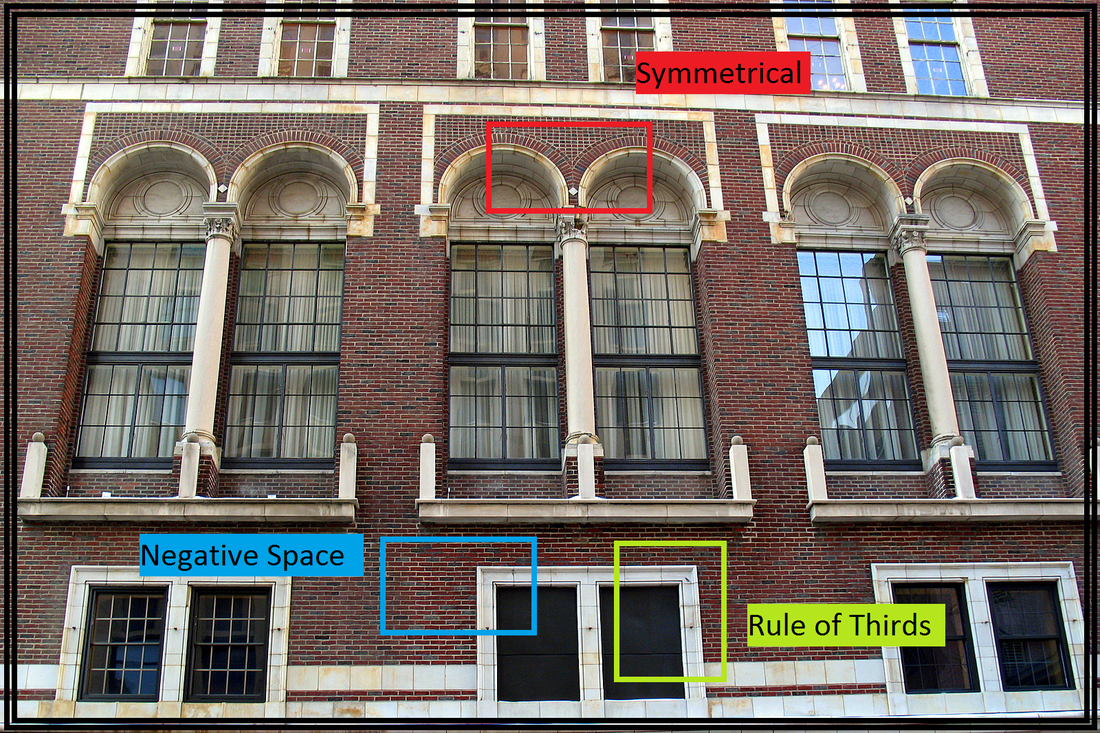  You have 10 minutes to write a new blog post to answer the following question: Why is drawing useful in photography? Use the powerpoint from last lesson (above) to help you if you need to. A short paragraph is plenty. 
|


| Bring your camera in for Tuesday's lesson. Make sure you have charged your batteries and that you have your memory card with you! |  In preparation for Tuesday's lesson and for extra marks, take a set of photographs outside of school along the same theme. See if you can take 10 or more photos of corners and curves on different architecture, focusing on close ups and different compositions. Upload them to your website under the title 'Going for gold: homework photoshoot' |
Author
These lessons have been written by Miss Wilson.
Archives
December 2018
November 2018
October 2018
September 2018
June 2018
May 2018
March 2018
February 2018
January 2018
December 2017
November 2017
October 2017
September 2017
July 2017
June 2017
May 2017
April 2017
March 2017
February 2017
January 2017
December 2016
November 2016
October 2016
September 2016
Categories
All
Component 1
Coursework
Skills Development
Year 10
Year 11
Year 12
Year 13
 RSS Feed
