
1. Independent Project Choice: Research and Mindmap

Which techniques have you liked best from the experimental photography workshops?
You will be required to use at least 3 of these in combination with digital photography skills for this mini project which will take up until Christmas.
You will be required to use at least 3 of these in combination with digital photography skills for this mini project which will take up until Christmas.

Choose a topic for this project. It could be one that you have started with one of the mini briefs we have done this term so far, or another that interests you. Bare in mind that it is only a mini project!

|
As with all projects, start with research.
1. Create a visual mind map - all of your ideas that link to the theme, supported with general images that inspire you. Do this on a powerpoint slide then upload to a new page on your website (give it a suitable title eg. Skills Project: Topic. 2. Find 3 photographers that will inspire this project - at least one of these should use one of the experimental photography techniques that you intend to use. Write a detailed analysis of each photographer, focusing on their techniques, styles, content, how they represent your chosen theme, your opinion and how they will inspire your ideas. Do the peer/self assessment task before uploading to your website when complete. |
|

|
Swap computers and read through their artist analysis. Be a critical friend and look for errors! In their book, make a note of anything that can be improved.
Have they: - used accurate spellings, punctuation and grammar? - focused on style, technique and content? - written in full sentences? - given their opinion throughout? - linked clearly to their ideas and how they will take inspiration from the artist?
|
|

2. Photoshoots in response to your chosen photographers

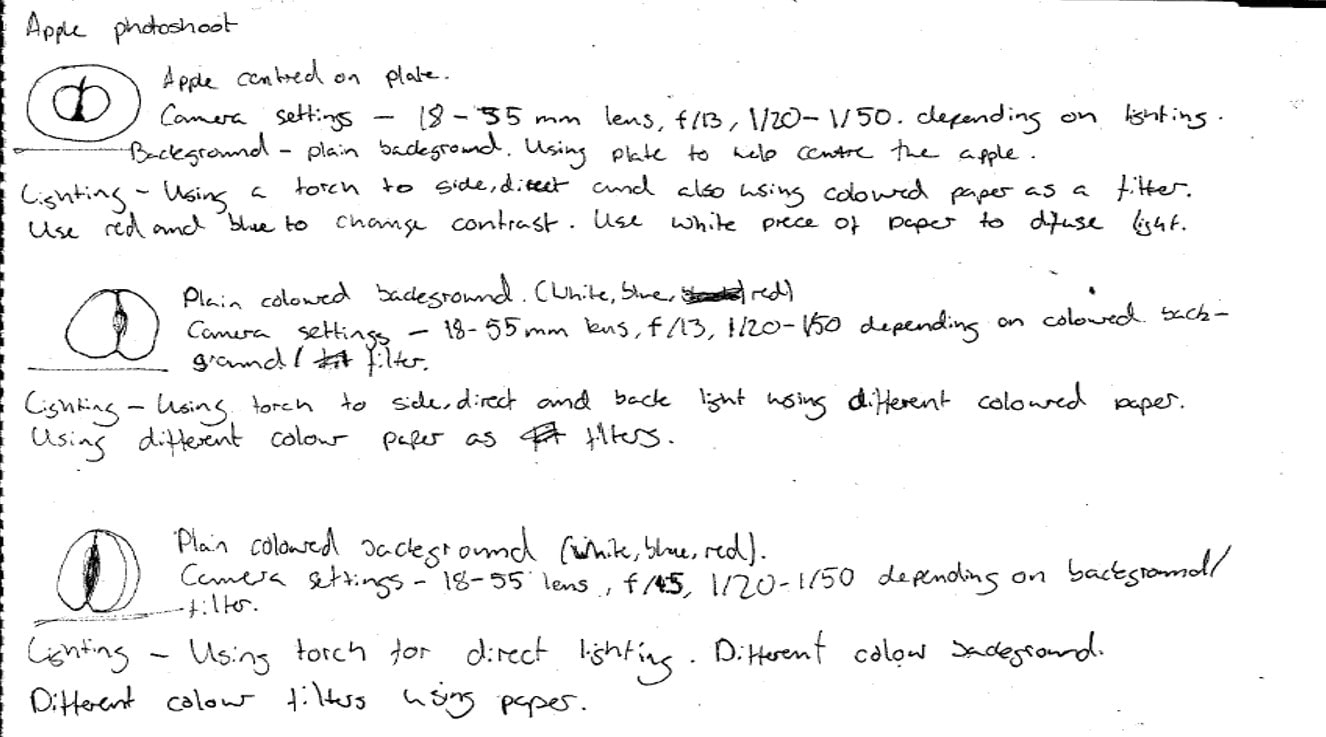
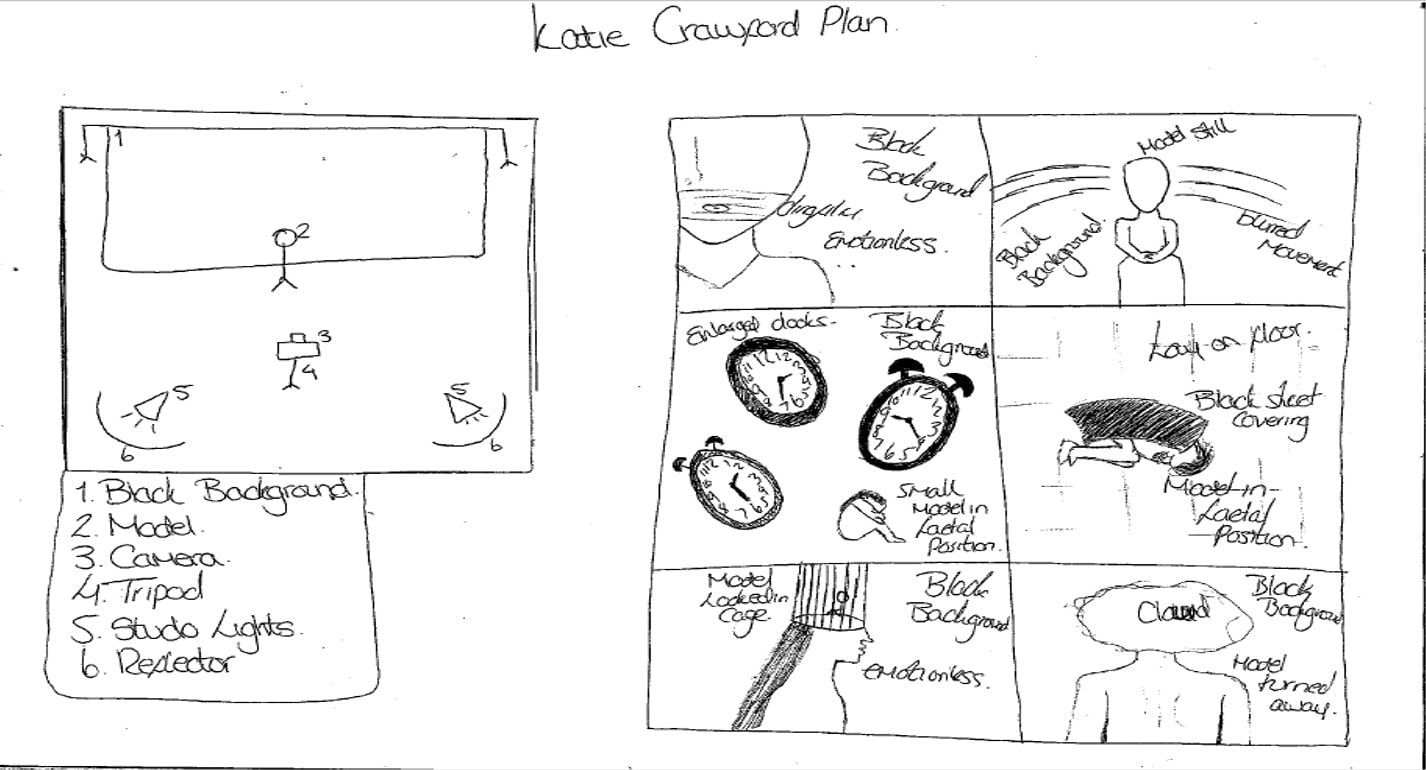
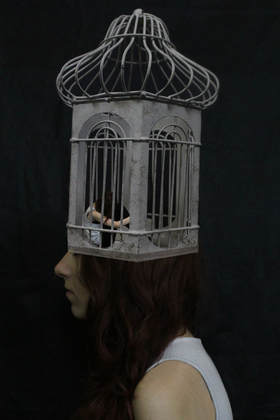
Analyse these two examples of photoshoot plans. What are the strengths and weaknesses of each? What is required from a plan? (click to enlarge plans)
|
|

This task gives you the opportunity to demonstrate your understanding of each photographer, and to apply their styles and techniques to your own photographs. This is key for AO1 (artists) and AO3 (recording ideas).

Plan your photo shoots - one for each photographer. Either on a powerpoint slide or photoshop and graphics tablet then upload OR by hand on paper and scan in when finished.
Upload your planning to your page under each photographer in order - not all in one go!
Upload your planning to your page under each photographer in order - not all in one go!


|
Carry out your photoshoots independently at home or in your frees. Aim to take 30+ Photographs in the style of each photographer.
Upload to your area AND to your website under your planning for each photographer in a gallery. Put the title 'Homework photoshoot in the style of...' above each photoshoot. |
|
Editing in the style of your photographers separately

What do you need to do in order to ensure that your editing is enhancing the way you work in the style of each photographer?

Here you will engage with the work of your photographers, applying different editing techniques to build on the way you have worked in their style. This will mainly cover marks for AO1 (Artists) and AO2 (experiments).


|
For each photoshoot, edit 2 or more images in the style of the relevant photographer SEPARATELY at this stage. Upload and review as you go along, using the notes below to help you review.
It is important that you are demonstrating a high level of skill as well as a wide range of techniques and processes as you edit/enhance your photographs. |

Review the edits for each photographers style in one paragraph (so three in total).
- Explain how you did the photoshoot and how you edited using key terminology
- Explain the links to your photographers clearly
- Review areas of strength and justify your reasoning
- Consider what you learnt through each set of photos/edits and how you could develop from here.
- Explain how you did the photoshoot and how you edited using key terminology
- Explain the links to your photographers clearly
- Review areas of strength and justify your reasoning
- Consider what you learnt through each set of photos/edits and how you could develop from here.
4. Combining the styles of your three photographers

|
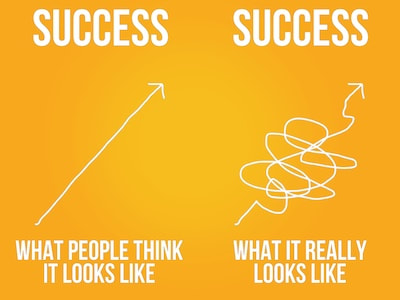
DISCUSS:
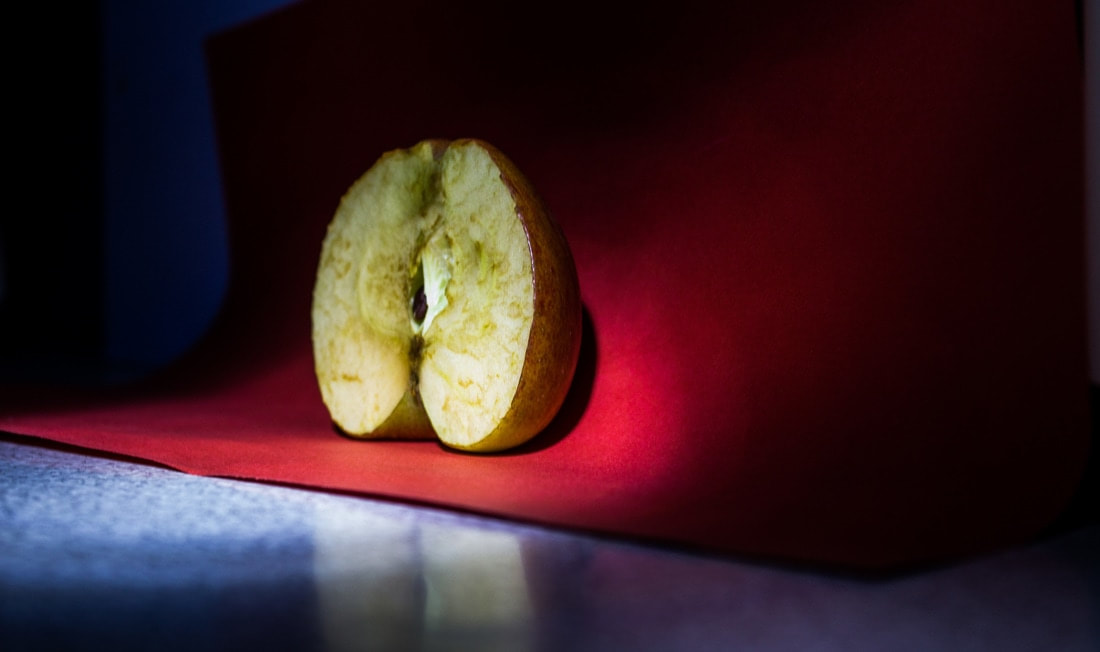
What did you learn in year 11 about how to be successful when combining the styles of your photographers? How does the opposite image link?? |
|

|
Here you need to start demonstrating your independent approach to working and start developing your own style by taking influences from multiple photographers in each experiment.
You are learning how to explore ideas and techniques at a higher level, as well as how to review and revise the way you do things in order to improve and show progress. (AO2 - Experimenting and AO3 recording ideas) |

|
Produce a series of experiments that combine the styles of all three photographers. You might choose to start by editing in the style of just two, then develop from there with the addition of the third.
You may work with any of your photographs so far, but avoid repeating your images too many times so that you show progress. There is not a specific number of experiments that you need to do - you should experiment in depth and produce as many as necessary to do this properly, making sure that each experiment builds, develops and/or improves as you go along. |
Top tips: - Save multiple versions of the same edit to show the progress you have made and the alterations. Present the final image larger than the others to draw attention to it. - Screenshots can also demonstrate the skills you have used - but don't overdo them! |

|
To push yourself further, plan an extra photo shoot with combined edits in mind. What could you do that combines all three photographers during the photo shoot?
Take these photos at home/in frees then upload and edit. |

|
Pair up with someone you don't normally sit with.
Show each other your portfolios then discuss the following and make notes about your own work in your book throughout the conversation: - What do they like about your experiments and ideas? - Is there anything that doesn't make sense? If so - clarify and discuss how it could be clearer. - What do they think you could improve? - What do they think you could do next in your experiments/photoshoots? |

|
5. Further photoshoots and development of ideas

Review your work so far:

|
From here, you will be exploring how you can develop your ideas further with the addition of new photographers, new photo shoots and potentially new skills.
Top tip for success: - Avoid being repetitive and ensure that anything you add is going to move your ideas forwards step by step rather than a massive leap in a different direction. |
|

To do list:
1. Find a new photographer. Analyse them and present appropriately.
2. Plan your next photoshoot inspired by this photographer, then get out and take photos (homework?)
GOLD OPTION: Plan an additional photoshoot which combines the styles of all photographers so far... This is a higher level because it considers their photography styles and techniques during the photoshoot rather than just at the editing stage. Communicate this clearly in your planning.
3. Upload and review your photoshoot(s).
4. Edit in the style of your new photographer alone first (2-3 edits), upload and review.
5. Next, go back to combining your photographers, incorporating the new photographers style. Don't be afraid to re-edit previous edits to add in the new photographer. It'll save time to have another version of it, plus it shows your development clearly.
Continue to edit, upload, review and refine, towards mini outcomes which will be the next task.


|
Consider how you will develop from here. Discuss your ideas in pairs - explain where you're going next with your project and the experiments/photoshoots you will do, and take on board feedback, making note of any alternative suggestions.
|
Task 6: Plan and create your final outcomes

What will your final 3 images be for this project?
- How will they represent your concept?
- How will they combine the artists you have researched?
- What will make them a series of photographs?
- How will they represent your concept?
- How will they combine the artists you have researched?
- What will make them a series of photographs?

How to bring together you ideas effectively - (AO4 Marks - 25% of your grade comes from outcomes and they way you meaningfully meet your intentions and what you set out to do at the start of the project.)

Select your final 3 images - if you dont have the right photos, prioritise a new photoshoot to ensure you have strong photos to work with.
Edit you photos to the best of your ability, bringing together your ideas explored throughout your experiments.
Make sure you are able to communicate HOW your are representing your concept. What is the meaning behind your photos? Is it clear to the viewer?
Edit you photos to the best of your ability, bringing together your ideas explored throughout your experiments.
Make sure you are able to communicate HOW your are representing your concept. What is the meaning behind your photos? Is it clear to the viewer?

|
Swap computers with someone you don't normally sit by.
What do you think of their work? What do you think their concept is based on what they have done so far? What are the strengths of their edited images? What would YOU do to develop from here if these were your images? (Positive criticism!!) Make notes as the other person is talking in your feedback book. |
|
