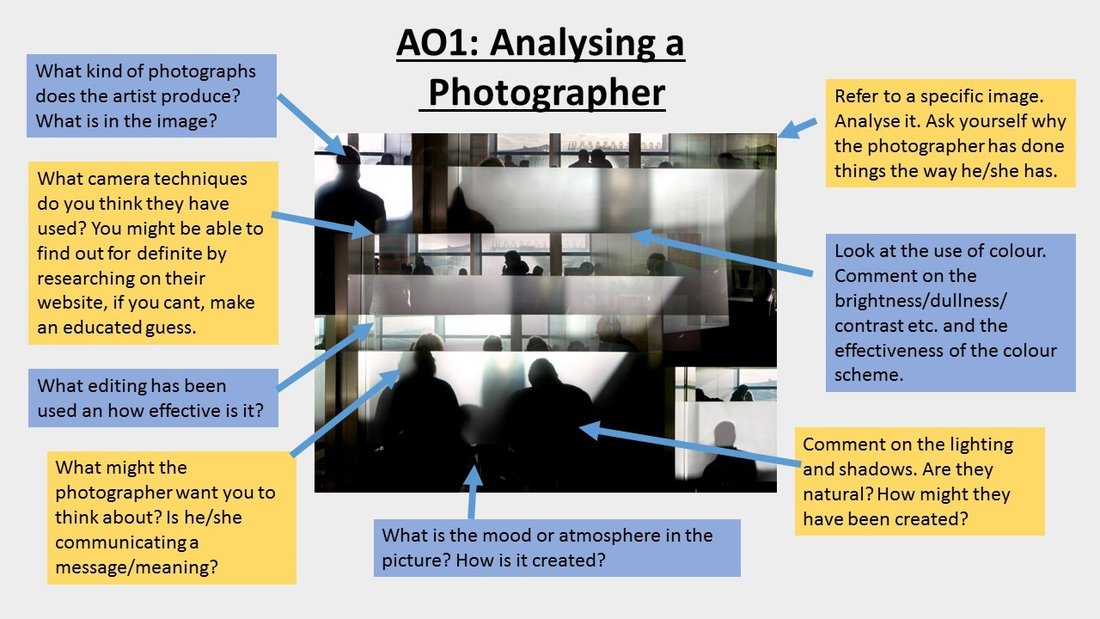
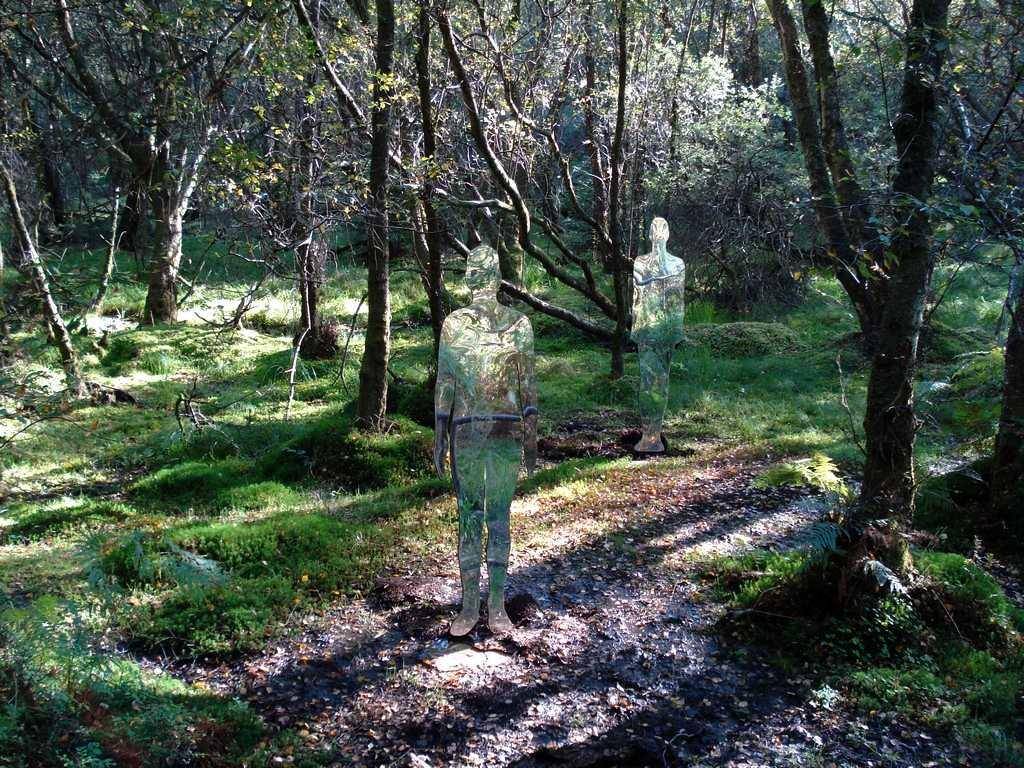
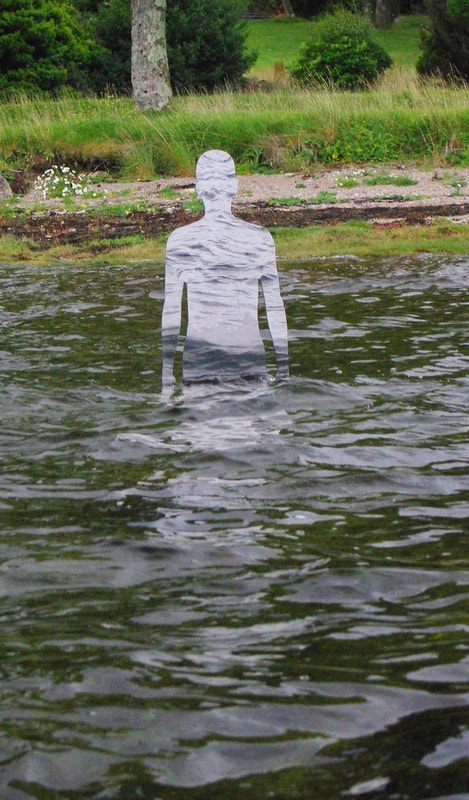
 How do you think these images have been created? How would you create them on photoshop?

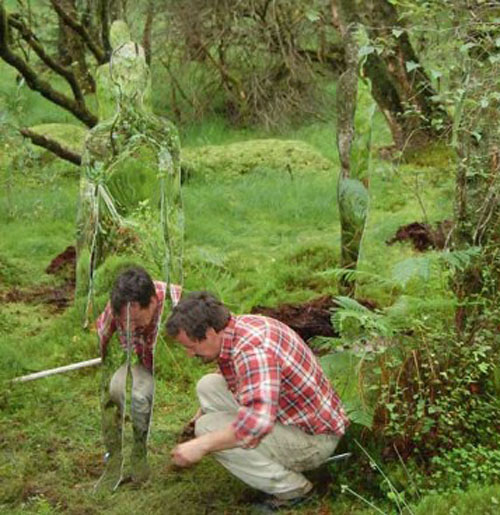
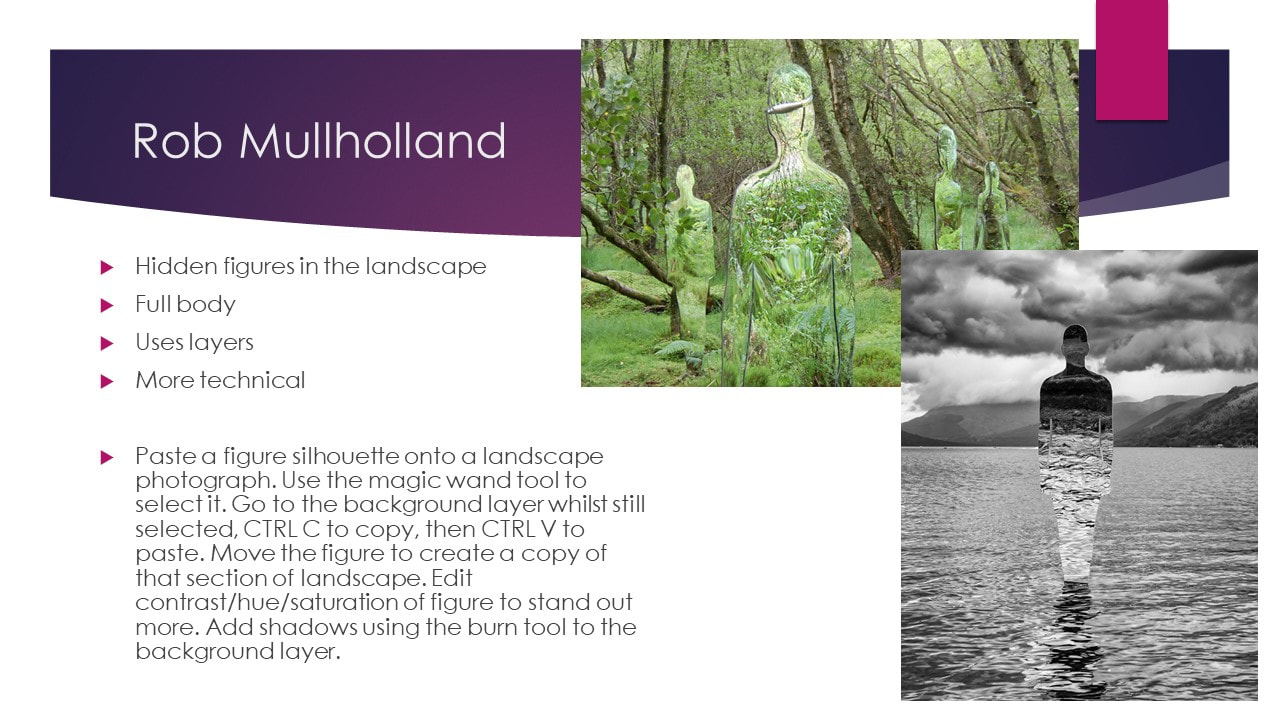  Create at least one edited image in the style of Rob Mullholland. You may include one or more figure in your image - up to you! Start by opening one of your landscape/scene photos to use as your background in photoshop. 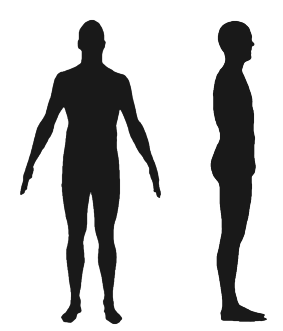 Copy the image above and paste onto a landscape photograph. Use the magic wand tool to select it. Use CTRL T to change the size if you need to. Go to the background layer whilst still selected, CTRL C to copy, then CTRL V to paste. Delete the original layer. Move the figure to create a copy of that section of landscape. Edit contrast/hue/saturation of figure to stand out more. Add shadows using the burn tool to the background layer. To try a different figure, search 'figure silhouette' in google images.  Upload your edited photo then review, including:
How did you create your image, taking inspiration from the work of Rob Mullholland? What do you like about this idea? How could you develop it further, more independently?
0 Comments
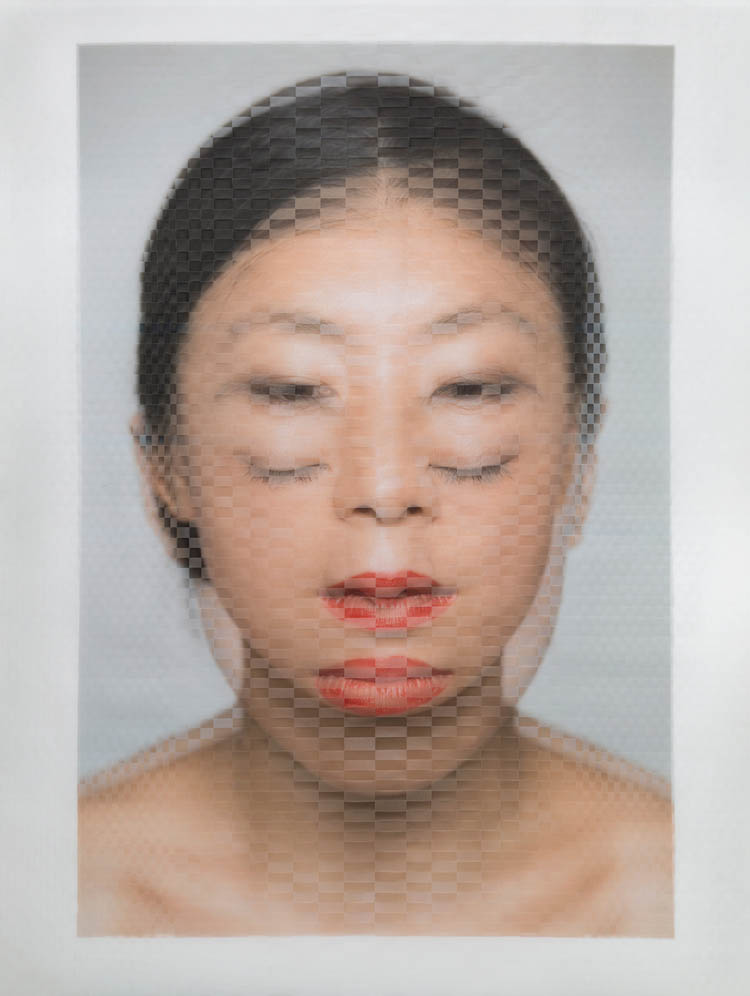
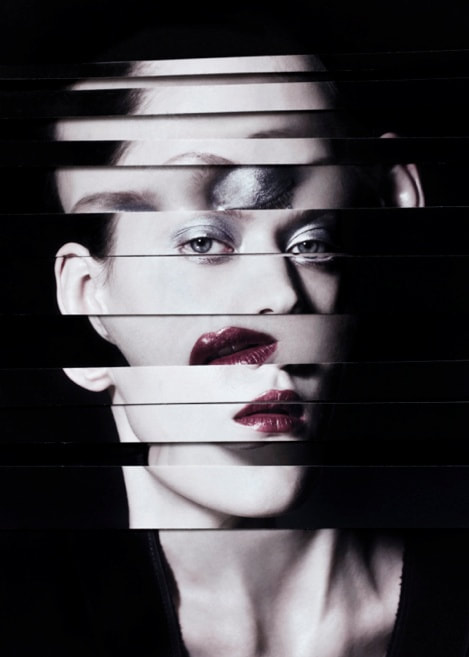
 Upload your edits full size under the title 'Antonio Mora' when complete, and explain the tools you used to create the image and review the strengths and weaknesses. To create this image I... I have taken inspiration from the work of Antonio Mora by... Something that I like about this technique is... I could refine it further by...  You are learning how to create a double exposure image by layer images creatively in the style of the artist. 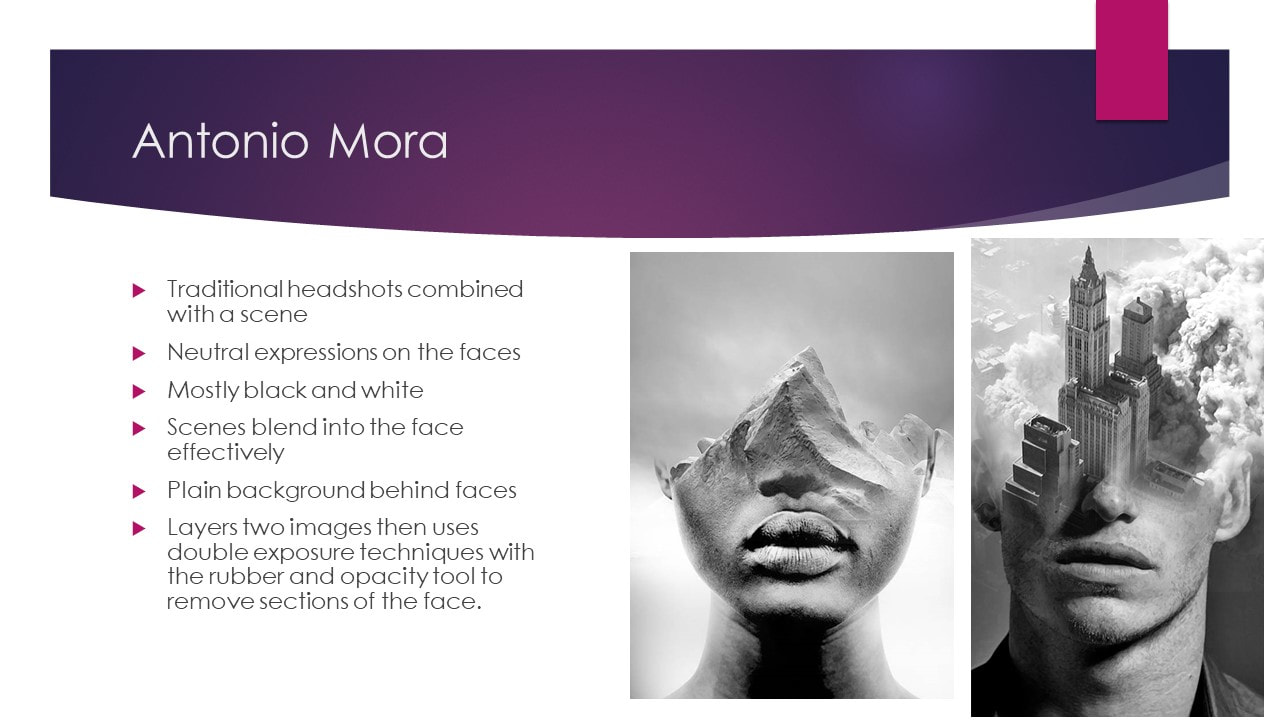  Use the instructions below to create your own double exposure image. If you have time to do more than one then you may, but try to do the second one differently - maybe in colour.  IF you need further help or want to try something different, have a look at these tutorials: https://www.youtube.com/watch?v=Mbf-QXCCXgM  Upload your image full size under the title 'Antonio Mora' when complete, and explain the tools you used to create the image and review the strengths and weaknesses. To create this image I... I have taken inspiration from the work of Antonio Mora by... Something that I like about this technique is... I could refine it further by...  For tomorrow's lesson, print 4 photographs FULL PAGE...
2x portraits - in focus, close up 2x edited photos - in the style of David Bailey and Antonio Mora Send your photos to AVA MFD TECH... Change the properties to print one sided and in colour!  In order to work in the style of Jason Faucheur, you need to print off one of your David Bailey style portrait photos 6 times! Choose your best one, and do this as quickly as possible. 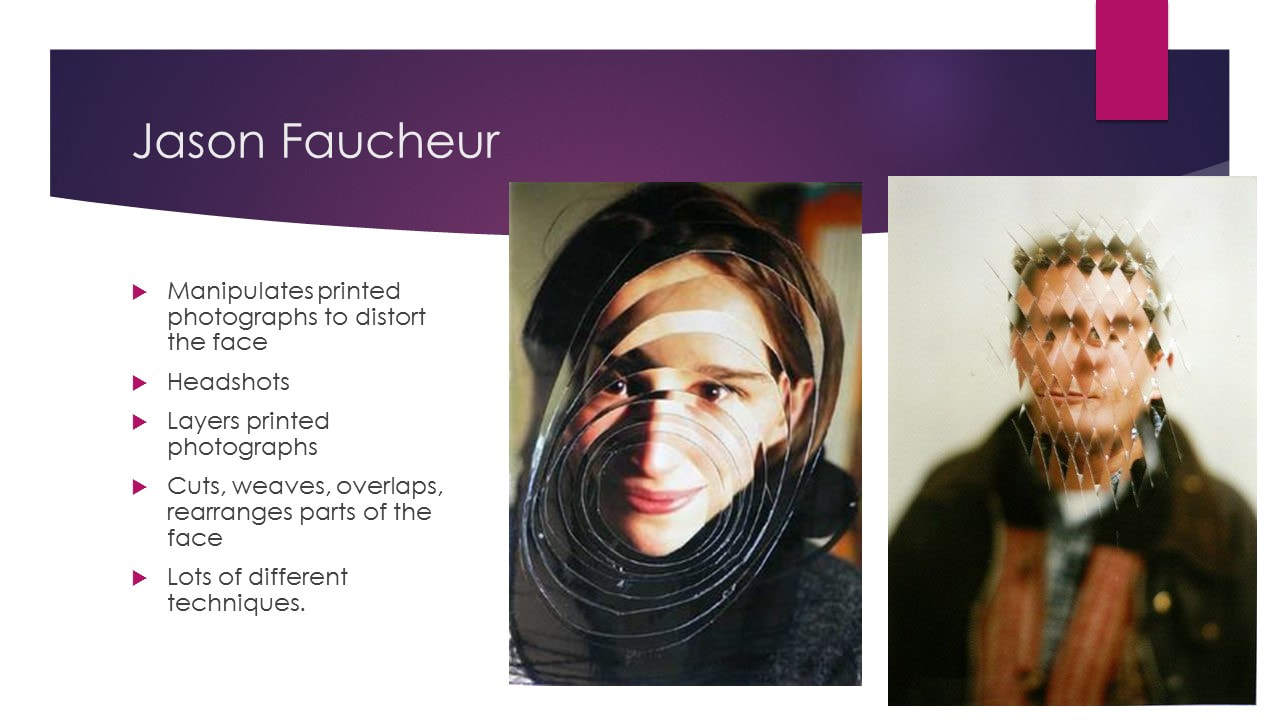  By exploring the style of Jason Faucheur you are learning about the alternative methods of manipulating an image... It's not always all about photoshop! 'Hand Manipulating an image'  See the demonstration of how you could manipulate an image by hand using some basic techniques such as: - Weaving - Rearranging
 Using the photos you printed out: - use 2 photos to weave together creatively then glue down - cut up and rearrange 2 photos together then glue down - get creative with the final 2 photos - how can you combine them?  Scan your work into the computer via the printer... Upload your scanned images onto your Human Figure page (student shared area, photography, year 10, Jason faucheur). Find your photos, click them one at a time so they go blue, right click to copy, then paste onto a new photoshop file and save as a jpeg. Write a quick review: - How did you take inspiration from Jason Faucheur? - How did you create your pieces? - What other ideas to you have for hand manipulated images? - How could you improve from here? (tip: what photography techniques could you use to improve your images before printing?) For these I took inspiration from Jason Faucheur by... I created them by... Other ways I could hand manipulate photographs are... To improve my overall images further I could...  The final part of this task is to complete one or more edits using your headshots (homework) to edit in the style of Jason Faucheur. Upload your headshots to your area and to your human figure page in a gallery. To edit you should: - EDIT THE PHOTO FIRST - brightness and contrast, sort the background etc. - use the select tool to copy and paste/move sections - rearrange the face - repeat parts of the face - use circles and/or lines 
 Read your exam paper. This is yours to keep - you can highlight and make notes on it.  See the powerpoint below - I have put together a range of ideas and artists for each exam title. Have a good look at all of them before you make any decisions.  Group mindmaps On the walls are pieces of paper with all of the titles on. Grab a felt tip, and go round each piece of paper and add as many ideas as you can think of - this will save you time when you have to do your own mindmap! Include: Things you could photograph Concepts/meanings that could be explored Places you could go to take photos Photography techniques Editing techniques I will photograph and upload these below for next lesson. Independent research Carry out general research into each exam question that interests you. Make notes on your exam paper of anything that interests you, and start copying any images that you might want to come back to later onto a powerpoint, making a note of the artists names etc. Choose your title carefully - you cant change it after today. Decide on a title then complete the following: Write up the relevant mindmap - you can add/leave things off it where necessary. You can do this either by hand or powerpoint. Create a collage of initial ideas. What are you planning to do? Make notes on the collage that link to your specific ideas. Create a new page called Component 2: Exam Project Upload both pieces of work as JPEGS.  You now need to find TWO artists to inspire your ideas. As you know, 25% of your marks come from artist research and using artists to inspire your ideas. Choose your artists carefully as you will spend the next few weeks working in their style. You should also consider how you will combine their styles, as you will need to do a lot of this! Things to consider when choosing your artists in order to be successful:
 Your task is to write a paragraph about the work of your chosen photographers to anaylse the way they photograph your chosen subject. You should include: - 3 photographs of their figure photographs (not photos of the artist!). - key information about their work from the things you have read about (not the photographer but the work itself) - Your own observations of the photography techniques and formal elements that you see - eg. how does the photographer use composition, lighting, line, shape, tone etc? - What you think the work is about - what does the photographer want you to think about? What might the meaning behind the work be? - Your opinion and explanation of how you will take inspiration from their work. If you need help getting started, copy and paste these sentences and fill in the gaps. The photographer I have chosen is... Having read about their photography, I have learnt that... When I look at _____'s photographs, I can see... One of the reasons that I have chosen this photographer to inspire my work is because I like ... I will take inspiration from ____'s work by...   Your homework is to prepare your webpage with the following blocks ready to put work into. this will speed up lessons and help you organize the work you need to complete. It will also help me to make sure that you don't miss anything out! Download the document below OR use the printed handout.
  You only have a couple of lessons left until Christmas. Most of you can completely finish your coursework in this time, including the gold project if you try...! Work through your feedback, but the main things are: 1. Finish both of your main coursework projects! 2. Do you have effective final outcomes for both projects as well as evaluations? click here for the link to the mock exam page if you need to know what to write... 3. Do you have drawing for both projects (you drop a grade band if you don't) - if not, add some. 4. Do you link clearly enough to both artists? If not, strengthen the links through extra experiments. 5. Do you have enough experiments for both projects? Can you add more experiments? More photoshoots? Finish final outcomes? 6. Are you totally finished? Then move onto the gold project. Click the button below. Remember to put extra time in at home to get the most out of your project - additional photoshoots will make this project great!    Continue to do as much work as you can at home to get both projects finished.
Take a photo of your feedback if you want to refer to it at home. Continue to do the going for gold project at home too, to really maximise these marks!  Quick recap: What are the different ways that you can experiment in photography? Write a list on your paper - first person to 15 different ways gets RSA points!  To be successful your experiments will: - 4+ Make clear links to both artists in each experiment - 4+ Demonstrate a range of different editing skills - 4+ Not be repetitive - 4+ You will complete 4 or more experiments this week - 5+ Show progression of ideas from one experiment to the next - 5+ Explore the formal elements effectively - eg. vary composition (cropping) or colour. - 5+ You will complete 6 or more experiments this week - 6+ Skills will visibly develop and improve - 6+ Ideas will be creative and individual - 6+ You will complete 8 or more experiments this week   Refer to your red books for your choice of experimenting tasks for this lesson. Tick off the experiments you try - you need to do at least one from each section - they get a bit more challenging with each option. Editing experiments TG 4+ Edit different photos to the ones you have edited previously, focusing on creative use of colour linking to your two artists. Upload, explain techniques and links to artists and review strengths and weaknesses. 4+ Edit the backgrounds in the style of your first artist and the foregrounds in the style of your second artist. Upload, explain techniques and links to artists and review strengths and weaknesses. 5+ Explore independent ways of combining the two photographers styles. Edit, upload, explain techniques and links to artists and review strengths and weaknesses 6+ Go for gold! Do some research on google to find a new photoshop editing technique, relevant to your chosen artists, then have a go at it. Upload edits, explain techniques and links to artists and review strengths and weaknesses. Photo shoot experiments 4+ Plan for a new photoshoot that includes drawings and notes of how you will use lighting and composition creatively. 5+ Also include details of other formal elements such as line, shape, colour, pattern, texture and tone with links to your artists. 6+ Go for gold: Communicate your ideas through your planning clearly and effectively, giving details of exact photos, objects and techniques for the photoshoot linked to your artists, as well as notes on how you will edit.  Complete the self assessment sheet (the page before today's checklist)
Add the task 'Independent experiments' What did you need to do in order to be successful? What is going well so far? What do you need to develop next?  What is an experiment? What might it look like in photography? Have a look at these student's portfolios from year 11. How do they experiment? How do they link to artists? And how do they combine the styles of multiple artists? What do you notice about the way their projects develop? What do you think the success criteria is? Password: camera  The purpose of today's lesson is to have a good understanding of how you are marked on AO2, and to learn how to develop ideas through experiments.  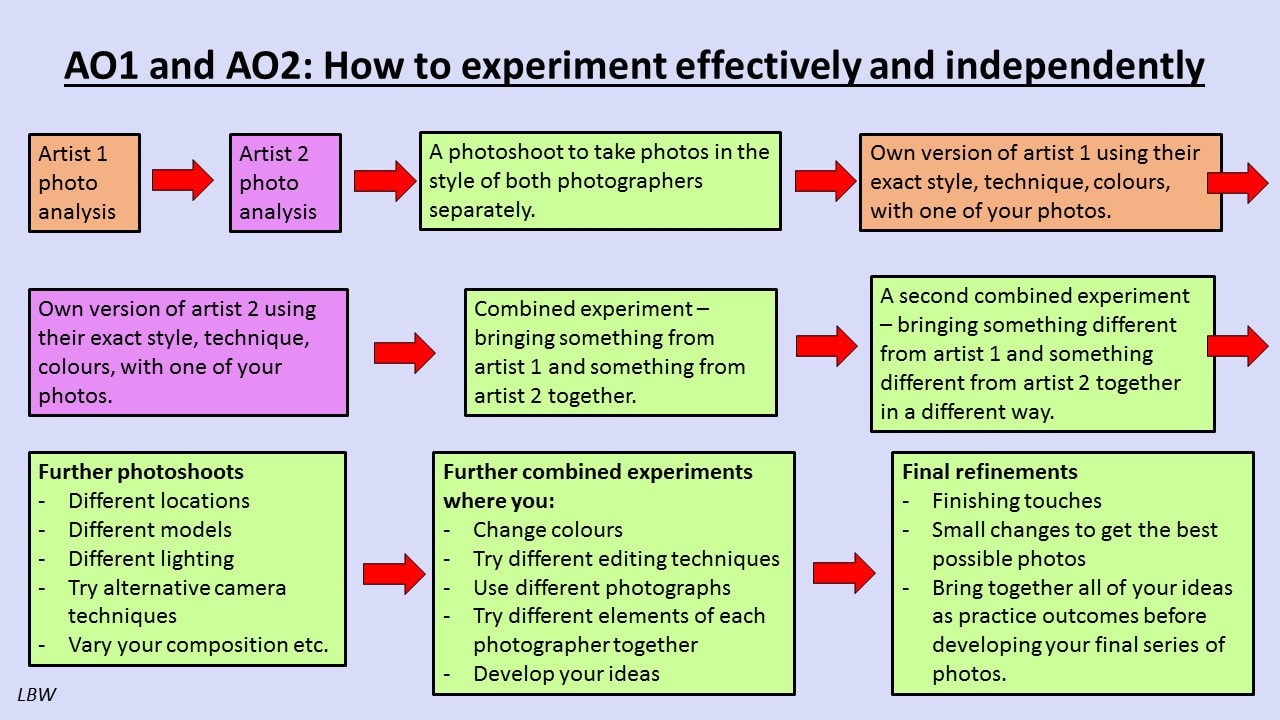  This lesson, I would like you to try to experiment independently. TASK 1: upload your homework photos under your other work so far. Task 2: Think about the three artists we have done so far - choose two and try to combine their styles, using some of the tips on the slideshow above. - when you finish an edit, upload it and review it using the questions/sentence starters below, then try a different way of editing on a different photo!  Which artists did you combine and how? What are the strengths and weaknesses?
In this image I have combined the styles of... I edited by... Something that I like about the edit is... Something else I could try is... |
AuthorThese lessons have been written by Miss Wilson. Archives
December 2018
Categories
All
|

 RSS Feed
