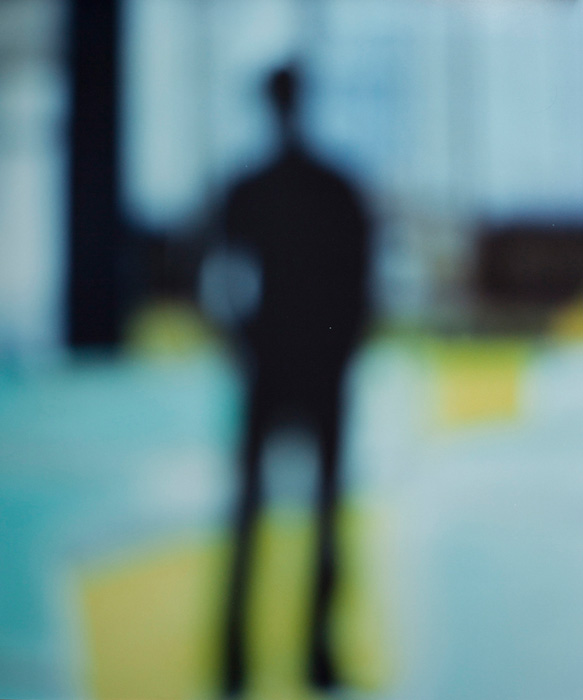
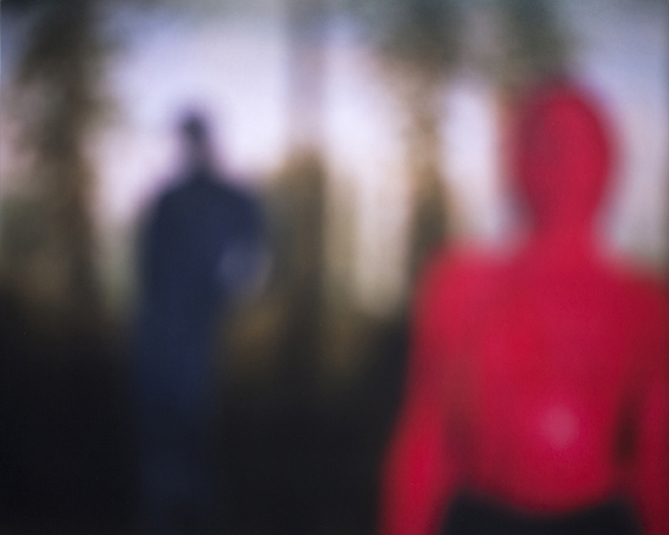
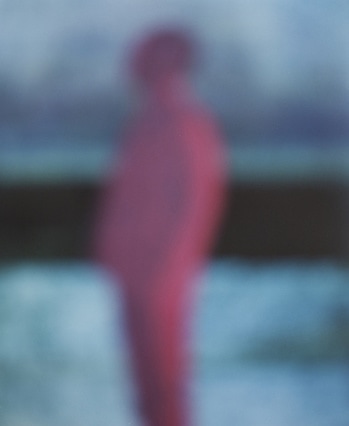
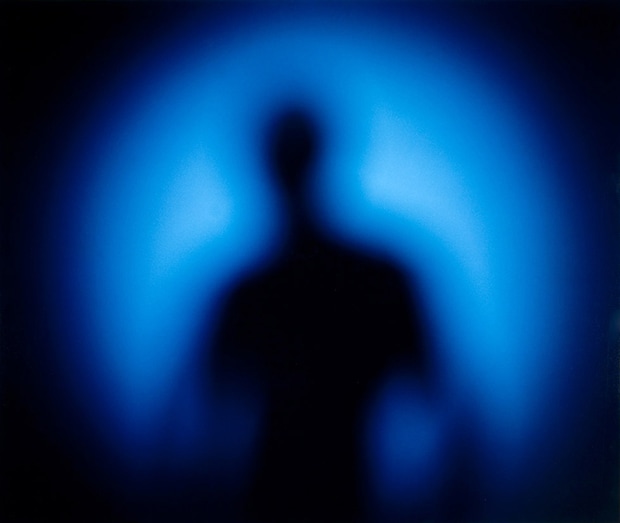
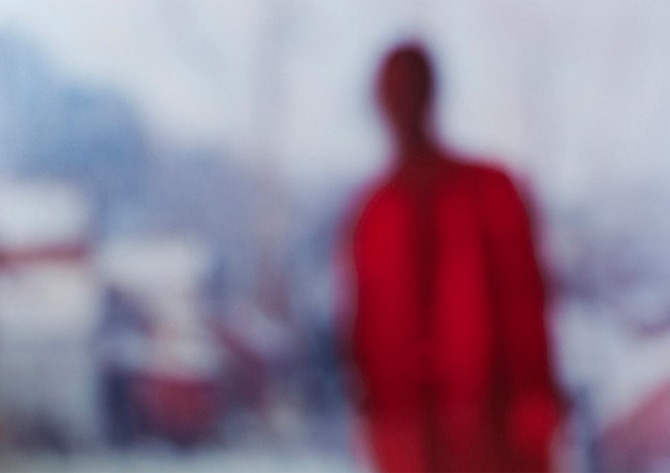
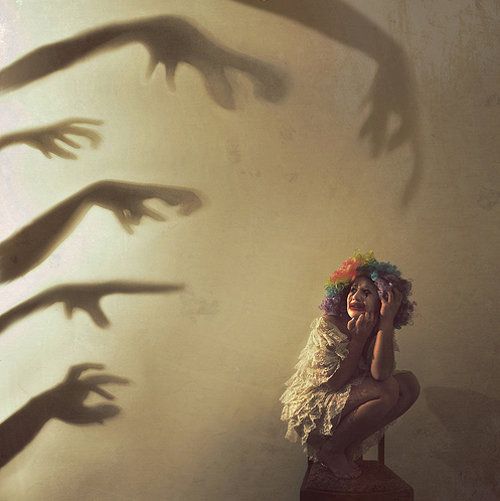
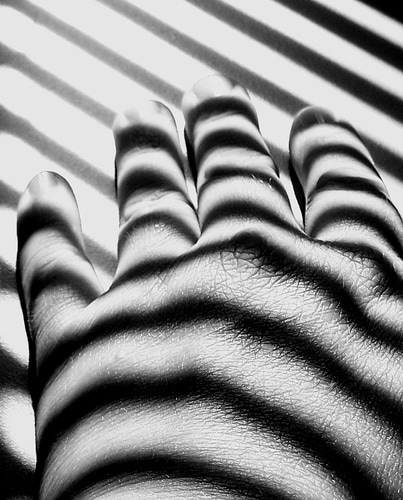
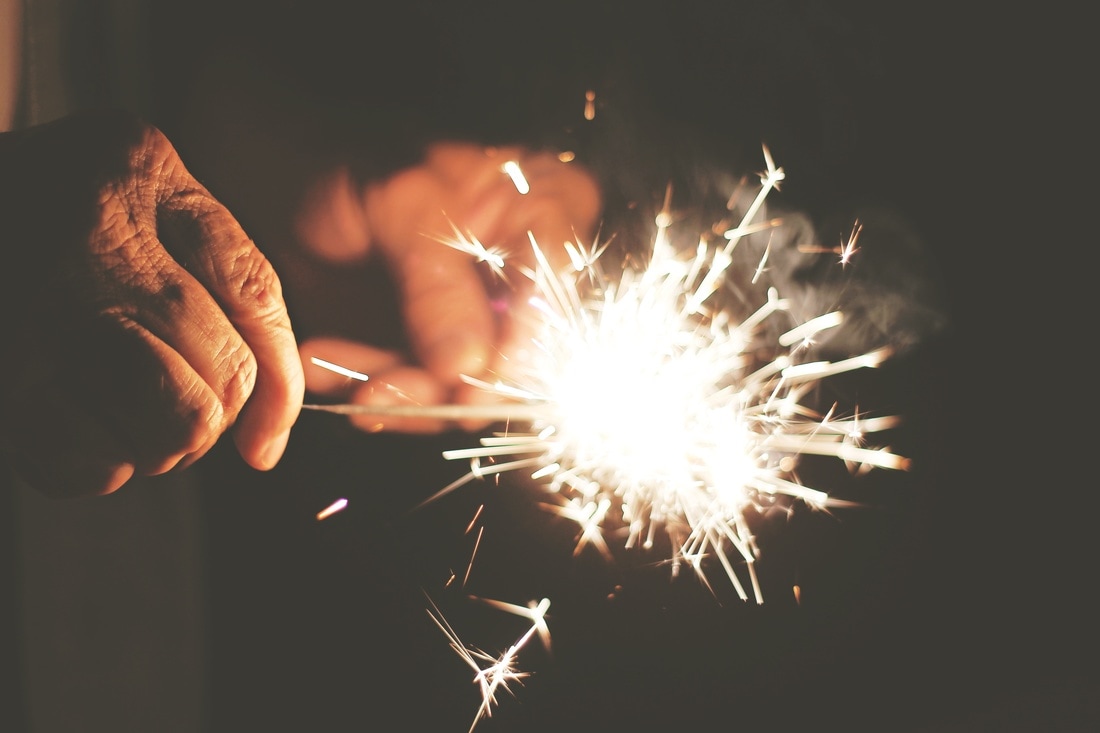
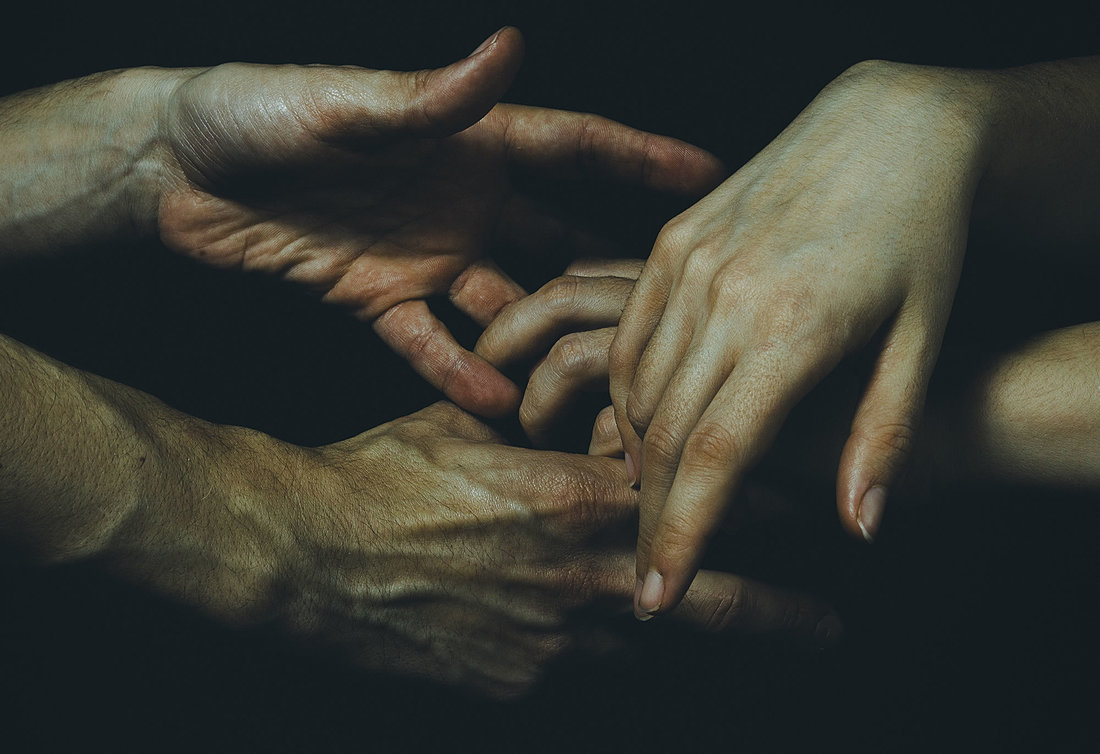
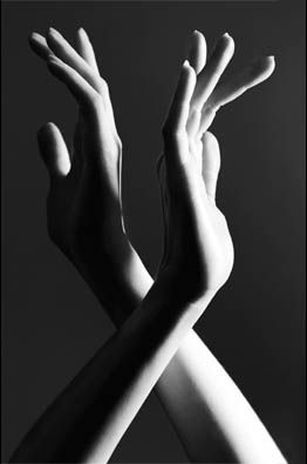
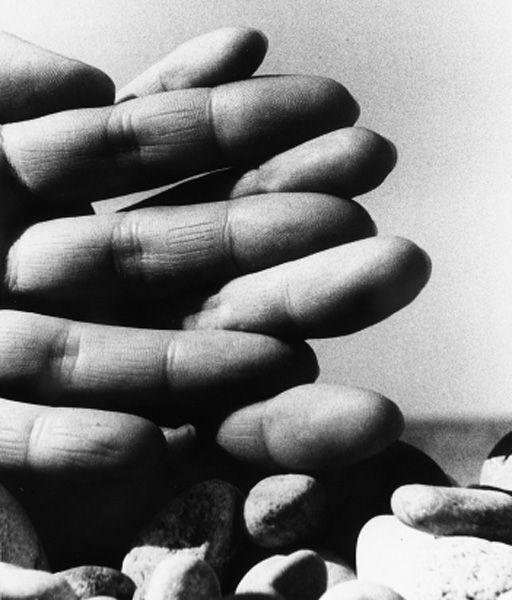
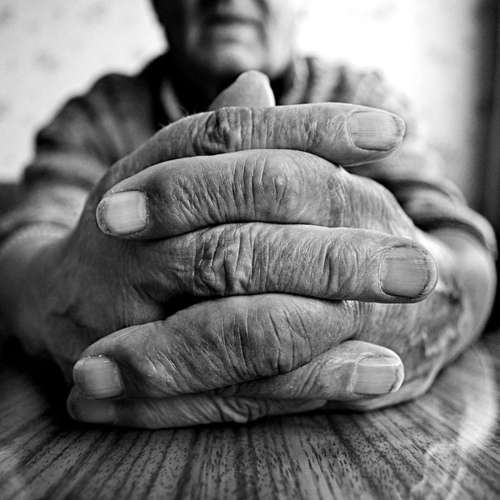
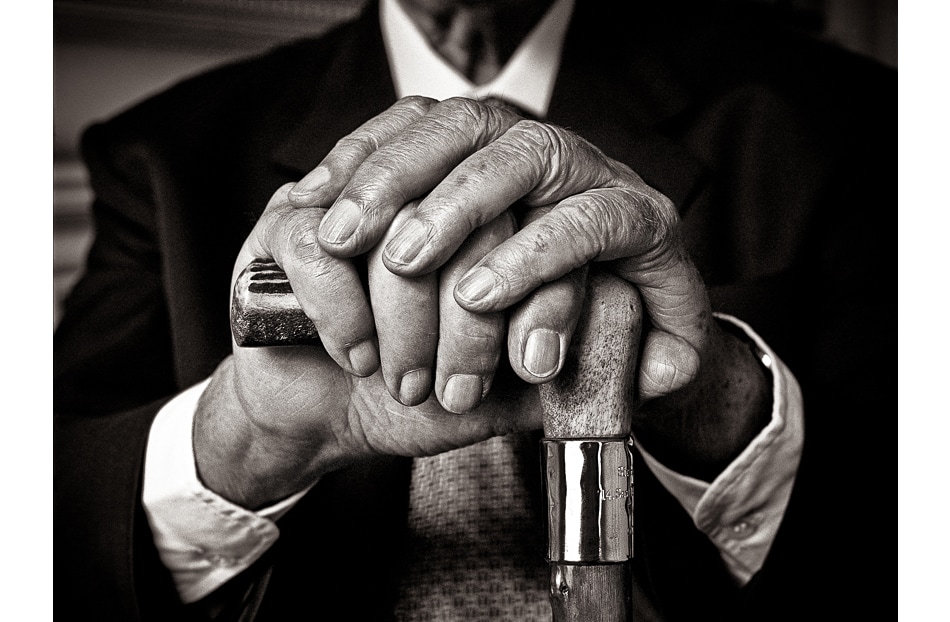
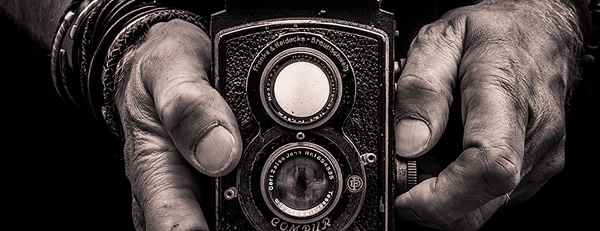
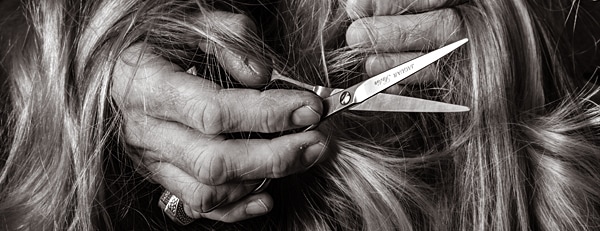
 What is your opinion of these photographs? Click them to enlarge. Be prepared to justify your opinion. How might they inspire your own work?
 How to photograph the figure in an abstracted way. 


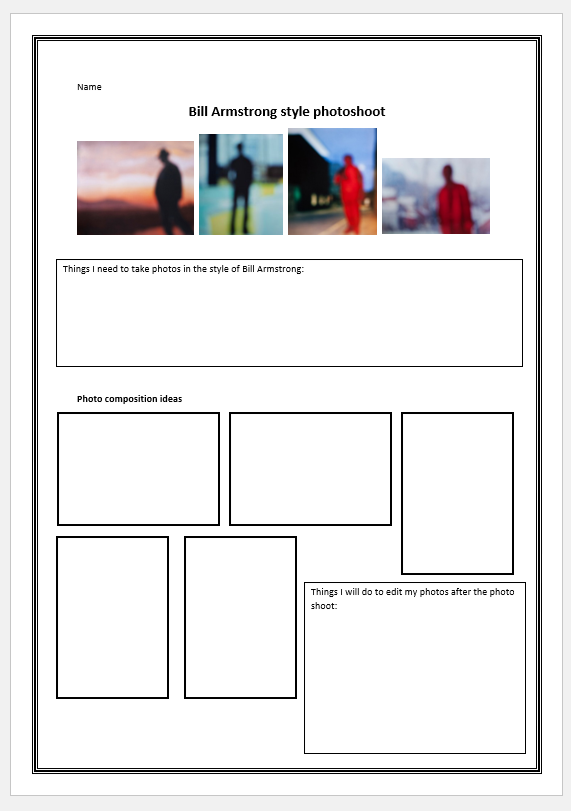
When you are finished, upload your PowerPoint to your Human Figure page.  Bring your camera to school on Thursday ready for a photoshoot p5. We will be planning your photos  What do the following words mean? They are key words for the lesson and you should be using them with reference to the editing in the style of this photographer. Abstract Distorted Unfocused Contrasting 
 Upload your best 10-15 photos to a new gallery on your Human Figure page under the title 'Bill Armstrong Inspired Photo shoot' Edit TWO of your photos in his style. -Open your photos on Photoshop - start by changing the hue and saturation, brightness and contrast of the photo to ensure you have high contrast (between colours and lighting) in your photo. - Going for gold option: the advanced version of this would be to use the select tool/magic wand tool to select sections to change the colours/brightness contrast, rather than do the whole picture. I would recommend making your selection then copying and pasting to a new layer then editing so that you still have the original, in case you want to go back and make changes. - Next, experiment with the Gaussian Blur filter in - filters, blur. Drag the bar at the bottom of this section to the right, and see the blur. You want the same level of blur as the artist - not too much/too little. -save when happy as a JPEG then upload as single images so they are fairly large. If you have a DSLR camera - some of your photos should be good enough to be left unedited. Add these as extra outcomes, and write a brief explanation of how you took these photos and that they are unedited. Don't forget... When your planning page has been scanned, this also needs to be added to your Human Figure page, above your Bill Armstrong photo shoot gallery. Click the image below to download the scanned drawings, then open your planning sheet on photoshop and save it as a JPEG and upload it.
 To finish, add a text box underneath your edited/final pictures and answer just this one question as a paragraph:
What did you learn about the idea of abstracting your work through this task and how could you apply it to your work in the future? Sentence starters if needed: Through this task I learnt that by abstracting my work... I could apply this idea to my future work by... Other things that I could do to abstract or distort my work could be...
0 Comments
 You should be in a position to start planning your final outcomes. On a powerpoint slide, write up your plan for a series of 3-5 images. A series must be linked in theme as well as visually through the style - eg. similar editing, colours etc. OR it could be linked by narrative, where one image leads to the next. Include the following in your planning: - A reflection on the strengths of your experiments and how you will apply them to your outcomes - The artists that will inspire you most - The original images that you will feature in your final series and why you will use them - A brief explanation of how you will edit your outcomes. Upload your planning when it is complete.  To do well in AO4 you need to bring together your ideas effectively to produce pieces of work that realize your intentions and what you have been working towards throughout the project. The criteria for achieving the top marks (20-24) is: An exceptional ability to present a personal and meaningful response. Demonstrates an exceptional ability to successfully realise intentions and, where appropriate, makes connections between visual and other elements.  Create your final outcomes - they should be your 'best experiments' yet!
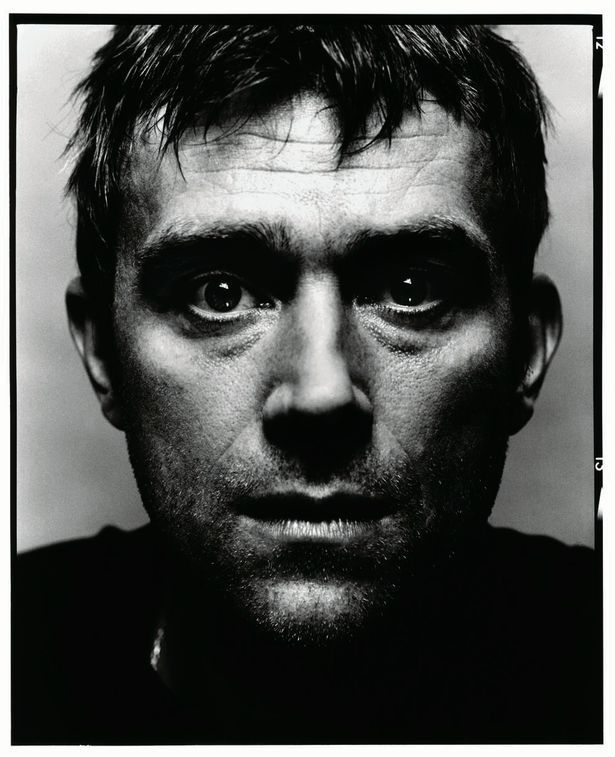
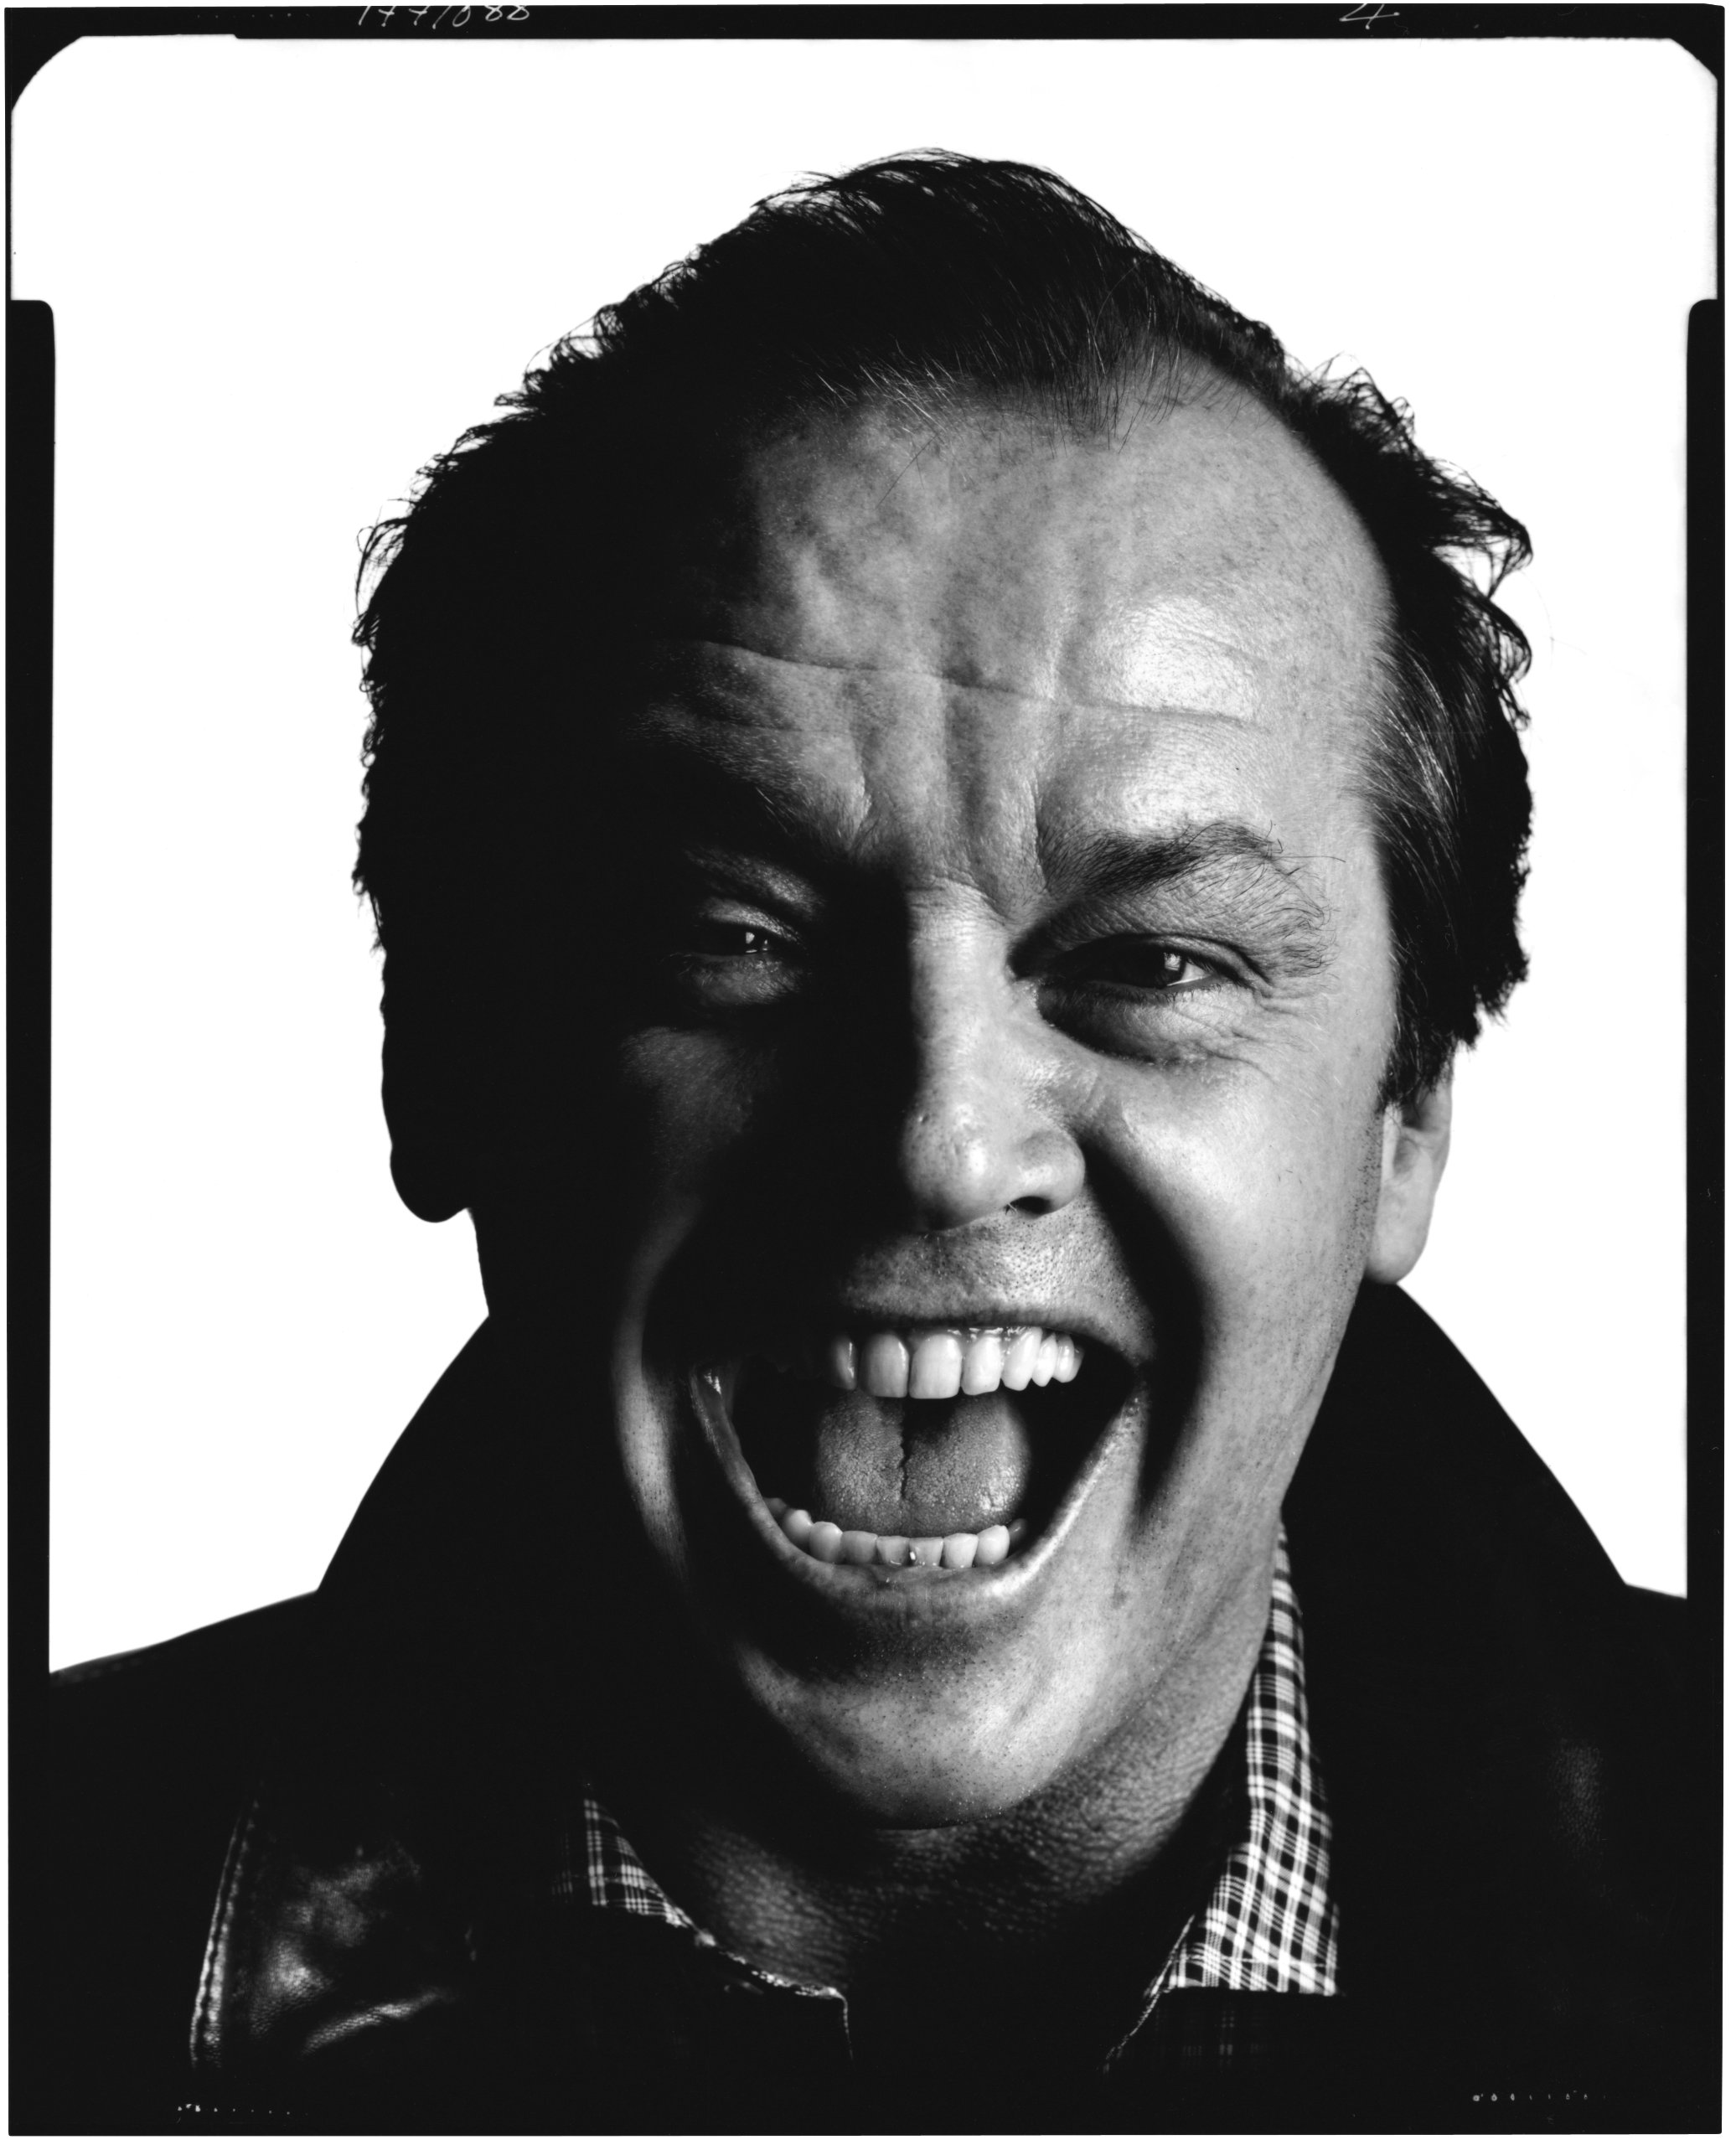
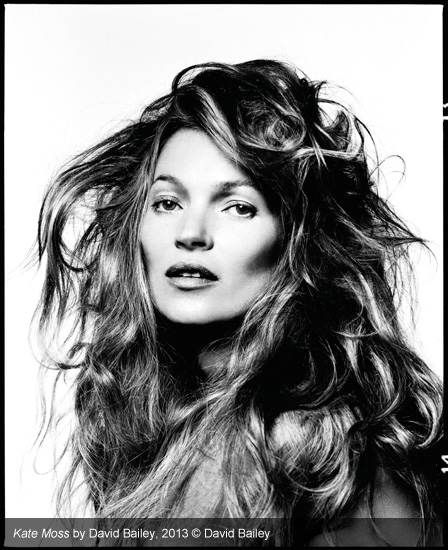
When finished, upload them as separate images so that they are the largest possible on your website. If they need to be viewed in a particular order, then you should consider this when uploading. A reminder of upcoming deadlines: Plan for, create and upload a final series of 3 or more images as the outcomes to this project by Friday 3rd February - Write an evaluation of the project in a 1000-3000 word reflection due Friday 17th February.  Discuss these two images in pairs. What do you think about the: Pose... Facial expression... Lighting... Background... Mood of the picture?
 How to take an effective portrait photograph in the style of David Bailey. 
 To bring together what you have learnt from this lesson, create a plan for your photoshoot next lesson. Your task will be to take 20+ Photographs of people, demonstrating the same skills and techniques you have seen within the work of David Bailey. Options for planning: 1. create a powerpoint slide, featuring the things you need to do next lesson in order to be successful. 2. get some paper and plan by hand, including some drawings of compositions, along with the key information. (if you choose this option - give it to me when it is finished and I will scan it into the computer so you can add it to your page). You must include notes on: - facial expressions you will get your models to try - moods you will try to recreate in your work - backgrounds you will use - Lighting - Props and/or costumes you will feature in your photographs. Upload the above planning to your Human Figure page under the title 'David Bailey style Photoshoot planning'.  Next lesson you will need to: - bring in your camera (make sure batteries are charged etc!) - bring in props/clothes to be used in your photos.  Underneath your David Bailey work, add a title 'David Bailey inspired photoshoot' Add a gallery and upload the best of your photos from the lesson today. Next, open the best photo on photoshop and edit in the style of David Bailey. - Desaturate your colours (make it black and white) - Enhance brightness and contrast - Enhance lighting and shadows (eg. curves or filters: render - lighting.) Save your edited photo as a JPEG then upload to a single image element under your gallery so your photo is large to show off your skills. You should have just one really effective photo as the outcome for this task.  Write a short paragraph to review your photo shoot and edited photos. Put this underneath your large edited photos. Discuss the following: - what did you do during the photo shoot? How did you take your photos, what props/lighting did you use and why? Did you create a mood/atmosphere through the facial expression/pose? How? - What are the strengths of your edited photos and why? - Going for gold: How could you develop this style of portrait photography in your own way? What could you do differently in either the photo shoot or the editing? To develop, you would take an aspect of the original style then make changes in an individual and creative way. - Going for gold 2: carry out whatever you just said you could do above to develop the style independently. This would need to be done when everything else is finished OR as a homework. It might involve a new photo shoot, it might just be a different edit.  Anything incomplete from this page is homework, due TUESDAY the 31st.
Make sure everything is uploaded and complete or there will be detentions on Tuesday after school..  Your homework is to do an additional photo shoot of hands, but this time in a different way. Be creative with it - there are no right or wrong ways to do this photo shoot, as long as you are being creative and photographing hands effectively. Upload them to your website or bring in the card for next lesson :) Tip: get a hand model (a willing friend or family member!) - you'll get better photos than just photographing your free hand!
 Upload your photos to your website into a gallery(contact sheet) under the title 'Hands Photoshoot'. If you have a homework photoshoot, add this to a separate contact sheet under the title 'Homework Photoshoot'. Before you unplug your memory stick, select the best 4 photographs and save them to your area in a new folder called 'The human figure - original photos'. This is so that we have some high resolution images for your coursework later in the project.  How to edit your photos to present some initial ideas for the project. AO3/AO2  Next, open the best photo on photoshop and edit in the style of Tim Booth. - Desaturate your colours (make it black and white) - Enhance brightness and contrast - Enhance lighting and shadows (eg. curves or filters: render - lighting.) - You might want to blur out or simplify the background (possibly use the clone tool Alt+ click the area you want to copy) - You might want to darken the background and lighten the hands (dodge and burn) Save your edited photo as a JPEG then upload to a single image element under your gallery so your photo is large to show off your skills. You should have just one really effective photo as the outcome for this task. 
 Write a short paragraph to review your photo shoot and edited photos. Put this underneath your large edited photos. Discuss the following: - what did you do during the photo shoot? How did you take your photos? How did you use lighting and backgrounds to enhance your photos? How did you direct your models to get the best possible photos? How did you take inspiration from the work of Tim Booth? - What are the strengths of your edited photos and why? Sentence starters During this photoshoot I... I took my photos by... My photos were inspired by the work of Tim Booth because... The main strengths of my edited photos are... because...
 Going for gold: Want to go a step further for higher marks? Combine your Tim Booth edited photo with the style(s) of David Bailey and/or Bill Armstrong. This could include some/all of the following:
- Colour changes - Blurring the image - Layering hands and portrait - Changing opacity of your layers - Combining colour and black and white images Upload this photo with an explanation of the links to the artists you have used, and how you edited. Title above: Independent Hand Experiment Please make sure you have completed your final images and uploaded them to your website before you continue to the essay.  Read the following essay by an A-level photography student. You will be writing a supporting, evaluative essay to accompany your project - this is a good example.  The first component of your A level work has a compulsory 1000-3000 word essay to go alongside your personal photographic investigation.  This is a practice essay for the required written element of Component One. To be successful you must: - Be reflective not descriptive - Explain your thought process at each stage of the project - why did you...? - Analyse the strengths and weaknesses of your experiments - Link to artists clearly (with pictures in relevant places) - Explain how your outcomes bring together your ideas to realize your intentions. You are marked on the essay in AO1 and AO4. See the criteria below, and be aware of the wording, including a requirement for 'fluent use of appropriate specialist language' and 'exceptionally clear, coherent and accurate use of language' to achieve the higher marks. 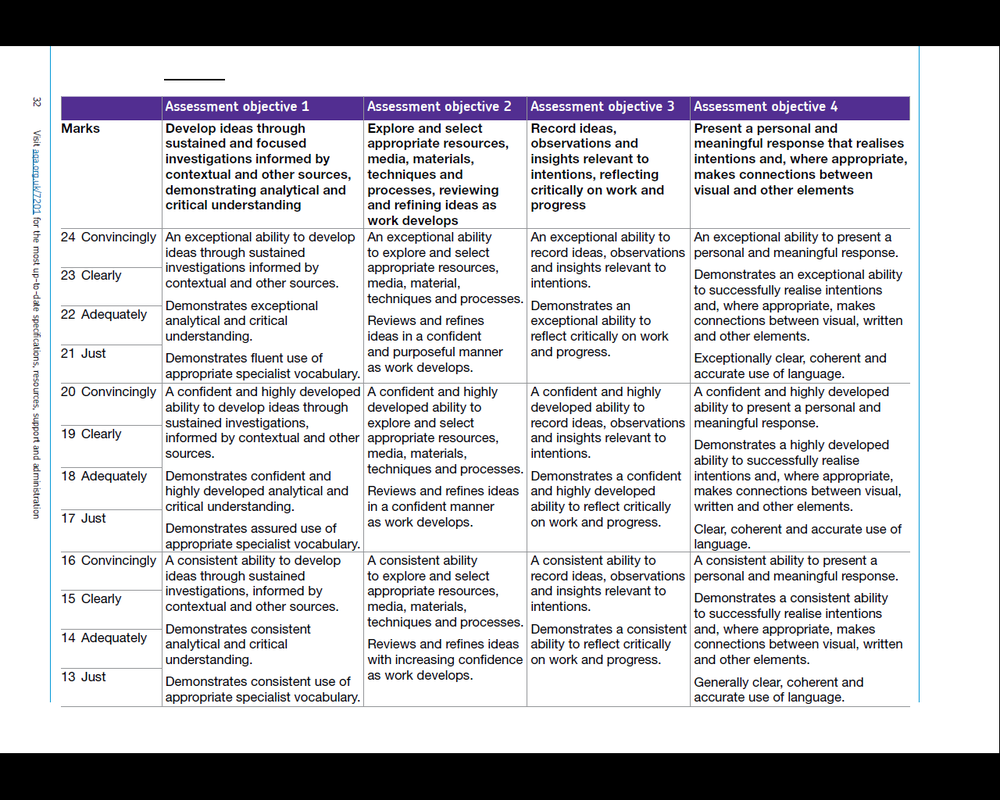  Use the above document to help you structure the way in which you write your essay. The word count must be above 1000 words but below 3000. Do not include your skills development tasks in the essay, just everything from the Journeys project. Write your essay on word so you can check spellings etc then copy and paste to your website. You have until the 17th of February to complete your essay and upload it to the bottom of your Journeys page, ready to be marked over half term.  Print your essay so far.
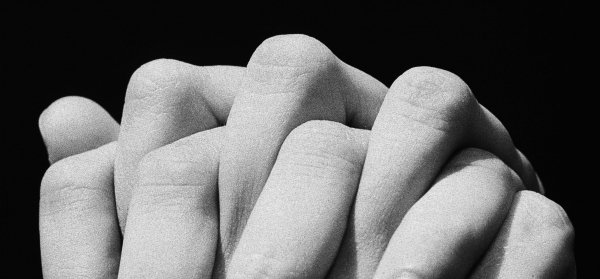
Swap them with each other, and read their work. Aim to: - underline any typos, spelling or punctuation errors - circle any repetition eg. if they use the phrase such as 5 times in as many lines! - underline anything that is waffling/irrelevant!   In pairs/threes, take it in turns to put your hands into different positions that might be interesting to photograph! (no photos yet though!) Next, take it further, by joining hands! What positions can you get your hands into when there are four or six instead of just two? Photographing hands
 This lesson you are continuing to build on learning how to research and plan a response to an artist. This will give you marks for AO1 (using artists to inspire your ideas). 4,5,6: To do this well, you should aim to: - Comment on his style, techniques and the meaning of his work - Include pictures of his work that inspire you - Use key words when talking about his photography - Give your opinion clearly - Link to your own work and explain how he will inspire you. 7,8,9: Going for gold: For the higher marks, key words are essential and you should be starting to analyse the artist's work rather than describe. Ask yourself - why does he do things? What effect does it have on the picture? How might it change if it was done differently. Also, make sure you fully explain your opinion, perhaps justifying it with comments on the artist's use of the formal elements. 
 On your Human Figure page, add the title 'Body parts: Hands'. It is a good idea to type up your paragraph on word then copy and paste into weebly so that you can check spellings etc! Carry out research into the work of Tim Booth and his project 'A Show of Hands'. Present the following on your web page: - 3 of his hand photographs (choose images that will inspire you later). - Information about his photography technique, choice of colours, lighting, models, poses, facial expressions etc. (in your own words) - Your own comment about his style - what do you like about it? How could it inspire your own photo shoot? Sentence Starters Tim Booth photographs hands by... Something interesting about them is... After researching, I have found that he creates his photos by... I think his work is about... Something I like about his photos is... They could inspire my own photos by... Going for gold reminder: For the higher marks, key words are essential and you should be starting to analyse the artist's work rather than describe. Ask yourself - why does he do things? What effect does it have on the picture? How might it change if it was done differently. Also, make sure you fully explain your opinion, perhaps justifying it with comments on the artist's use of the formal elements.  Get someone else to read through your paragraph before you upload it to your page. Look for spelling mistakes or typos, and check they have included everything without babbling! Upload your PowerPoint to your Human Figure page then move on to the review.  Following on from your research, add a title under your previous task with the title 'Hand Photo-shoot Plan' then a text box underneath. Copy and paste the following text, and list as much as you can next to each heading in order to plan for your photoshoot next lesson. - The different ways I will photograph hands: - How I will photograph multiple hands: - Lighting types I could try: - Backgrounds I could place the hands on: - Other things I could include in the photo with the hands:  Carry out some further research into hand photography. On either a powerpoint or directly onto your website, add a title of 'Other inspiring images' and add 6 hand photos that you like. Try some of the following search terms: - Hand photography - Intertwined hands photography - creative hands - moving hands photography - multiple/layered hands On your inspiring images page, add key words to describe the photographs and the techniques you can see in them. Use some of the words below - (also look at your key words page!) Going for Gold: Use key words! lighting, shadows, contrasting, bold, soft Composition, rule of thirds, symmetrical, balanced, negative space Background, foreground, perspective Focus, focal point, blur, subject, layered, intertwined, movement, position, angle Creative, artistic, symbolic, moving, emotive Hands: nails, knuckles, creases, wrinkles, muscles, veins, fingerprints  Bring in your camera for the photoshoot next lesson.
Also - if you want to feature any 'props' in your photos, bring them with you! eg. Jewellery, objects, money, a flower (this might be inspired by your research!) etc.  Give a 2 minute presentation of your work since i last saw you. - What was your most recent photoshoot? - How did it link to your photographers? - What have you/will you do with the photos next?  You should be starting to develop your knowledge of how to bring your ideas together through experiments, and showing clear progression of ideas from one to the next.  Timeline of remaining time on this project: - All experiments completed, uploaded and annotated by Friday 20th January. - Plan for, create and upload a final series of 3 or more images as the outcomes to this project by Friday 3rd February - Write an evaluation of the project in a 1000-3000 word reflection due Friday 17th February. Your main coursework project starts after half term. You will choose the title of your project from an exam paper, and the project will run until Christmas.  For the next few lessons, you need to continue your experiments using your new photos. Think about what you have done previously. You need to bring the things that worked well forwards and build on them, as well as develop new ideas and try different things. Focus on trying to bring together ideas and artists in each experiment.
 You should have completed a new photoshoot over christmas and have the photos with you. Upload them under the title 'New Photoshoot' On your Journeys page in a contact sheet, then add captions to identify the strengths and weaknesses. Write a paragraph above your contact sheet to explain the photoshoot. Where did you take the photos, why did you choose this location, What were you aiming to capture in your photos, what photography techniques did you use, which artists did you link to and how, what were the overall strengths and weaknesses etc.  Next, you need to continue your experiments using your new photos. Think about what you have done previously. You need to bring the things that worked well forwards and build on them, as well as develop new ideas and try different things.
Begin experimenting and upload anything that you complete before next lesson, ready for discussion.  Today you are learning more about how you are marked in photography. There is proof that if you understand how you are marked, you are more likely to reach the higher marks - so pay attention!   What do you think are the differences between grades 8(A*), 6(B) and 4(D) in photography? Discuss in your pairs and be prepared to share.  Look at the portfolios below. These are students from another school, who have previously taken photography and have received the grades listed. Look at the grade closest to your target grade or the grade you would like to aim for. On their website, look mainly at Unit 1: Multiple images and Abstraction. These are 2 short projects that the students have completed for their coursework.
|
AuthorThese lessons have been written by Miss Wilson. Archives
December 2018
Categories
All
|
|||||||||||||||||||||||||||||||||||||||||


 RSS Feed
