Year 9 Mini Project
Before you get started, you need to set up your website. Click here for instructions on how to do this.
Log into your Weebly Website here
Log into your Weebly Website here
Present ALL of the work for this mini project on your skills development page.
Task one
|
All art and photography projects start with research. Create a PowerPoint to explore the following photography techniques. Find pictures to include as examples of each technique, and give an explanation of what each one is/how to do each one. Create a slide on each technique:
- Rule of thirds - Negative space - Symmetry in photography - Lighting techniques - Shadows and silhouettes - Leading lines - Macro photography - Panoramic photography When you are finished, drag a 'document' element from the tab on the left of your website onto your skills development page. Put a title above it called 'Researching photography techniques'. Upload your powerpoint to add it to your website. |
|
Task two
|
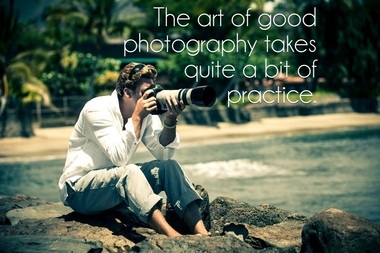
What makes a good photograph? Type this question into google, and see what answers you get!
On your skills development page, add a title under your powerpoint called 'Photography tips' then a text box underneath. Write a list of 20 tips using your research (pick them yourself, don't just copy and paste one page) to refer back to later. You can add images next to your tips if you want to. |
|
Task three
|
Your mini project title is 'Objects'. Create a powerpoint to include the following:
- A mind map or list of different objects that you have at home or access to at the weekend that you could photograph. - A slide full of creative photographs of objects. - A slide with tips on photographing objects creatively (google this!). When you are finished, drag a 'document' element from the tab on the left of your website onto your skills development page underneath all of your previous work. Put a title above it called 'Researching the title: Objects'. Upload your powerpoint to add it to your website. |
For example

|
Task four
|
Plan a photo shoot!
You will take these photos outside of school - what could objects you photograph? Where could you take the photos? How could you make sure they are creative? What images could inspire your ideas? Create a single slide on powerpoint with the title 'Photoshoot Plan'. Make notes and add pictures to inspire you. Upload the powerpoint when you are finished. |

As homework, take at least 20 photos of objects. Try to be creative and use the techniques you have researched in tasks 1, 2 and 3.
To upload you photos, drag a gallery element under your other work on your webpage. Click it then find your photos on your computer and select them all. It will take a little while to upload them all. Put a title above your gallery of 'Homework Photoshoot'. |
Task five
|
Artist research.
For your next photoshoot, you will take inspiration from 3 photographers. Look at the websites opposite, focusing on the photos of objects. On a powerpoint create a slide per photographer. Add a couple of photos of their object photography then write a paragraph to explain: - What kind of objects do they photograph? - How do they photograph them? - How would you describe the style of photography? - How do they use colour? - What is your opinion of the work? - What ideas could you take from their photography and the way they photograph objects? |
Maurizio Di Iorio
Andre Kertesz
|
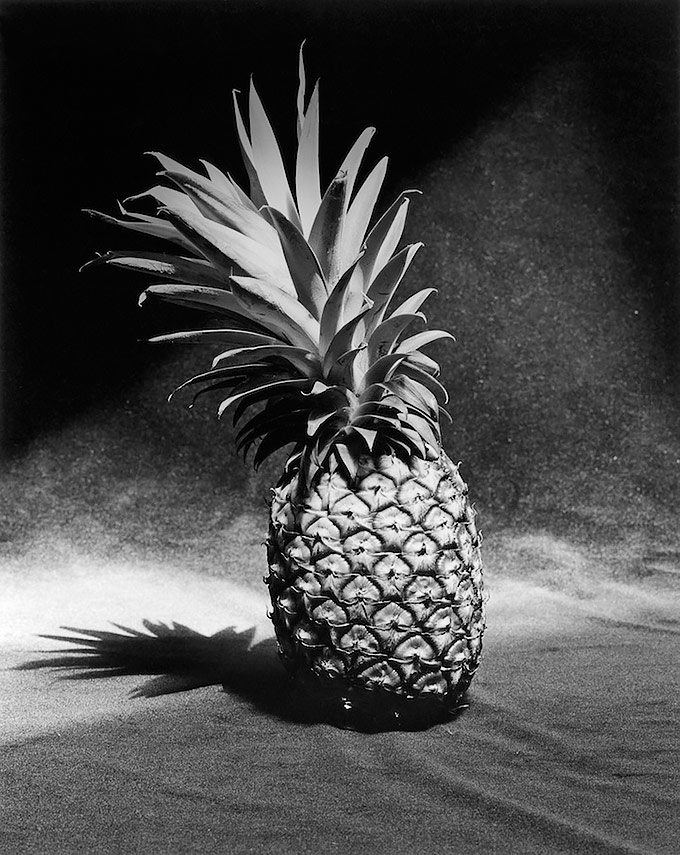
Robert Mapplethorpe
|
Task Six
Carry out research into how to set up a still life studio at home.
Start with this website: http://www.abeautifulmess.com/2014/12/tips-for-using-natural-light-in-still-life-photography.html
Create a PowerPoint on the topic, including pictures and the answers to the questions below.
- How can you set up a mini studio at home for taking photos of objects?
- What materials and props can you use?
- what is a reflector? What is it for and are there any alternatives that you can make use of at home?
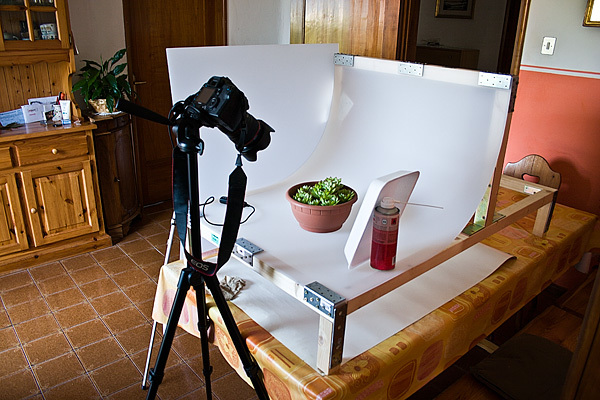
- what is the purpose of using the props and background pictured below?
- how should you use lighting? What are the different types/reasons for various light sources?
- Any other tips for taking professional style photos of objects?
When you are finished, add a title on your skills development page of 'Still Life Studio Set Up' then upload your powerpoint using a document element.
Start with this website: http://www.abeautifulmess.com/2014/12/tips-for-using-natural-light-in-still-life-photography.html
Create a PowerPoint on the topic, including pictures and the answers to the questions below.
- How can you set up a mini studio at home for taking photos of objects?
- What materials and props can you use?
- what is a reflector? What is it for and are there any alternatives that you can make use of at home?
- what is the purpose of using the props and background pictured below?
- how should you use lighting? What are the different types/reasons for various light sources?
- Any other tips for taking professional style photos of objects?
When you are finished, add a title on your skills development page of 'Still Life Studio Set Up' then upload your powerpoint using a document element.

|
|
Task Seven

Your next task is to try to set up your own still life studio to photograph more objects. Also, this time you will need to think about linking to the photographers you have researched.
Try to take 10 photos in the style of each photographer.
For the best marks, take photos of different objects, vary your composition and camera angle, and experiment with different backgrounds and lighting.
Try to take 10 photos in the style of each photographer.
For the best marks, take photos of different objects, vary your composition and camera angle, and experiment with different backgrounds and lighting.
Task Eight
Following your latest photoshoot, your task is to edit your photos in the style of the three artists you have looked at for this project. Edit one or two photos for each artist on photoshop, then save them as JPEG files, and upload them to your website.
Put a title above these photos of 'Working in the style of my artists'.
Write a sentence below each photo to say how you edited in the style of the photographer.
Put a title above these photos of 'Working in the style of my artists'.
Write a sentence below each photo to say how you edited in the style of the photographer.

Robert Mapplethorpe
Make the photo black and white by desaturating (go to image, adjustments). Next enhance your shadows using the brightness and contrast tool, and enhance further on curves by dragging the line around until you are happy. Use the dodge and burn tools to lighten (dodge) or darken (burn) some areas to enhance further. use 0% hardness and change the opacity to alter the intensity of the dodge/burn. |

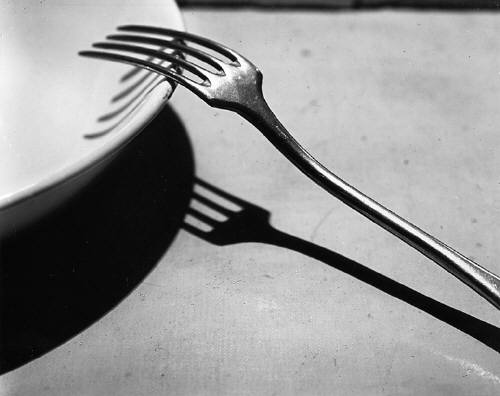
Andre Kertesz
Make the photo black and white by desaturating (go to image, adjustments). Next enhance your shadows using the brightness and contrast tool, and enhance further on curves by dragging the line around until you are happy. |
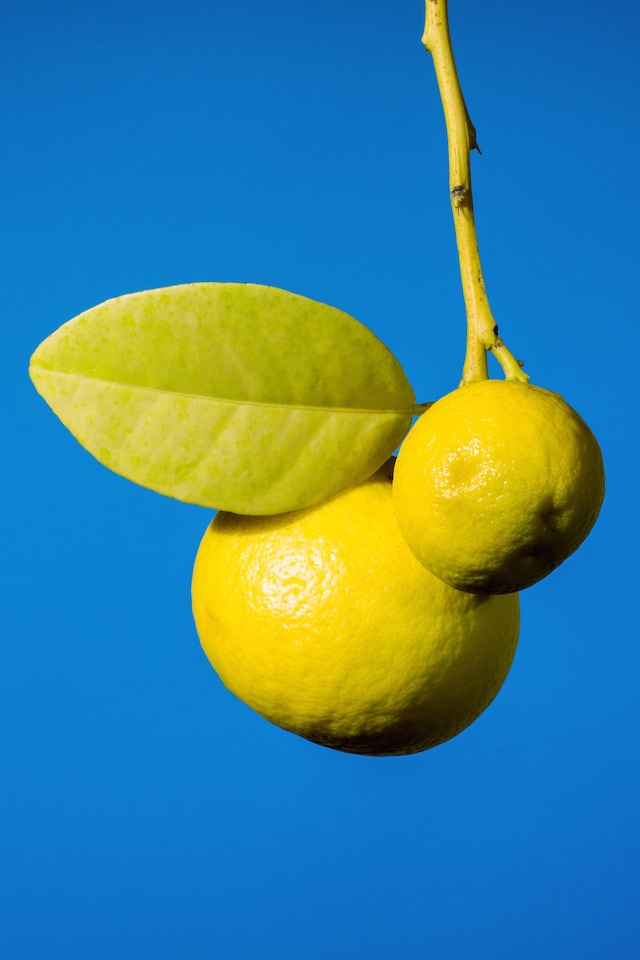
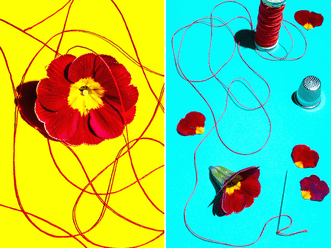
Maurizio Di Iorio
Brighten your colours (hue and saturation, brightness and contrast) Change your background to be one flat colour (select it with the wand tool then add a layer, then whilst the background is still selected use the fill tool to change the colour) |
