
For the first half term you will be learning a range of experimental photography techniques - most of which will be new to you! This will be important to have the chance to take your photography skills to the next level.
Today, we will start with scanography which you should know a little about from your homework.
Today, we will start with scanography which you should know a little about from your homework.

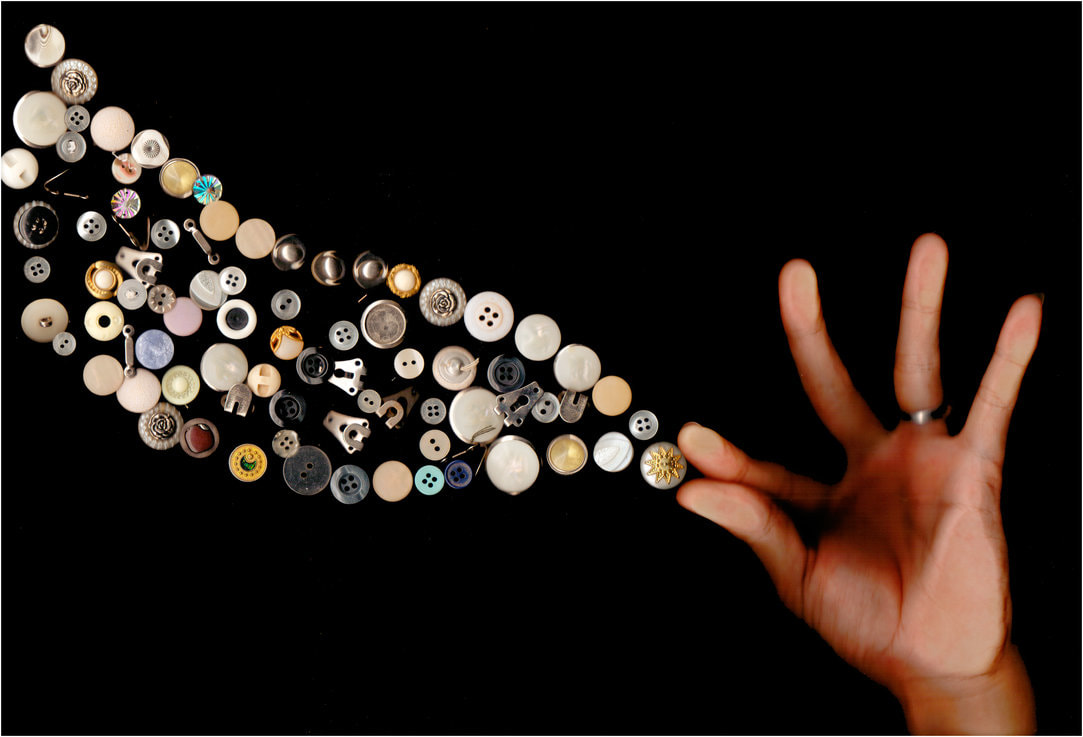
Using a scanner as a camera to capture images
Think of the scanner glass as your camera screen - anything you place on it will be photographed in that composition.
IDEAS TO TRY:
- place items on the screen in an arrangement
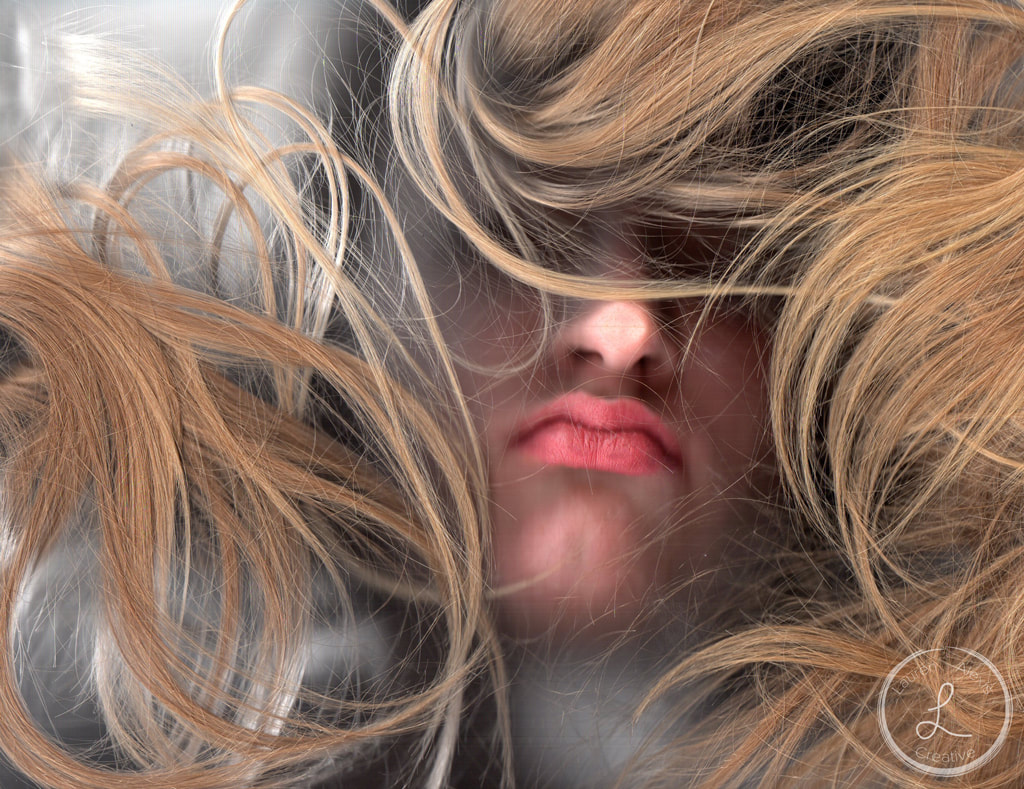
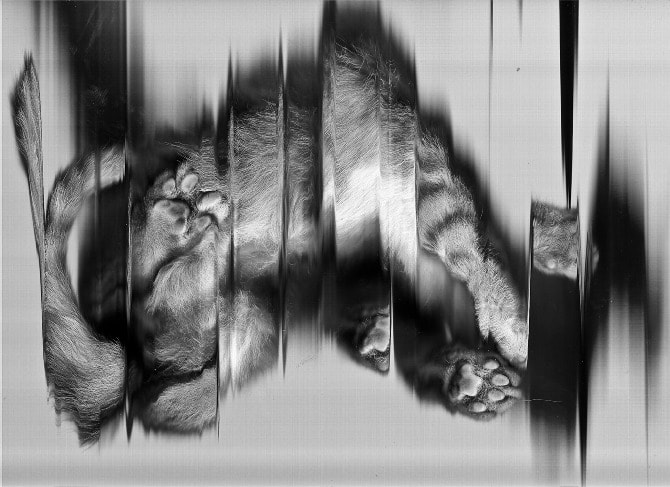
- photograph your face
- move yourself/ the item up and down/across the bed as the photo is being taken
One thing to think about - you'll need to block out all light as the photo is being taken, probably with a piece of fabric or a scarf.
IDEAS TO TRY:
- place items on the screen in an arrangement
- photograph your face
- move yourself/ the item up and down/across the bed as the photo is being taken
One thing to think about - you'll need to block out all light as the photo is being taken, probably with a piece of fabric or a scarf.
Artists who use scanners in their photography:
https://www.scannography.org/artists/artists.html
https://www.scannography.org/artists/artists.html
|
|
|

Task 1: Collect a selection of inspiring scanned images and present them on your powerpoint for reference later.
Task 2: Come up with a list of ideas for your own experimental photoshoots. Next task, experiment with the above!
- Plug in a scanner (you'll probably need to unplug a computer at the wall. please plug it back in at the end of the lesson)
- Put the cable in to the USB port
- Open paint
- Go to file/from scanner...
- then scan!
- Remember to save each image you do, even the ones that aren't great as you'll review why later.
What can you do? What works? What doesn't work? What are the possibilities?
produce 5-10 images - save them all, even the ones that Don't work! We'll reflect on these later.
Write up your experiments
Present all of your experiments on your PowerPoint - don't cram too many images onto a slide.
Write up your reflections - label the images that worked and why they worked. Evaluate the ones that didn't and suggest alternative ways of working.
Next, select 3 images to edit to enhance them as you wish.
When complete, prepare for the next task! You will need different images for his collage style, either from a magazine or printed.
Task 3: Look at the work of Sabato Visconti. How does he create his glitch effect collages? Have a go at using this technique! Experiment to create at least 2 pieces in his style.
https://www.sabatobox.com/passion-of-the-jcrew-scanner-art-collage
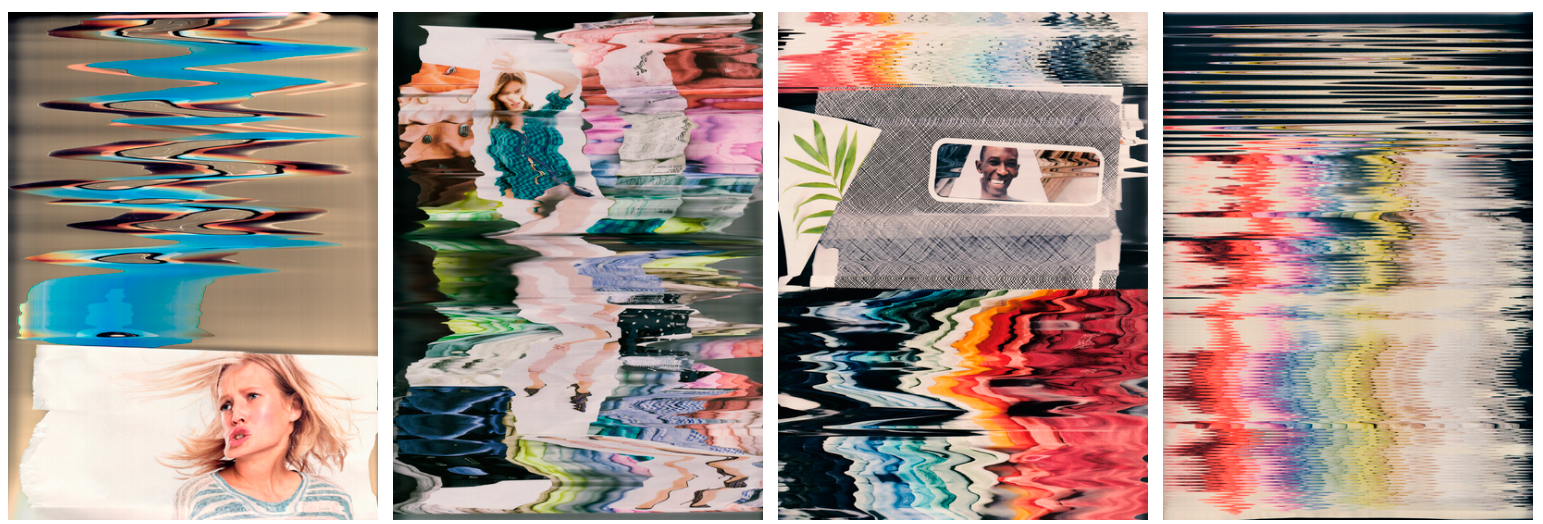
Upload your Visconti style edits to a new slide when complete. Reflect on the possibilities with this technique in your annotations - what else could you try? When might you use this technique in the future?

The Brief: Expressive Faces
Create a series of two or more images that feature expressive faces. You have complete freedom with this other than the fact that you must use a scanner.
Consider:
- varying your models and facial expressions
- do you want to tell a story/communicate a specific emotion?
- you might want to have a theme across your series - eg. horror movie
- use of props and varied backgrounds
- aim for quality photographs that require MINIMAL editing - they should be good enough as they are!
Task 1: RESEARCH and PLAN!
carry out research into ideas for using scanography to respond to the brief. Present all of your work on a powerpoint.
Task 2: PHOTOSHOOT
Take 20+ scanned photos in your frees OR outside of school, linking to what you planned previously.
Upload/bring in for next lesson.
Task 3: EDIT
Apply what you have learnt previously to create two edited photographs in response to the brief.
Task 4: UPLOAD AND REVIEW
Upload to your powerpoint, making sure you have included all of your planning and photos plus this review:
- What are the positives of this technique? What might it be good for in the future?
- What are the negatives or limitations to the technique?
- Explain the idea behind the way you have responded to the brief. How would you move forwards from here?
