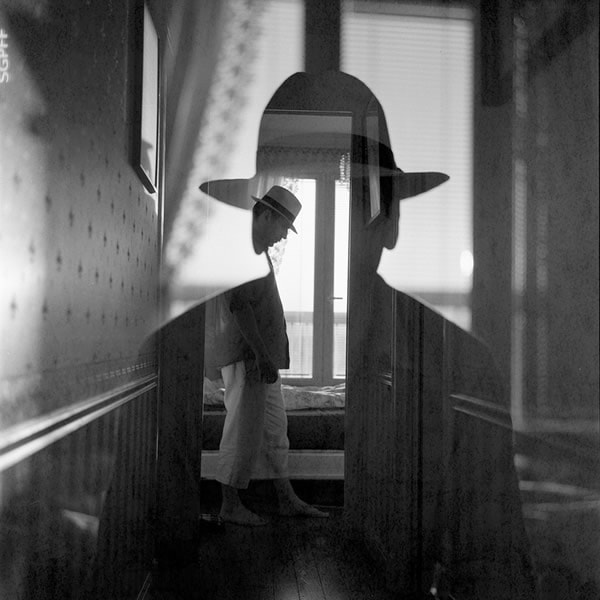
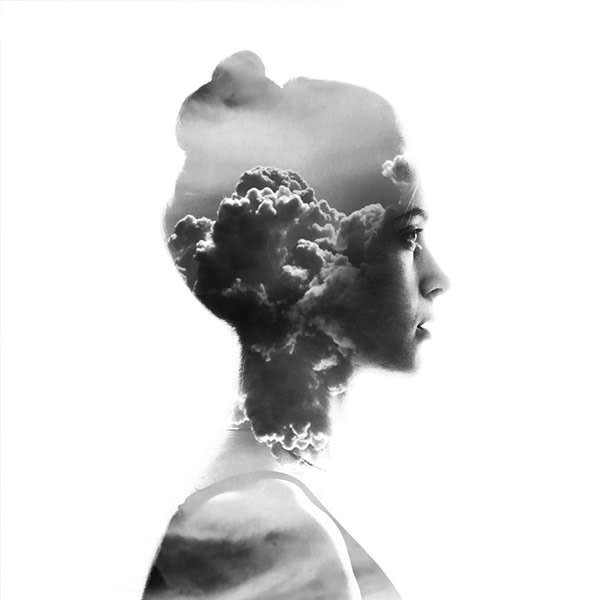
 How have these images been created?
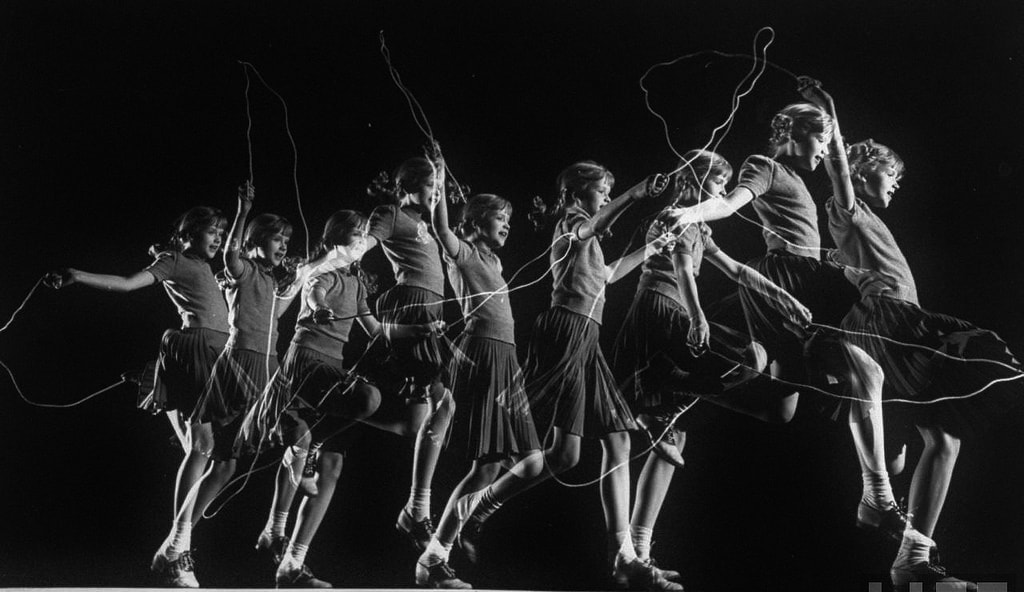
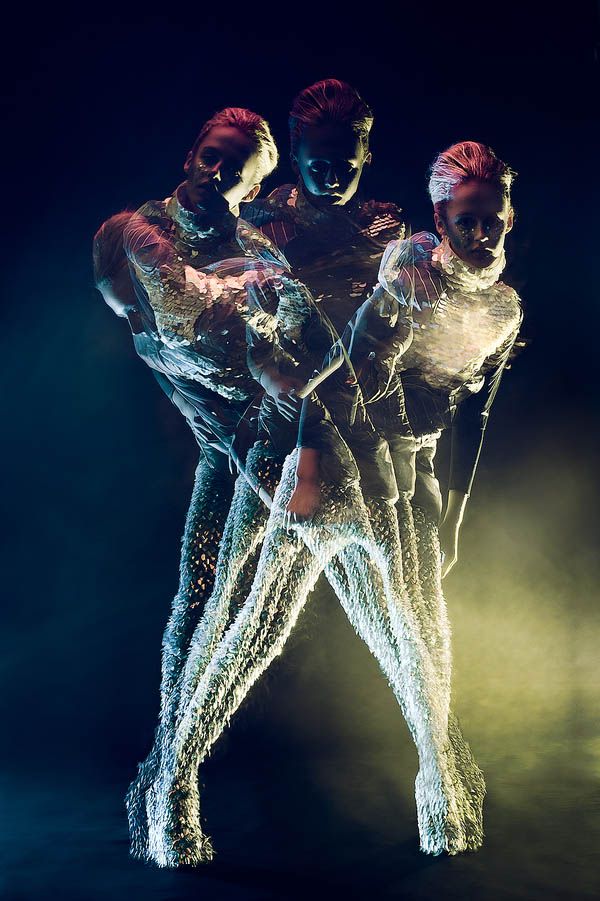
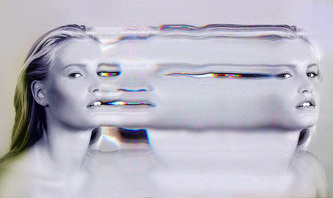
 You are learning how to create a double exposure image by layer images creatively. This is a simpler option compared to the slow shutter speed portrait task. You will each be asked to create images that represent a journey in some way.   Analyse the work of Antonio Mora directly onto your website (or on word then copy and paste in), along with some photos of his work. As a paragraph, include: What is the work about? How does the artist create the work? Discuss use of the formal elements, as well as camera and editing techniques Analyse the work, justifying your opinions clearly, using technical language.  For this task, you will be required to 'print screen' and save this as a jpeg at different stages of your editing to demonstrate the process visually. These images will be uploaded as a slideshow or gallery above your completed edits, with a clear title to explain that they demonstrate the process you went through. INTRO TASK Open a portrait image and a scene in photoshop and layer them over each other, then edit in the style of Mora. Alter the opacity above the layers box to make the top image slightly see through (50%) Use the eraser tool with 0% hardness and lowered opacity (40%?) to remove parts of the image. Edit both layers separately - brightness, contrast, curves, colours etc. by hiding the other layer whilst doing so. If you get stuck, use the tutorials on the above powerpoint in the links section. DEVELOPMENT TASK Following the first edit, your task is to build on what you have learnt. Plan for an edit, which will require all NEW photographs (part of your homework due Monday). Most importantly: how will your double exposure image represent a journey?  Upload your edit(s) and review them, with specific use of technical language to explain how you created them and how they represent journeys. If you finish early during the cover lesson, create a second image using previous photographs, but try to do it quite differently to the first.  DUE MONDAY - no excuses or I'll be calling home. Use your phone if you have to. 1. 15+ photos to be used in your developed double exposure image on Monday, relevant to your planning. 2. 5 photos of three different movements (15 in total). This will be for multiple exposure edits next week. eg. walking, different arm/hand positions, different ways of sitting on a sofa, different heights - crouched, kneeling, stretching etc. Eg. Movements:
 How would you use multiple exposure to show a movement like the photos above? What could the problems be that make the task tricky?  How to use double and multiple exposure to show journeys in your edited photographs. (AO2 - experimenting)  Task 1: complete the work from last lesson - upload your photos, review/explain the photoshoot then edit using double exposure in the style of Antonio Mora to show a Journey. Upload your image full size under your gallery when complete, and explain the tools you used to create the image, links to Antonio Mora and how it represents a journey... Task 2: Use your second set of images to represent movement as a journey by layering them as a multiple exposure. You will use the same methods as double exposure, but will need to alter the positioning of the layers, remove more with the reduced opacity eraser from each layer, and alter the opacity of each layer so that they are all different. eg. Top layer - 30%, layer 2 40%, layer 3 50%, layer 4 60%, bottom layer 100%. IF you need further help or want to try something different, have a look at these tutorials: https://www.digitalartsonline.co.uk/tutorials/photoshop/combine-photos-in-photoshop-create-stop-motion-still/#2 https://www.youtube.com/watch?v=xCDuygVrU4g Upload your image full size under your gallery when complete, and explain the tools you used to create the image, how you have built on the work seen in Antonio Mora more individually and how it represents a journey...  Complete the self assessment slip on your double exposure photographs and editing so far.
0 Comments
 What do the following tools do on Photoshop? - Brightness and contrast - Desaturate - Levels - Curves - Black and white - Invert - Shadows and Highlights - Crop 

 Upload your photos under the title 'Editing in the style of Keetman'. This time instead of annotating all three photos, write one paragraph to explain your editing over all. - How did you edit? I have created these edited images by... - How have you worked in the artist's style? I have taken inspiration from the style of Keetman by... - What could you develop further? To develop my editing technique further I could... Going for Gold ExtensionIf you are finished, start to think about how you could combine the work of Peter Keetman with ONE of the other artists we have looked at - Niemela or Blossfeldt. Make notes on word - we'll come back to this next week!
- what would you photograph? - how would you edit?  How could you combine the styles of these two photographers in one image?
What about these two?
Now have a think about Niemela and Keetman. How could you combine their styles?
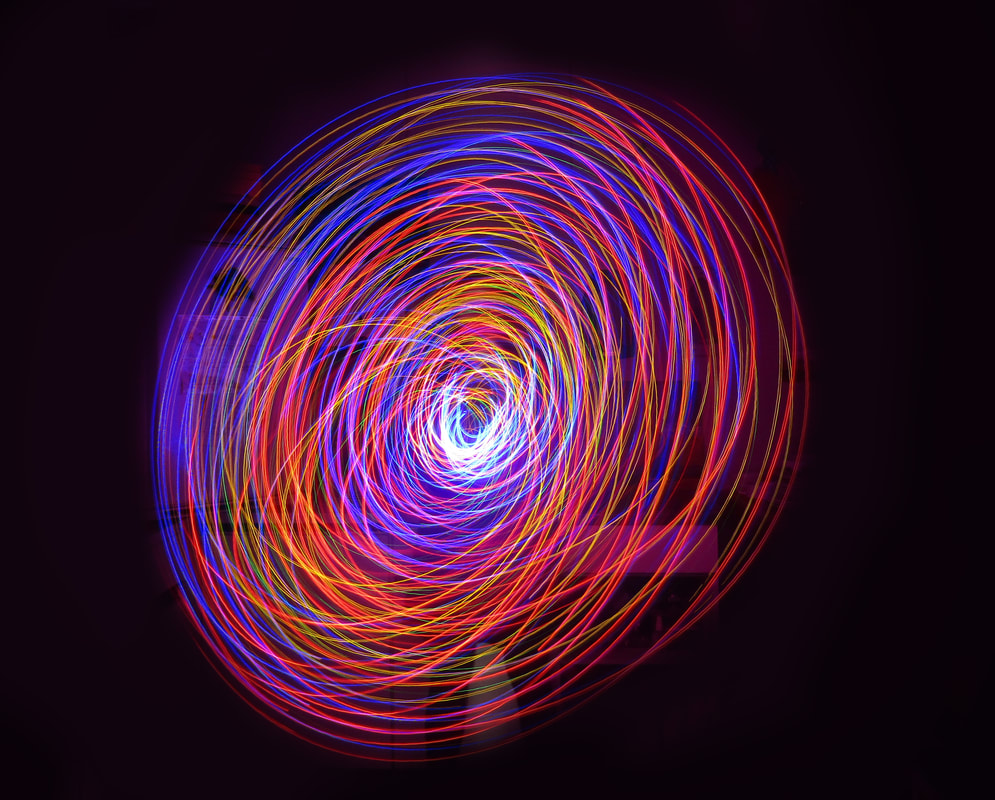
 Today you are focusing on AO1 and AO2 which is experimenting with links to artists. You will learn how to combine the styles of two artists in one edited image.  The key things to remember: Take something from each artist and bring them together. EG: - colour from artist one... and composition from artist two - Content from artist one... and colour from artist two Mix it up with each edited image, doing something different each time.  Copy and paste the following text onto your close up page under the title 'Planning Experiments to Combine Niemela, Blossfeldt and Keetman'. Fill in the gaps. Experiment One Colours from _______, Background from _________ Experiment Two Composition from _________, Background from _________ Experiment Three Composition from _________, Colours from __________ Experiment Four Content (nature/mechanical objects) from _________, Colour and contrast from ___________  For example:'Planning Experiments to Combine Niemela, Blossfeldt and Keetman' Content (mechanical objects) from KEETMAN, colour and contrast from NIEMELA Edit 4 different photographs in the styles mentioned in your plan above. Upload each edited photo, and label how it links to your two photographers, along with the strengths and areas for development.
To edit this photo in the style of Keetman, i have taken inspiration from his mechanical object photographs and edited the contrast to be stronger. To combine with Niemela, I have used layers of gradients 
A further gold task would be to do a fifth experiment, this time combining 3 artists - Niemela, Keetman and Blossfeldt. Upload and explain. Put a title 'Going for gold!'  In your feedback book answer the following questions under the title 'self assessment' and today's date... Why do we look at artists in photography? Why do we have to combine multiple artists? How have you refined your ideas through your 4/5 edits? Why is this important?  DUE TUESDAY:
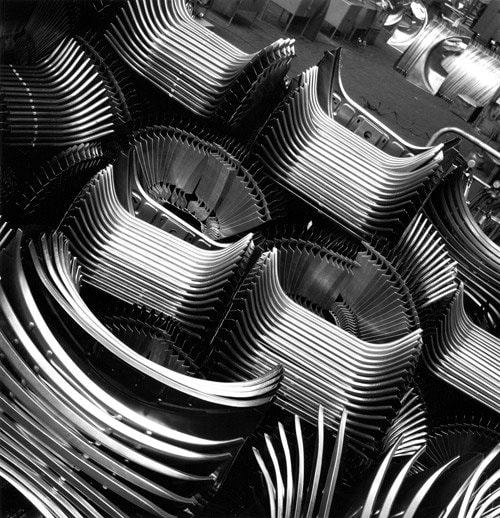
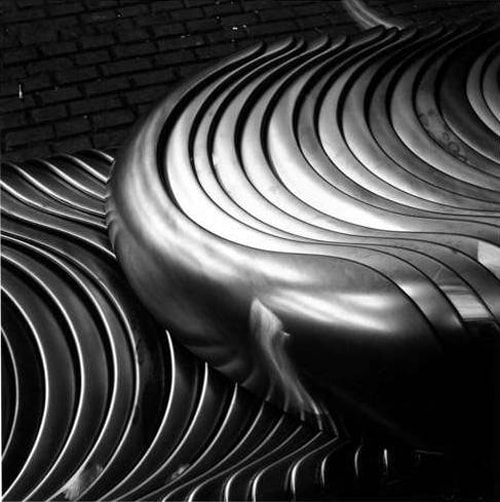
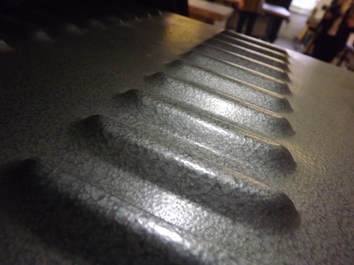
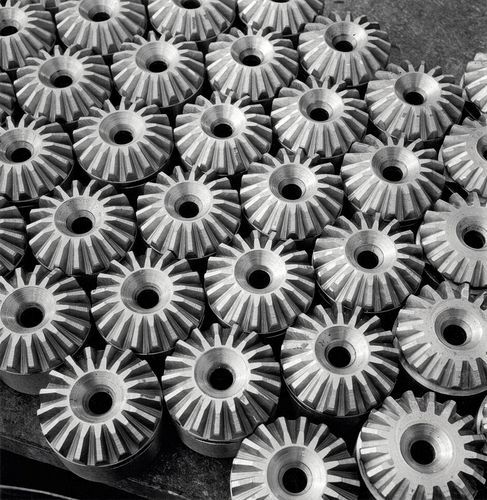
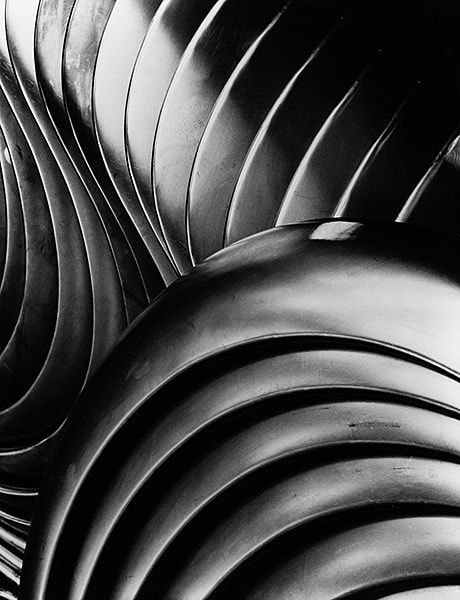
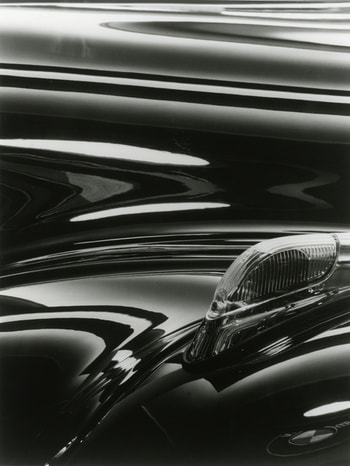
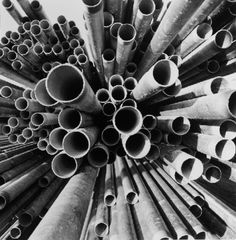
Your next task will be to edit photos in the style of TWO of the above artists. Take 20 photos according to the two you would like to focus on: Niemela and Blossfeldt - 20 macro nature photos - some should be single items on a black or white piece of paper (look at Blossfeldt's his work!) Niemela and Keetman - 20 macro photos of nature AND mechanical/shiny objects Keetman and Blossfeldt - 20 macro photos of nature AND mechanical/shiny objects - some should be single items on a black or white piece of paper (look at his work!)  If you have a card reader and your memory card...Go to your Close up page. Add a title underneath your artist research, followed by a gallery element. Plug in your memory stick or cable so you can access your photos. Save all of your photos to the shared area in a new folder called 'Keetman'. Click your gallery icon then upload ALL of your photos (except selfies!). This will take a few minutes. Do the next task on a word document whilst you are waiting - you will copy and paste it when your photos have uploaded. When finished, pass your card reader/memory card to the next person. Click the gallery at the edges so the settings come up. Change the number of columns to 5 or 6 depending on the number of photos you have so they fit more neatly onto the page. Put a title above your gallery called 'Keetman inspired photoshoot'. If you are waiting for the card reader or memory card do this whilst you wait... On your Close up page, add a title 'Keetman inspired Photoshoot' under the work from last lesson, then a text box below. Write a paragraph to explain the task using the following questions. When writing, always imagine you are talking to the examiner as that is who will read your work! What did you have to do? For this task we had to... What was the purpose of this task? The purpose of the task was to... How did the work of Peter Keetman inspire you? Make links between your work and theirs. I took inspiration from the work of Peter Keetman by... Explain how you used the macro setting, what you took photographs of, and what you found to be most effective. I used the macro setting to photograph... The objects I found most effective were.... because... Did you try anything that didn't work? Explain why this was. Something I tried that didn't was... because...   For the rest of the lesson, you are challenged to edit a selection (2? 3? 4+?) of your photos in the style of Peter Keetman... freestyle for now, you'll get more guidance next lesson! This is part of the challenge - can you apply your knowledge of photoshop independently?? ADD NEW BOXES for each photo that you edit AND UPLOAD UNDER YOUR PHOTOSHOOT REVIEW. Think about his key features: - black and white - close up details - high contrast - reflective/shiny surfaces - pattern and texture     Discuss the following images. What interests you about them? What makes them good photographs?
 How to analyse the work of a new artist and take inspiration from their work.  Peter Keetman Keetman's extensive portfolio combined nature and motion studies, experiments, industrial and applied photography. Peter Keetman (1916–2005) was a central figure in German post-war modern photography, Characteristic of Keetman’s work is his continuous and imaginative exploration of the camera’s potential to create rather than just capture images. Keetman's photographs unite the period’s two main aesthetic currents: On one hand there is the modernist intention to form, experiment, and abstract – on the other hand there is the wish for a humanist relationship to the world as well as a turning towards reconstruction, the city, and nature, up to its most fundamental elements. Keetman stated that he discovers the "great picture" in the smallest details – and translates them into abstract images. His bold, black and white, high contrasting photographs become abstract as a result of looking so closely at unusual details of different items, often including mechanical structures with reflective surfaces.  Using the information above plus your own further research, write a paragraph to analyse the work of Peter Keetman. Work onto a single slide of a powerpoint Include a 4+ photos of his work, and use the sentence starters/prompts to help you. To analyse a photographer's work, you need to talk about what is in the picture, how they have taken the photograph, camera or editing techniques they have used, how they have used the formal elements (colour, composition, lighting, viewpoint etc), what you like about the work, and how their work could inspire your own photographs. Try to use key words. If you need help getting started, use these sentence starters but write as a paragraph... Artist's Name takes photographs of... He/she takes his/her photos by... This photographer considers formal elements in their work by... Something I like about Artist's Name's photography style is... I could take inspiration from this photographer in my own work by... Going for gold: Use ALL of these key words!CONTRAST COMPOSITION MONOTONE REFLECTIVE LIGHTING PATTERN TEXTURE REPETITION LINE SHAPE 
 If you are ahead - well done! Go to one of your homework photos, and edit it in the style of this artist. Think about what you just identified about his style. It should be:
- monotone - high contrast - feature pattern/line - look shiny/reflective 
 This lesson you will start thinking about your final outcomes for each project and how you will get there...  Go to this website: http://tommysgcsephotography.weebly.com/personal-projects-abstraction.html This student got a grade 7. Why is it a good example of a high level GCSE project? Why are the experiments effective? Also look at these examples:How do they bring together their work in final pieces?? Look at the last photos for each project first, then go back and see where their ideas came from and how they brought everything together effectively. 
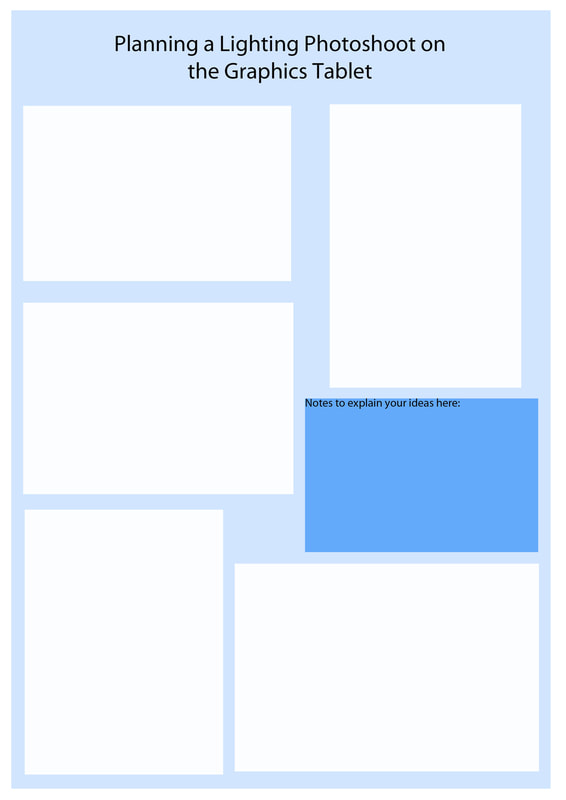
Click the picture below to download a template to start you off with your plan: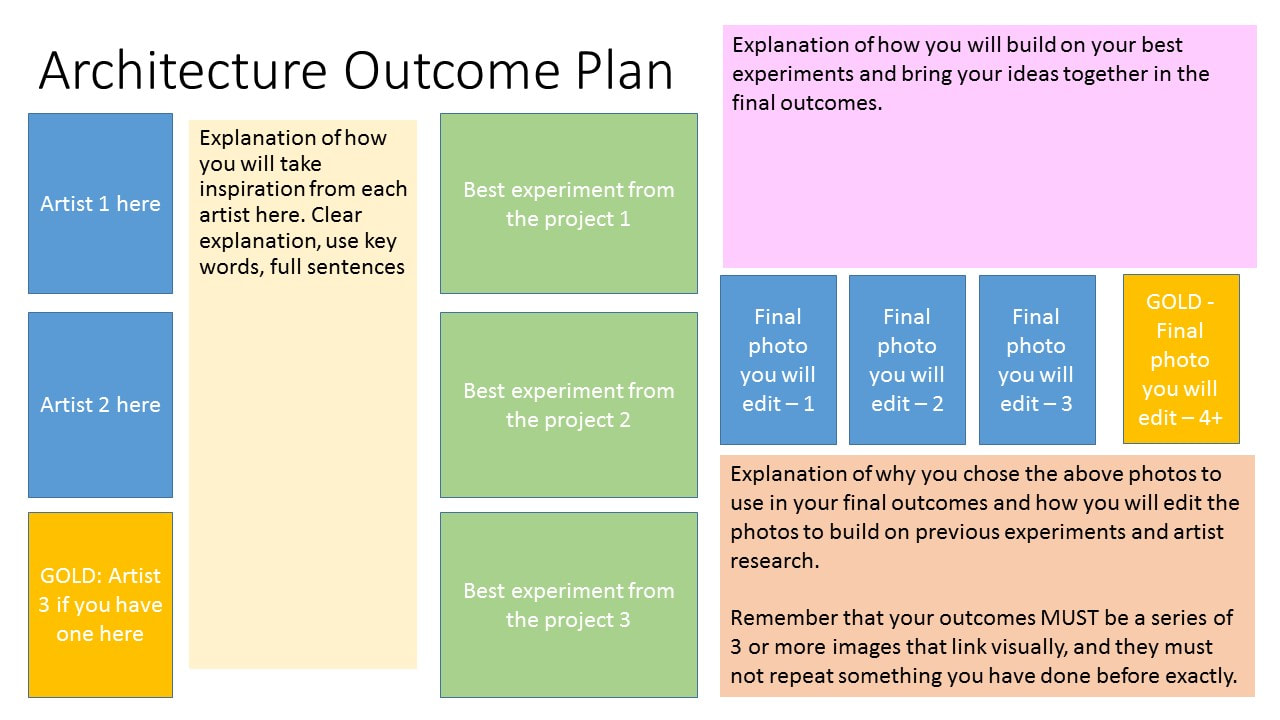  SAVE your planning as a powerpoint file AND a Jpeg. Upload your jpegs to the right pages at the bottom of each page. You may need to update them slightly at a later date as we will experiment a little more before actually creating your outcomes as they will be completed in the MOCK EXAM at the end of November.  1. complete your two planning pages.
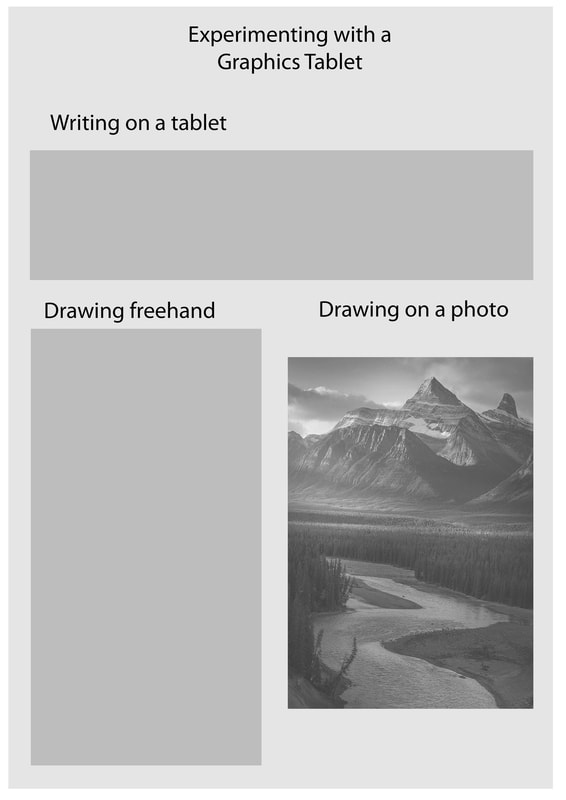
2. IF you need more photos for your final pieces... do further photoshoots over half term! Bring these in the first day back after half term. Going for GOLD HOMEWORK If you are pushing for the top grades, look further at the top examples above and see what else you can do to get those higher marks. Finally, dont forget about the light painting project - we will come back to this in the first week back!  Plug in your graphics tablet, and prepare to watch the demo. Graphics tablets are great for drawing and making notes by hand on the computer! They aren't cheap, so please look after them. Using the graphics tablets should help you get extra marks in AO3 (Recording ideas) by showing a different method of recording. 

Other ways you will use the graphics tablets in the future might be: Option 1: Open one of your most recent photos in photoshop. Select a brush tool in a colour that will stand out, then draw onto your picture and make notes. Eg. draw around things that need to be improved. Option 2: Plan compositions for your next edit. eg. Draw boxes onto a photo to identify the crop that you will do. Option 3: Plan your next photoshoot by drawing onto a blank new file. Little sketches in landscape or portrait boxes to show what you will photograph. OR you could do the drawings linked to the previous photoshoot! .  After uploading, you need to write about your drawing and explain that it was created on a graphics tablet and why they are useful.
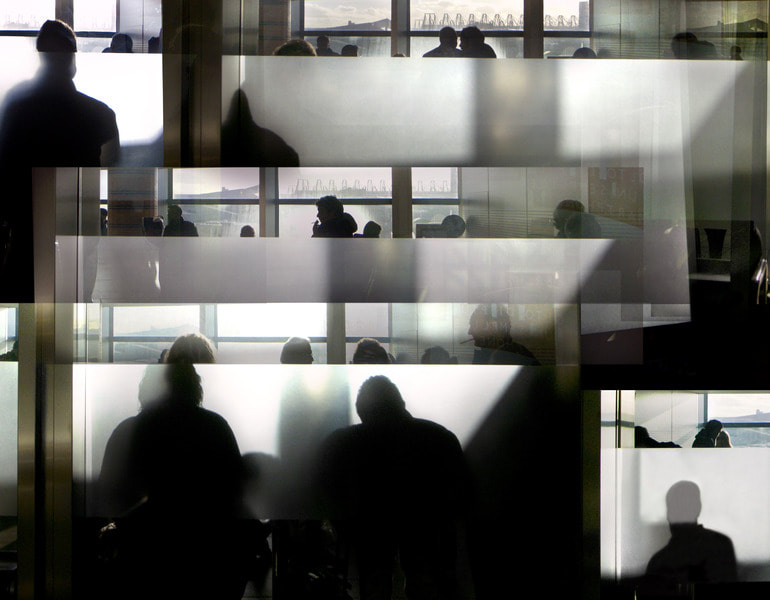
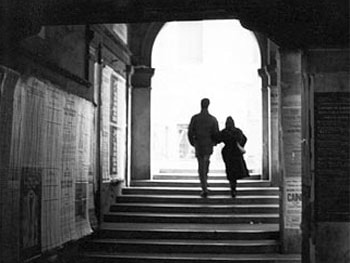
I used a graphics tablet for the drawings which is effective for... In future, I might use a graphics tablet to...  Analyse these photos through discussion in pairs. 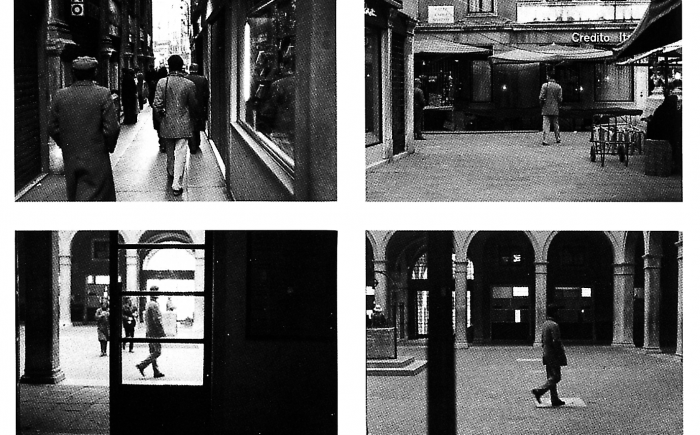  You are learning how to take inspiration from a photographer, but also how to produce a series of work rather than a single image. A series of photographs is a set of images that share a narrative or a style, designed to be presented together and viewed as one or as connected.  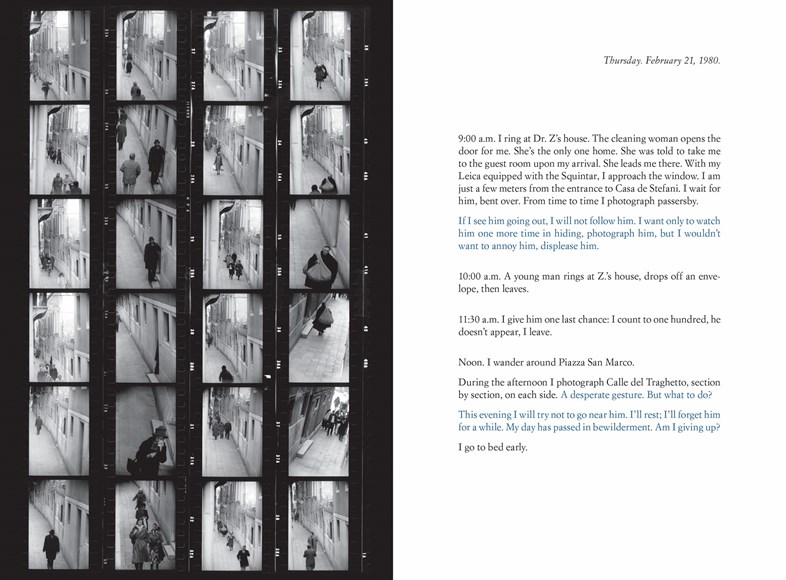 Suite Vénitienne (1980-96) By Sophie Calle “For months I followed strangers on the street. For the pleasure of following them, not because they particularly interested me. I photographed them without their knowledge, took note of their movements, then finally lost sight of them and forgot them. At the end of January 1980, on the streets of Paris, I followed a man whom I lost sight of a few minutes later in a crowd. That very evening, quite by chance, he was introduced to me at an opening. During the course of our conversation, he told me he was planning an imminent trip to Venice.” Sophie Calle’s work is inseparable from her life, and often relies on coincidence to generate its content. Suite Vénitienne opens with the above text, and proceeds to document Calle’s pursuit of a man through a seemingly labyrinthine Venice, in a detailed photographic and written report that captures and orders the full range of feelings the endeavour provokes in her. At times, she loses trace of the man altogether, or conversely, or finds herself face-to-face with him; Calle likens the excitement of the chase to the thrill of being in love. Suite Vénitienne is a confession of desire; it holds our rapt attention as it unfolds, exposing intimate secrets in a detached, factual manner. Calle employs the standard tools of Conceptual art: black and white photographs and texts—but to different ends. Whereas conceptual artists used these techniques to record perceptions of language, time and space as objectively as possible, for Calle they function as a means to register a range of subjective, psychological response. Her use of the diaristic entry, the snapshot, confession and surveillance has greatly influenced much contemporary work concerned with self-documentation and the investigation of ritual, fantasy, anticipation and desire.  Suite Vénitienne – is the documentation of the artist following total strangers in the street. Calle is documenting and annotating her pictures with their actions and behaviours. The sequence in Suite Vénitienne depicts her investigation into unsuspecting individuals. It works exactly like a storyboard. She uses her experience, as an author would, to deploy a narrative. Using the information above plus further research to help you, write a 200-300 word analysis of Sophie Calle’s series of photographs 'Suite Venitienne'. Include a clear title and images to visually support your analysis.
 Pair up. Go to 'Student Portfolios' and open your partner's website. password - camera. In their red book, complete the peer assessment about their paragraph. Swap your books back, then make improvements in purple text where appropriate.  Following your analysis of her work, your task is now to interpret her work in your own responses. Edit multiple images to represent 'Being Followed' in an individual style, taking inspiration from Sophie Calle as a starting point. They should be presented as a series of images, therefore the style of editing should be the same. For higher marks, you should experiment with your editing technique before deciding on a style, and upload your experimental edits to show alternatives and to demonstrate your thought process. Annotate each edit, and evaluate your completed series with reference to Sophie Calle.  What did you learn through this task?
What would you develop from here if you were to continue with this concept?  Read your feedback. The missions on there are the first part of your lesson! Get logged on to your website.  Task one: respond to your missions. Where you add extra writing or titles etc. use PURPLE writing. Task two: Finishing off. All tasks should be complete and uploaded ready for your work to be graded. Go through the check list: 1. Formal elements 2. Artist research page 3. Artist research paragraph 4. Lighting 5. Composition 6. Keywords 7. photoshop tools 8. Composition photo gallery 9. 6x edited composition photos with explanations  Anything incomplete is homework due Wednesday. IF you don't have a computer, you need to work in the library at lunch times or after school.
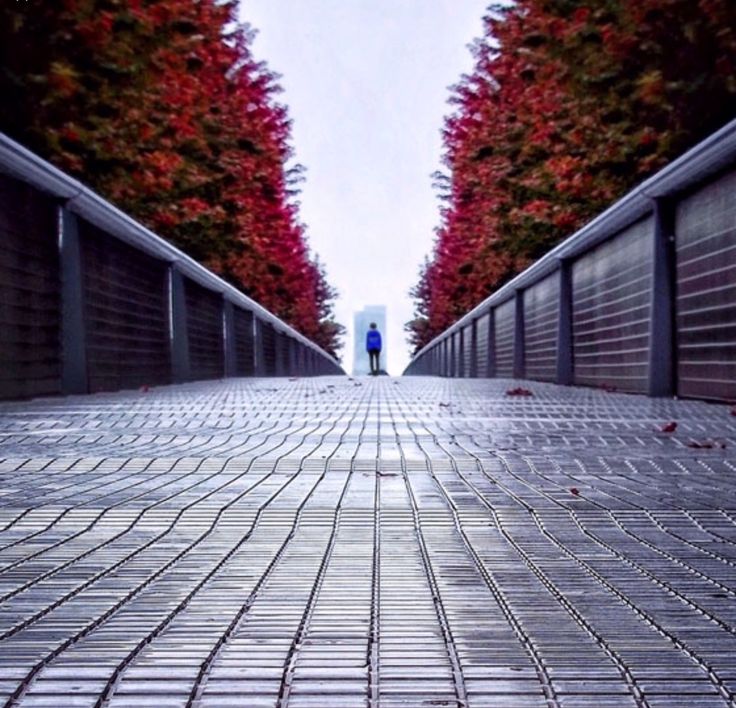
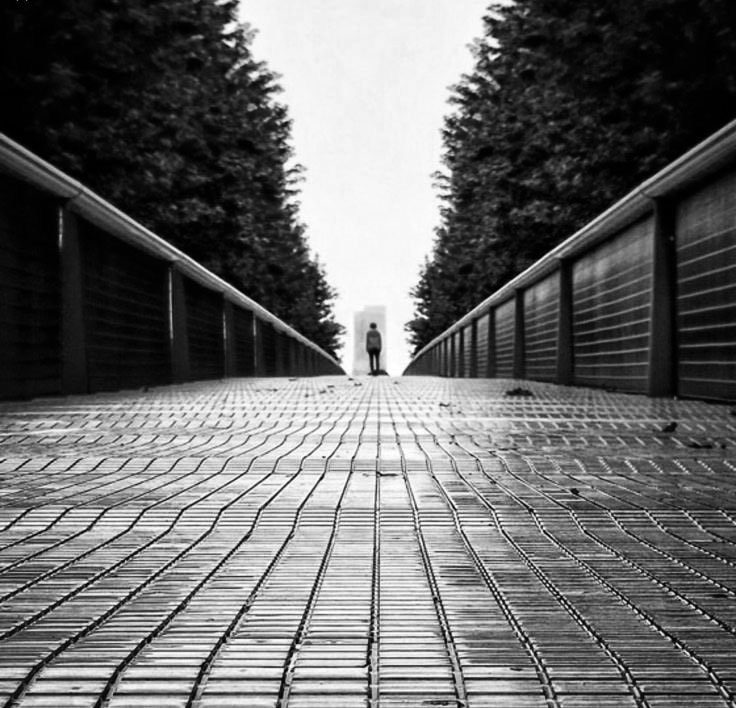
Also, I offer intervention in IT4 every Wednesday if you would like to come 3-4pm to do some extra work or get your homework done!  Log into your website and upload your photos. If your photos are not yet on the area, use a card reader and copy them into a new folder on your area. - Add a title under everything else: 'Composition photos' - Below the title, add a text box. - Below this add a gallery block. Click it and add ALL of your photos from last lesson. if you used a school camera they are on the shared area in photography, year 10. ONLY INCLUDE THE PHOTOS THAT YOU TOOK. In the text box, copy and paste this sentence starters into the text box then complete them in as much detail as you can. The aim of this photoshoot was to... Something I found that worked well was... because... Composition is important in photography because... From here, when editing my photos I could enhance them by...  Today you are learning how to edit a photo effectively using photoshop, and how to present your edits.  Open photoshop. Select a photo that represents leading lines and open it in photoshop. Make this photo black and white by going to image, adjustments, desaturate. Then edit the contrast by changing brightness and contrast. Save the photo as a Jpeg - first edit. Under your gallery, put a title 'Editing Leading Lines' then two image boxes below it. Upload your edited photo next to the original then explain what you did using key words. Example: Editing Leading Lines
I have edited this image by desaturating the colour to make it black and white. I have then increased the contrast for bolder leading lines in the photo. Repeat this for different images: Rule of thirds - Increase saturation and change the hue - go to image, adjustments, hue and saturation. See what happens! Symmetry - Add a filter to the photo. Go to filter, filter gallery, and choose one that you think makes the photo look effective. Negative space - Go to image, adjustments, curves, then drag the line around to change the brightness and contrast. Save when you think it looks good then upload. Balance - Invert to swap the colours completely. Go to image, adjustments, invert. Then save and upload. Viewpoint - Change the Vibrance of your image - go to image, adjustments, vibrance. Drag the bars and save and upload when you are happy. For each image, ensure that you are including the original image next to the edit, and that you have a title and explanation for each one.
|
AuthorThese lessons have been written by Miss Wilson. Archives
December 2018
Categories
All
|
||||||||||||||||||||||||||||||||||||||


 RSS Feed
