 Task 1: Upload your photos to your area AND your website in a new gallery under the title 'homework'. Task 2: Organise the photographs on your area. - Make sure you have a year 10 photography folder - everything should be in here. - inside year 10 photography, you need 3 folders: * Skills Development * Human Figure * Architecture Make sure all of the correct work is in the right folder. This is essential as you need to be able to find your work when you come back to it in September!  In today's lesson, you need to edit your images linking to the plans you did last week. How will you bring your ideas and the best bits of your project together? Edit at least 1 image, making sure they link to your experiments and artists. You will come back to this project in September to complete it, when your skills are even stronger! However, if you have any spare time at a computer with photoshop, feel free to finish the 3 edited photographs as this will make things easier for you in year 11.  In preparation for your new project which is Architecture, take 30+ photographs of buildings (the more the better!) Due the first lesson back after Easter. 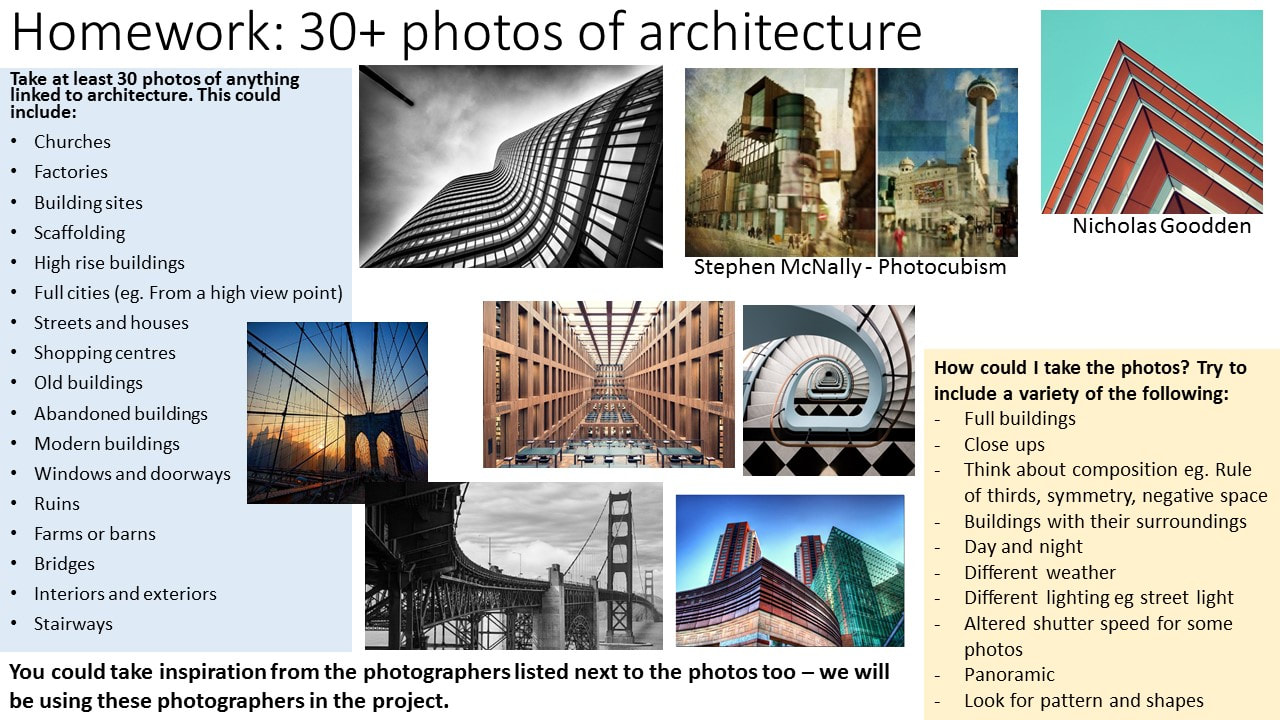
0 Comments
 Add a title under everything so far 'Mid Way Outcomes' Put an image block underneath and upload your planning page (hand drawn plans are on the shared area in year 10 photography folder).  Photoshoot lesson
Due to being in non uniform, today is a good day to take photos! Use a school camera in groups, and aim to take 10+ photos each (you cant share) to link to your planning page. You may use the studio OR take photos outside - but you only have 25 minutes to take your photos. THINK about composition, pose, facial expression, background etc...  Look at the name of the student you have been given on their book to find out who you will be peer assessing this lesson. Go to Student portfolios at the top of this page and open their website. Complete the peer assessment sheet in their book. Something I like about your experiments so far is… I think your artist links are:
Something I would question about your project/suggest you improve is: Response to the question/suggestion: COMPLETE THIS AFTER RECEIVING YOUR FEEDBACK  Today you are learning how to plan for a final set of images, to bring together your ideas and experiments so far.  In photography, you must demonstrate the ability to record ideas through drawing. This lesson, plan out a set of three photographs that combine both photographers styles. OPTION 1 - draw on paper and scan in OPTION 2 - draw with a graphics tablet On both options, draw neatly - the examiner will see your work. Label things including lighting, backgrounds, location, model etc. Then explain your ideas and plans in more detail 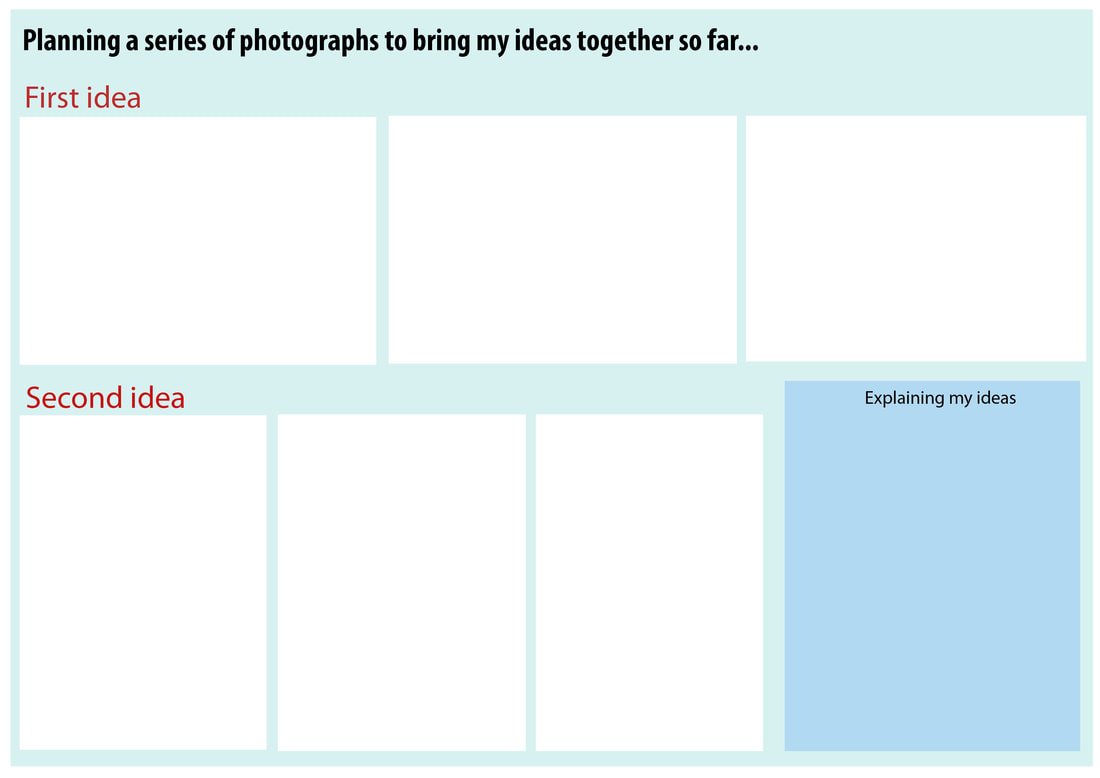 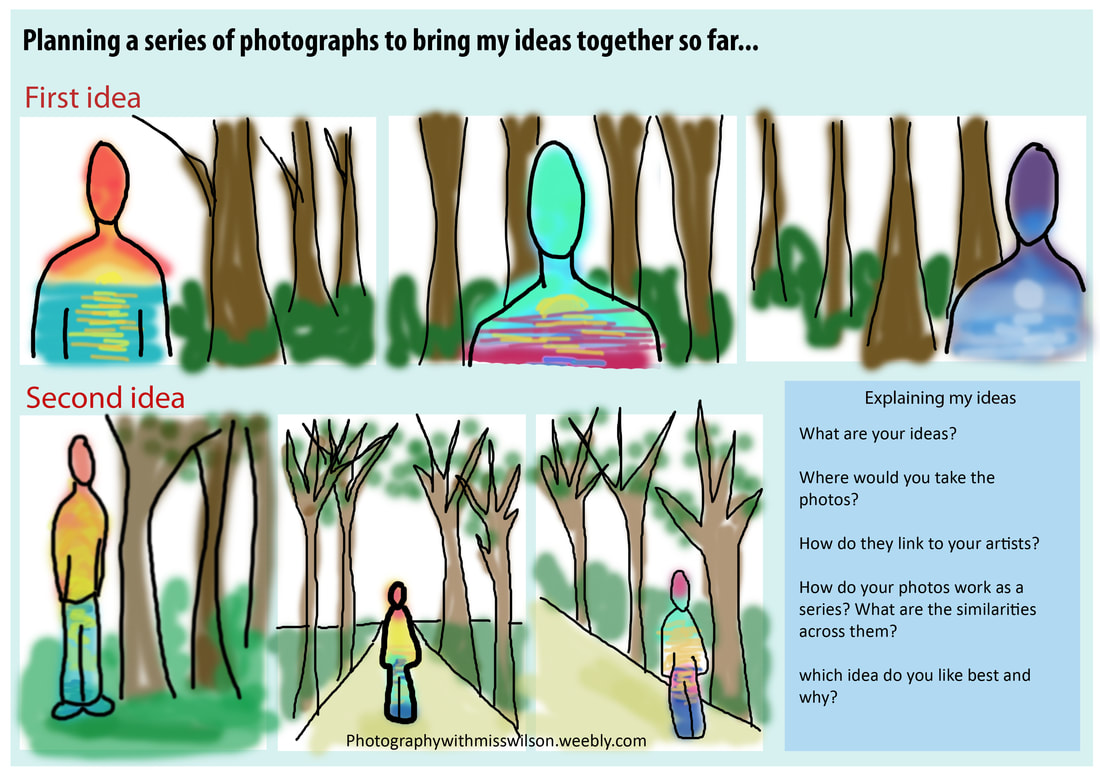  Take more photos for your final set of images, please take these as soon as possible - by tomorrow if you can, or Wednesday at the latest!   You are learning how to show the examiner that you have considered alternatives in all areas when you are developing ideas. Why?? For the higher marks!  This lesson, your challenge is to choose your best image so far, then make small changes to it, documenting them in order to show alternatives like the example below. Aim to make 6 changes! Save each change as a JPEG. Changes should link to your artists where possible... 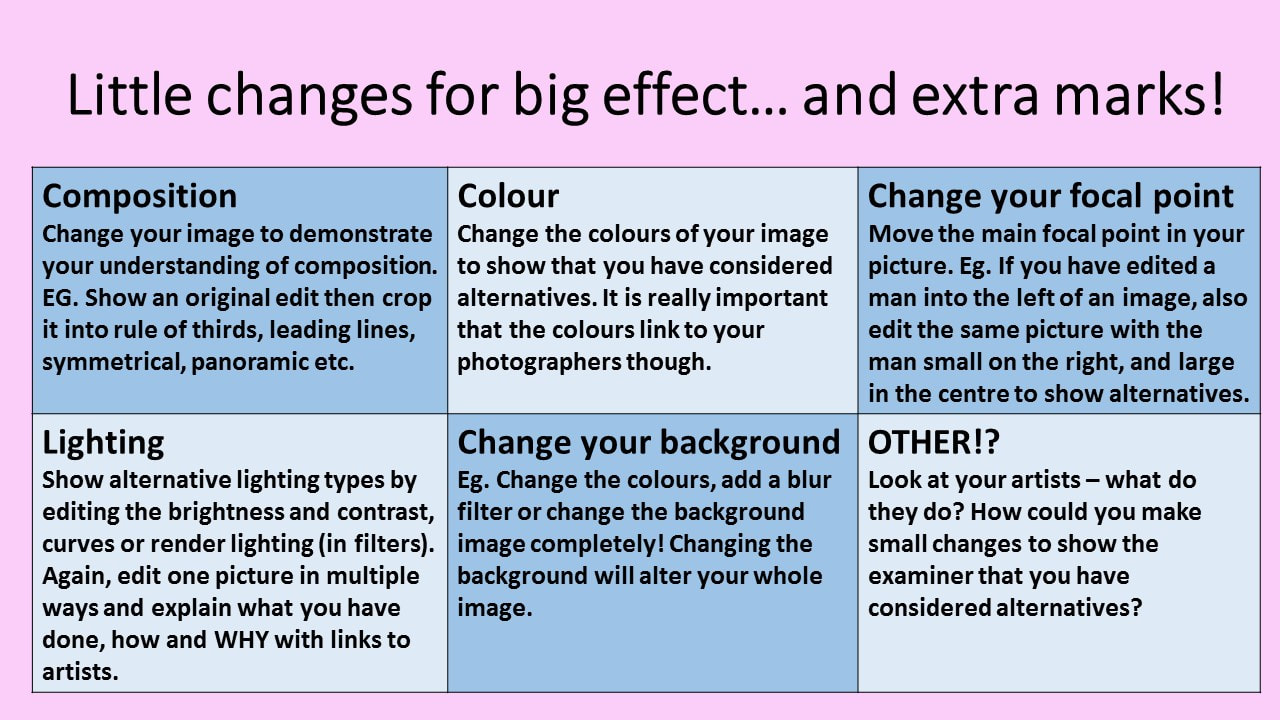 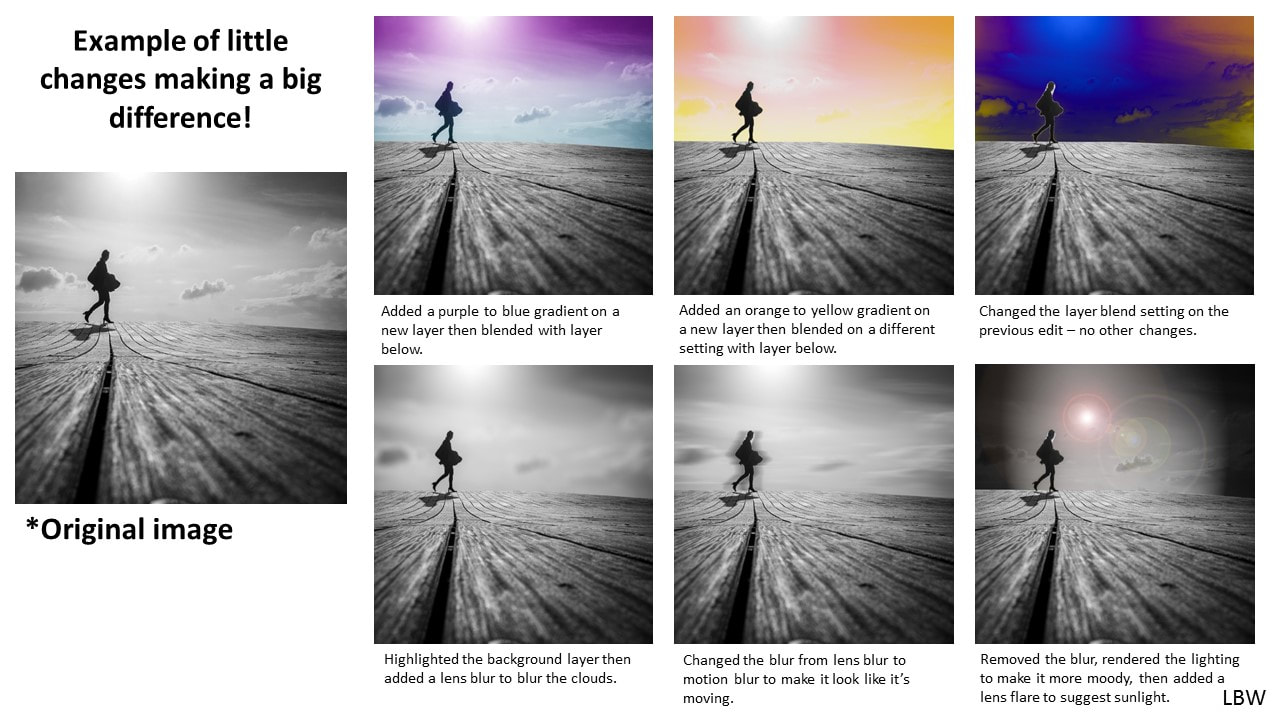  Add a title 'Considering Alternatives' below your other work.
upload the your edits into a gallery, but keep your best image separate and upload it as a single image full size. Write your review: In these images I have edited... I aimed to show that I have considered alternatives because... From here, I could also explore...  Quick discussion: What is this type of photograph called? What are the different ways that you could create one like it?   what am I learning through this task? You are learning to demonstrate your understanding of composition. Why am I doing this? Because you'll get higher marks from the examiner!  This lesson, your task is to create a new edit, but to produce 3 different versions of it to vary your composition. 1. Edit a new photograph in your two artists combined style - DO NOT EDIT A COPY FROM YOUR WEBSITE - must be an original photograph. Save as a JPEG when finished. 2. Crop the edit into a panoramic photograph. Save as a JPEG. 3. Crop the panoramic photo to be a different composition. Save as a JPEG 4 GOING FOR GOLD: produce an extra edit that shows - leading lines, negative space, balance or rule of thirds. Discuss this when you upload it.  Upload your photos to your website under the title 'Exploring Composition'
Put your favourite photo full size, and the others side by side. Review your photos using these sentence starters: In these photos I have explored composition by... It is important to consider composition in my photography because... The most effective composition was the last image because... If you also did the gold task, write a sentence to explain how you used the composition type that you focused on, and put your text in gold.  To start the lesson - as Lauryn missed out on a tutorial yesterday, Owen and Trinity - do a tutorial for Lauryn! Discuss as a group - what she has done so far and how she might move forwards. Lauryn, take notes to add into your red book later - I'll follow up with a tutorial tomorrow.  ***Expectations during a cover lesson are as usual: No headphones, no games, no phones, 100% focus and effort!***  1. UPLOAD NEW PHOTOS (HOMEWORK), and write a short explanation of what you aimed to do with your photoshoot. title 'Homework photoshoot' 2. Spend the next 5 minutes of today's lesson going back over this project to check and improve the following: 1. is everything uploaded? 2. is everything in order? 3. is all work reviewed? 4. do you have any gaps? Refer to a friend's project to check. If so, find out what you are missing and plan for/add the things you are missing. 5. do you have clear titles throughout the project so far? When you are happy that everything is done, move on to the next part of the lesson. What do I write about my experiments?To create this experiment, I... I have combined the styles of ______ and ________ by... Something that works well about the edit is... To develop further from here I will... Going for gold Try to use cover some (NOT ALL!) of these points in your review, expanding with extra sentences where necessary: USE OF COLOUR COMPOSITION TECHNIQUES LIGHTING TECHNIQUES CAMERA TECHNIQUE EDITING TECHNIQUE MEANING BEHIND THE PHOTOGRAPH THINGS YOUR EYES ARE DRAWN TO IN THE PHOTO HOW THE IMAGE MIGHT BE VIEWED BY THE VIEWER - WHAT MIGHT IT MEAN TO THEM  You are learning how to develop your ideas though varied experiments inspired by two photographers. To be successful you will need to: - vary each experiment, try different techniques, colours, compositions etc. - experiments should build on one another - each time getting better and showing stronger skills - reflect on your thought process to explain to the examiner how your ideas are developing.  Continue to experiment by completing another combined edit.
Make changes to your previous experiments, such as: - use a different picture - combine different images - link to your artists in a different way - try a different composition - crop your photo before editing it - change your colours - try a different editing technique Think about the success criteria above, and be careful not to be repetitive.  In your green book, copy and finish these sentences... Today's date and Self Assessment as the title - So far I have combined by artists by... - Something that is going well so far is... - To improve next time, I am going to develop...  Continue to experiment by completing another combined edit.
Make changes to your previous experiments, such as: - use a different picture - combine different images - try a different composition - crop your photo before editing it - change your colours - try a different editing technique |
AuthorThese lessons have been written by Miss Wilson. Archives
December 2018
Categories
All
|
 RSS Feed
